
Months ago, we were in our preview meeting for Easy Weaving with Little Looms Fall 2022, and one of the projects presented was the Cute as a Bug Pencil Case by Deborah Bagley. As soon as I laid eyes on this adorable project, I knew I’d be making one.
I started thinking about which colors I’d use (I went with the classic colors Deborah chose) and how to make it toddler-proof because I wanted to give it to my little niece. It was at that moment that I realized I had a problem: I had only a 4" square pin loom, but you also need a 2" × 4" rectangle loom for this project—and I wanted to finish it in less than a week.
That’s when Little Looms editor Christina Garton came to the rescue!
 Cute as a Bug Pencil Case by Deborah Bagley from Little Looms Fall 2022. Photo by Matt Graves
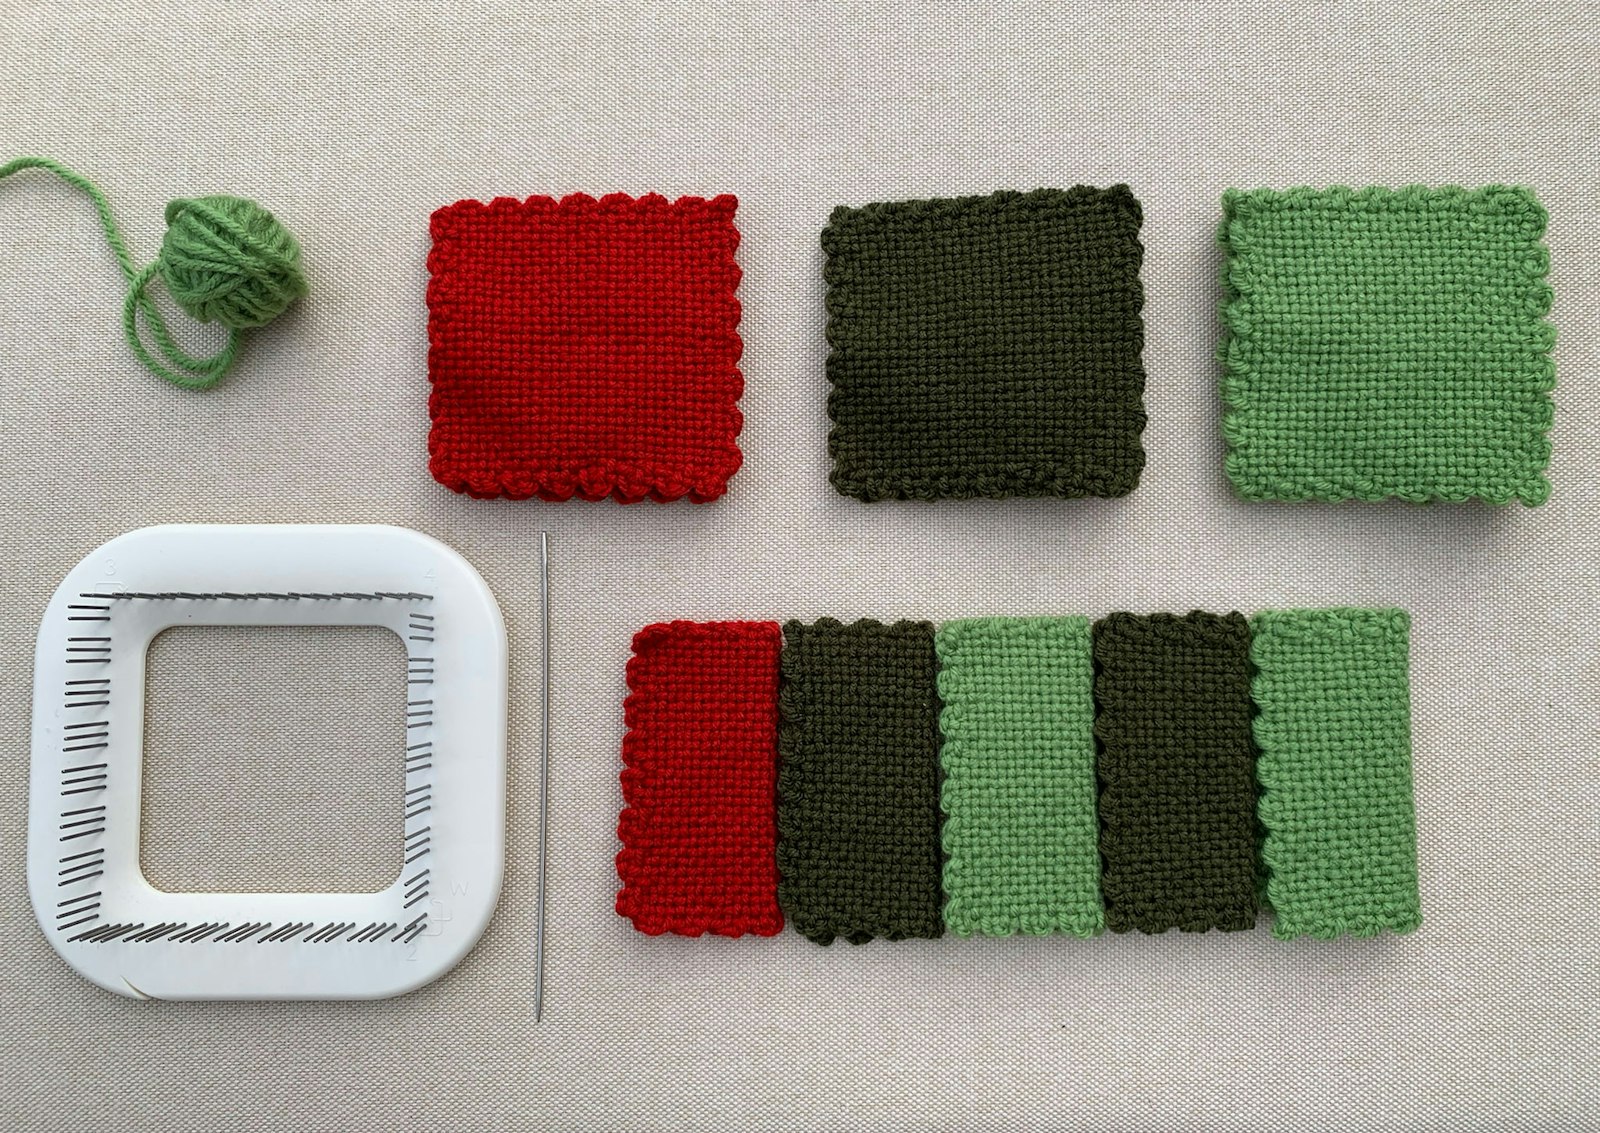
She reminded me we had the same issue years ago for our Zoo Crew eBook, also by Deborah Bagley, and it turns out there was a simple solution: folding the squares in half. Not only would this allow me to get the rectangles I needed, but I could also skip the liner because I’d have doubled fabric. Win, win! The same trick works when you need right triangles, by folding pin-loom squares corner to corner. I loved this simple solution and started weaving my pin-loom squares that same day.
 You can see the original pin loom squares above and their folded counterparts below, ready to sew together. Photo by Tiffany Warble
By the time I completed my caterpillar, I had made a few other minor adjustments to adapt this project to the tools I had and its recipient. Below are the three other modifications.
1. Skipping the liner
The liner is optional in this project anyway, but having doubled fabric, I knew nothing would inch its way out of this caterpillar.
2. Tweaking the zipper
Because this was going to a young child, I used a YKK® zipper to be sure it would be safe and stay secure. I also used my sewing machine to sew in the zipper using a zigzag stitch, knowing it would get some extra use. My last zipper update was to add a pull tab using braided embroidery thread to make it easier for little hands to open and close.
 My finished Cute as a Bug Pencil case with adjustments, including a felt smile and pull tab on the zipper. Also shown are the YKK zipper and embroidery thread I used. Photos by Tiffany Warble
3. Face options
I loved the felt eyes but tested a few options for the rest of the face. I cut different mouths and tried out the classic round nose but decided to do a subtle smile with dark red felt. I also stitched on the felt pieces (including the antennae), rather than gluing them, to make them more secure. I’d suggest gluing them in place first, so they stay where you want as you sew them on.
Next time I have even more ideas to try. I’d love to test machine stitching the body together rather than hand stitching. It seems like it could be a time-saver. I’d also love to try out other color combinations using caterpillar pictures for inspiration and maybe even make another one as a stuffy by seaming it closed.
I hope these tips will come in handy the next time you work on a pin-loom project—especially when you need to get creative with equipment.
The instructions for the Cute as a Bug Pencil Case can be found on page 54 of Easy Weaving with Little Looms Fall 2022, and be sure you check out the issue for even more pin-loom fun.
Happy weaving,
Tiffany
Originally published 8/16/2022; updated 9/2022