
Even the most inexperienced weaver (me) can learn branch weaving! The resources to do so are inexpensive and found almost anywhere. All you need to dive into branch weaving is a Y-shaped stick, yarn, and possibly a fork or darning needle. The fork and needle aren’t necessary but could make the process a bit easier.

All I needed to create my woven branch: several balls of yarn, a branch, a fork, and scissors.
I found out about branch weaving when looking at weaving projects on Pinterest. Then I looked around the web to see how to make my own. These are the steps I followed:
1. Find your branch! Take a nice little hike through a woody area or even just your own back yard. Maybe ask your dog to help. Find a Y-shaped branch with a fork wide enough to fit some weaving between. I would recommend one that is 1 to 2 feet in length.
2. Gather your yarn. I would suggest using a few different colors, but you can use any kind of yarn. I just pulled a few yarn balls from my stash that I hadn’t earmarked for any projects.
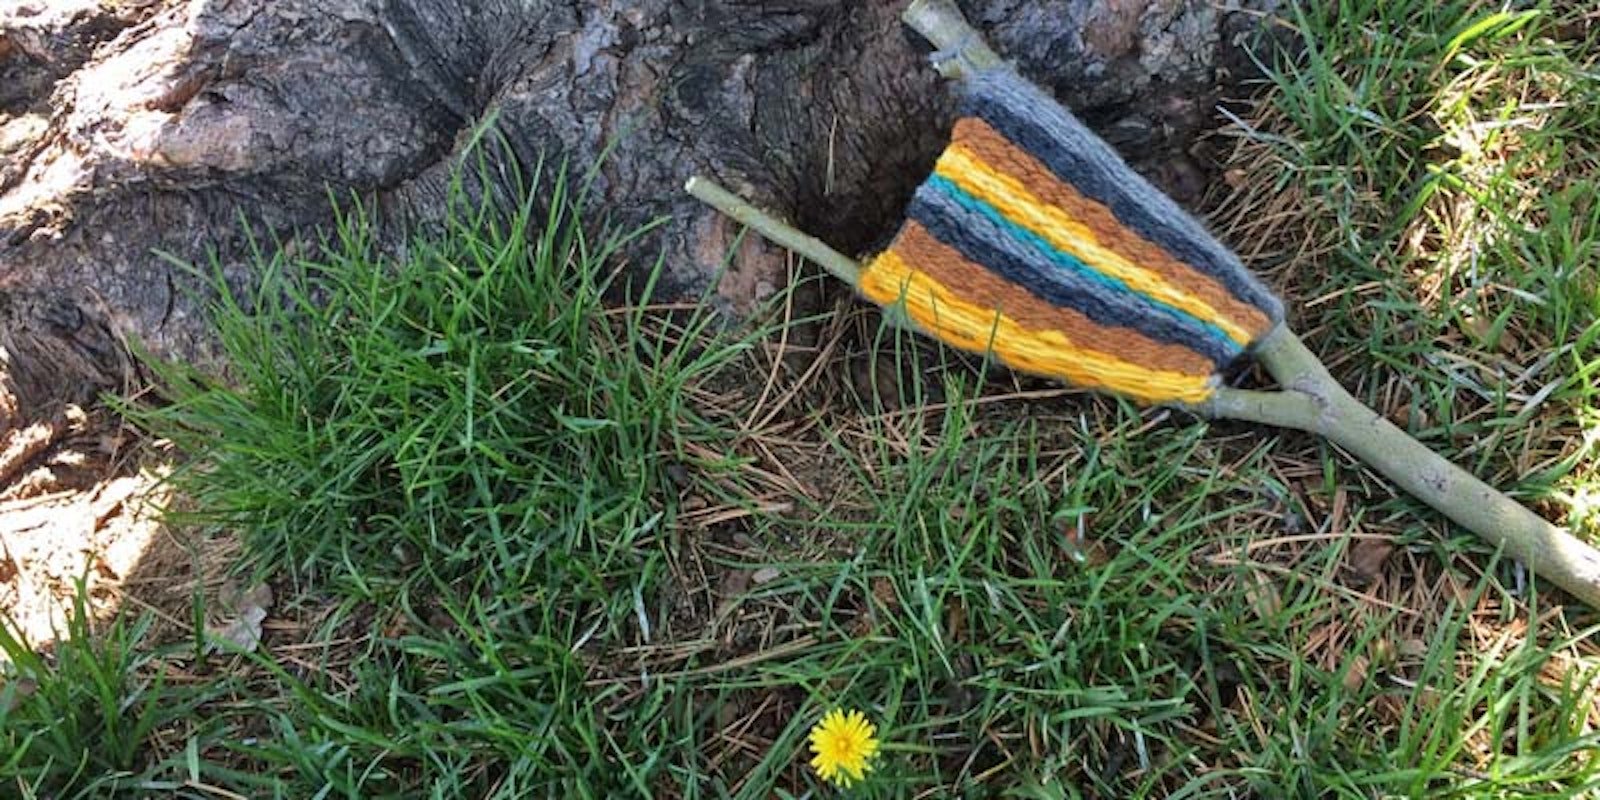
3. Warp your branch. This was the hardest part for me to get right. First, tie your yarn onto the bottom leg of the Y. Next, wrap the yarn once around that leg, then carry the yarn across the open space to the top leg. Wrap the top leg twice, then carry yarn back to the bottom leg, where you’ll wrap once again. Keep going like this: always wrap once around the bottom leg and twice around the top leg. Leave spaces between each strand of yarn so you’ve got space to weave in weft. You will have a 2-sided warp, and you can choose to weave on one side or both.

I warped my final project with gray yarn that was hard to see against the stick, so here is a warp I did with lighter yarn.
4. Begin weaving! Pick the yarn color you’d like for your first row and tie it onto the yarn strand at the open end of the warp. Weave your yarn through the warp in an over-under-over-under pattern until you’re happy with the look. To finish with that color, weave to the end of the warp and then cut it, leaving a 2" tail. Secure the tail to an end strand of the warp with a knot—you'll weave that tail into the piece at the end. For now, the knot will keep your weaving from unweaving. Use to fork to press the yarn together after it’s woven to avoid any open spaces.

This is the simple over-under pattern I used to weave onto the branch.
Repeat this process as you switch yarn colors. For more intricate designs, switch up the weaving pattern. I was happy with my simple rows of color and not yet experienced enough in weaving to get too fancy.
5. Weave in the tails Weave in the tails between rows of yarn just as you wove the rest of the yarn in an over-under pattern. Make sure the end of the yarn goes over the warp so the very end of the tail is only visible from the back.
When you’re finished with your branch weaving, hang it on the wall or put it on a table for colorful décor. It’s sure to be a conversation starter! Plus, it’s a fun project for anyone interested in nature and creating with their hands! Try it with kids to get them into weaving.
—Jenna