

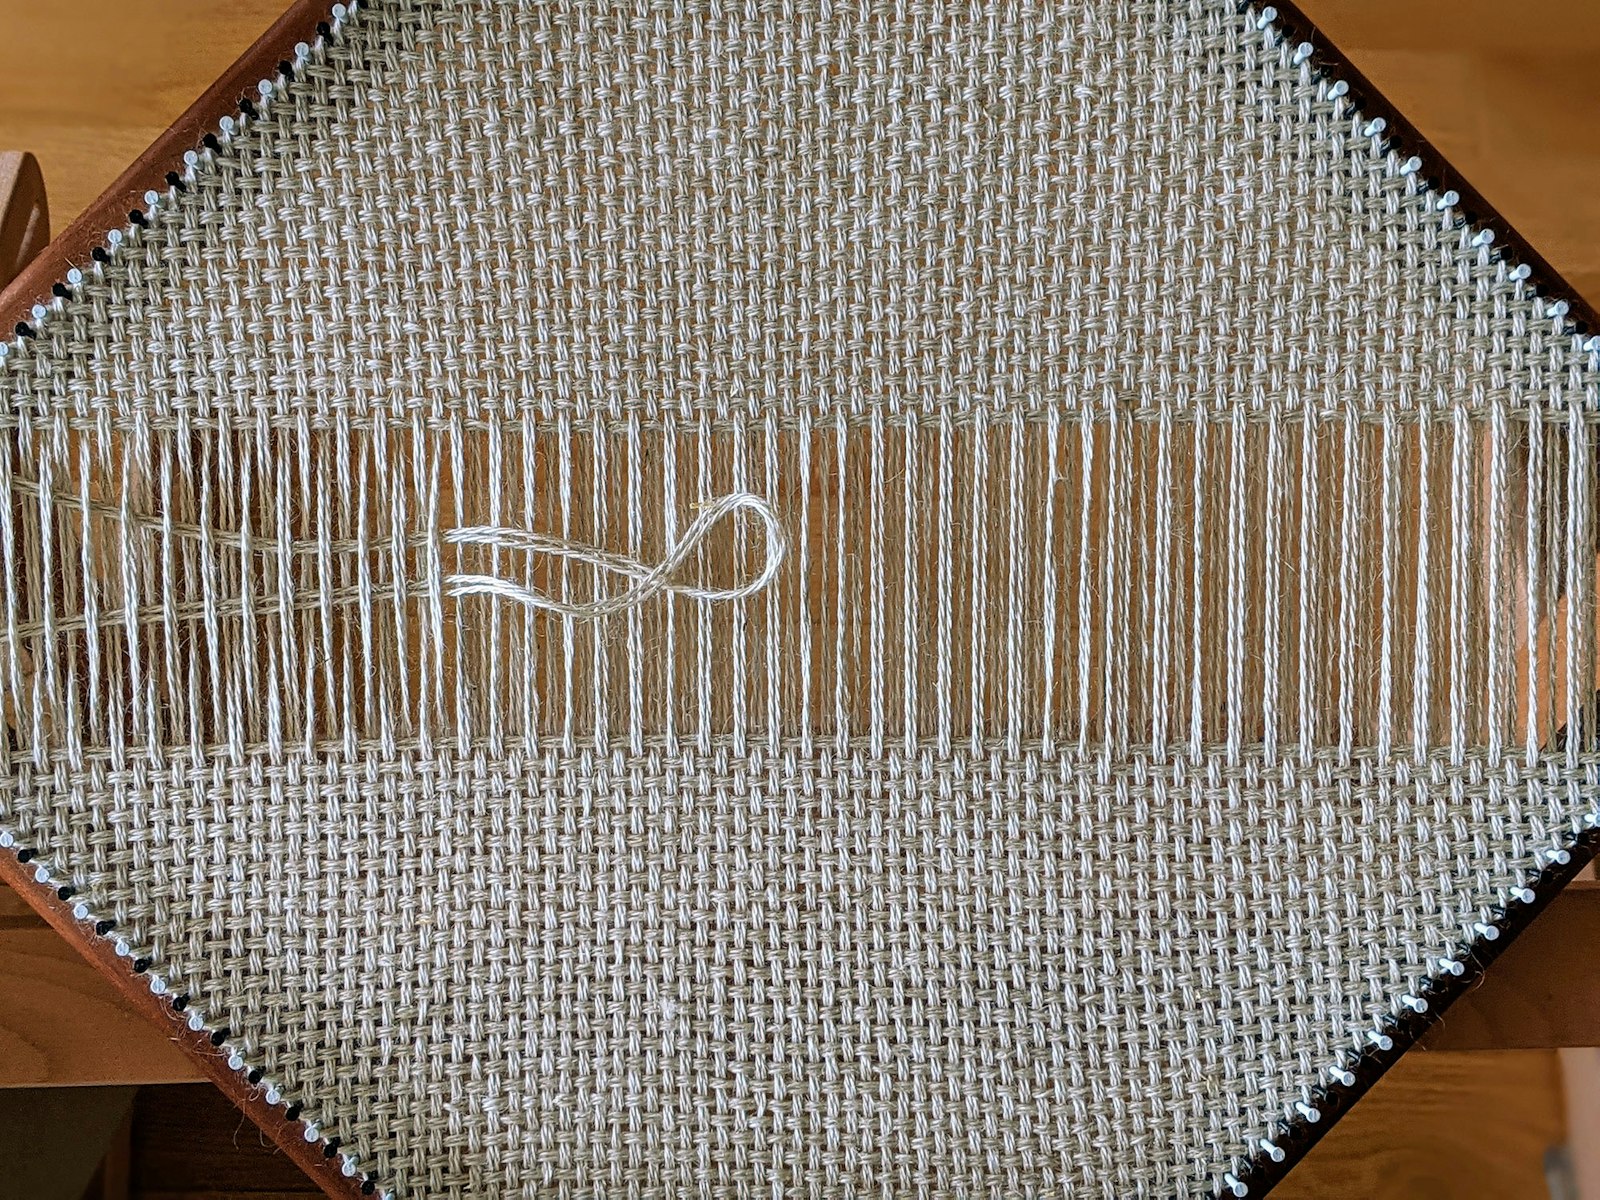
Continuous-strand weaving, sometimes called bias weaving, is a great technique for weaving on your pin loom. While there are ways you can use this method on looms with the 3-pin configuration, you’ll usually see it done on pin looms with equidistant pins. With this method, you warp and weave at the same time.
If that sounds confusing, never fear! In this exclusive Little Looms tutorial, we have instructions for weaving using the continuous-strand method from this article by Jennifer Chapman.
—Christina
Continuous-strand weaving is an exciting and efficient technique that simultaneously warps and weaves an evenly spaced pin loom with a single strand of yarn. The result is a zero-waste, bias-woven piece of fabric. This method can be used on looms of many shapes and sizes—squares, rectangles, triangles, hexagons, and even diamonds.
To start off, here’s the basic method for weaving on a square pin loom.
You’ll need the following supplies:
- Pin loom with uniformly spaced pins
- Packing fork
- Either a locker hook or a crochet hook
- Long weaving needle or blunt tapestry needle
Continuous Weaving Steps
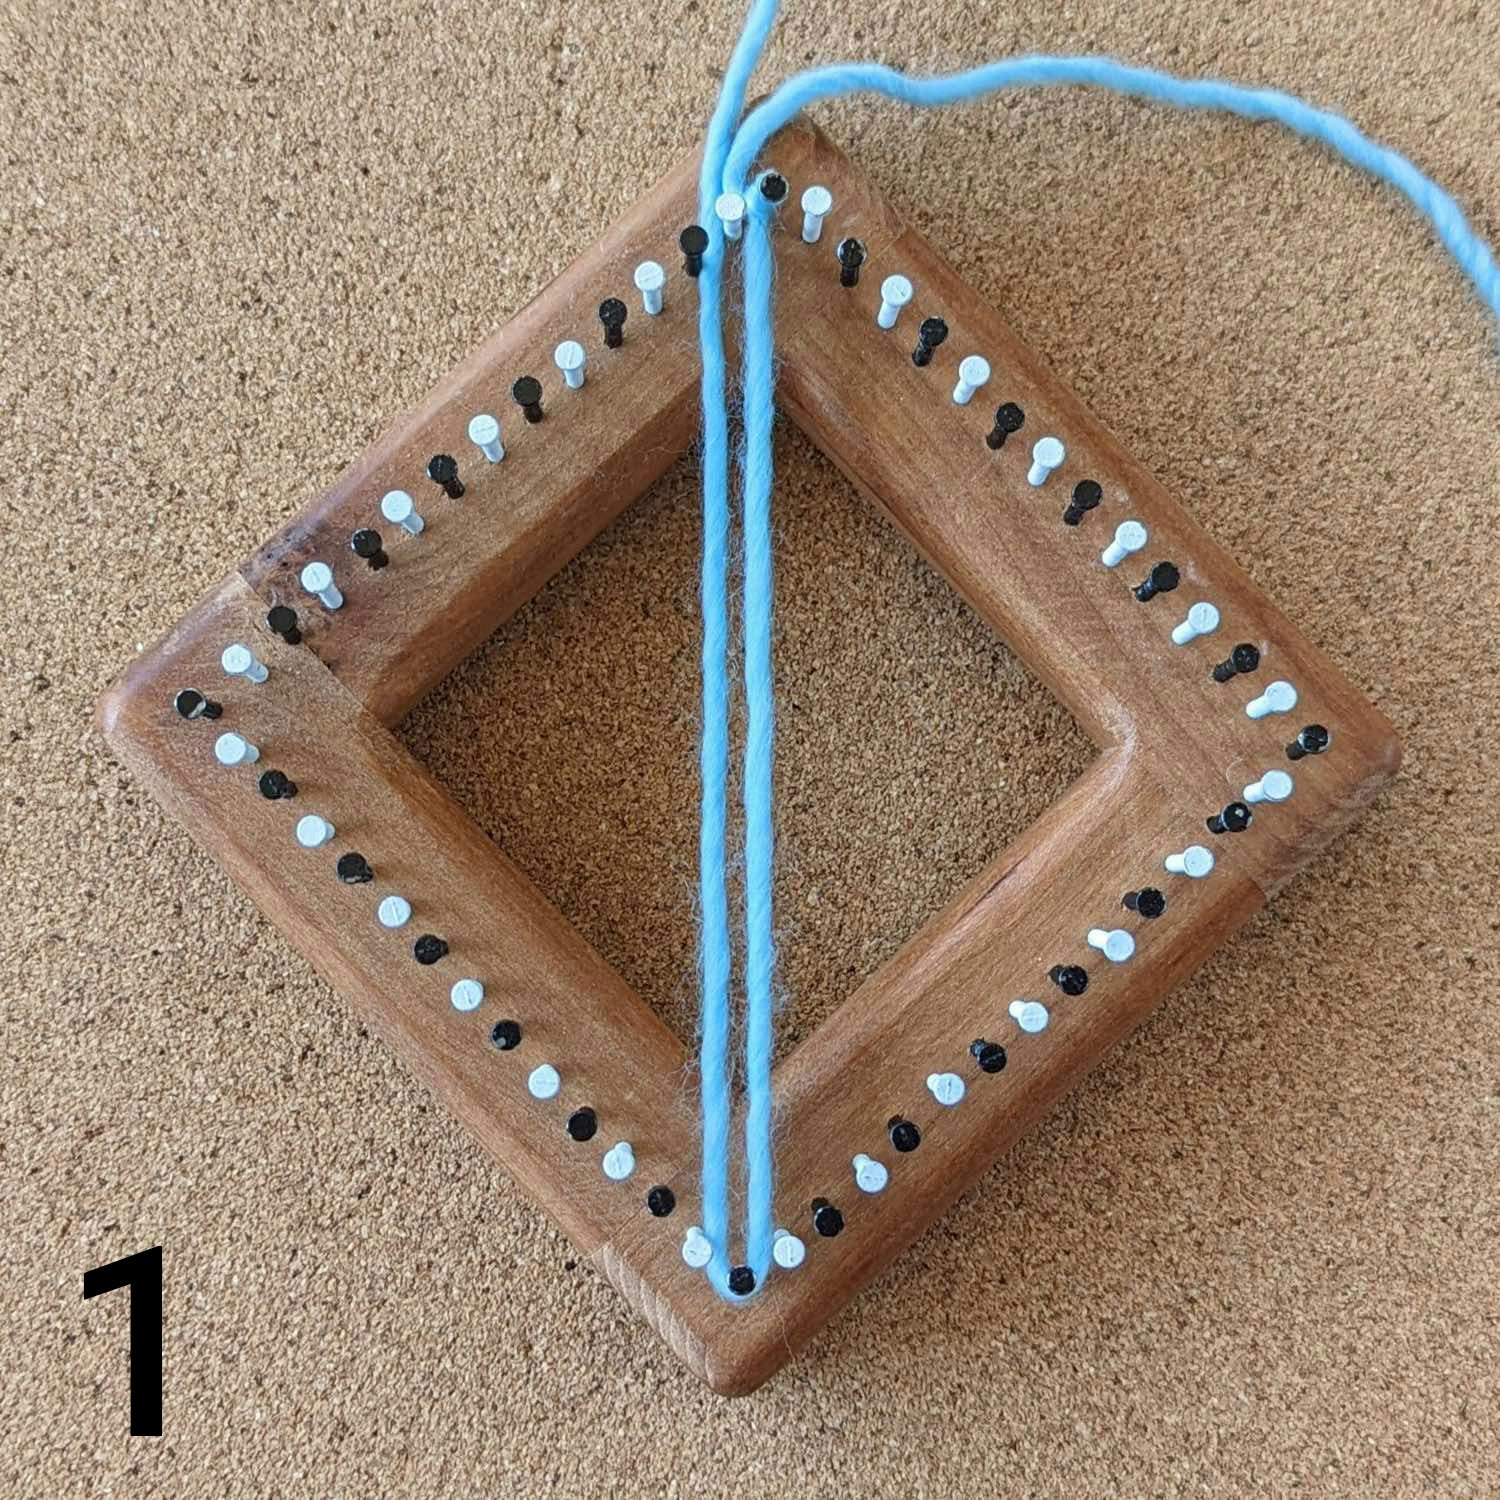
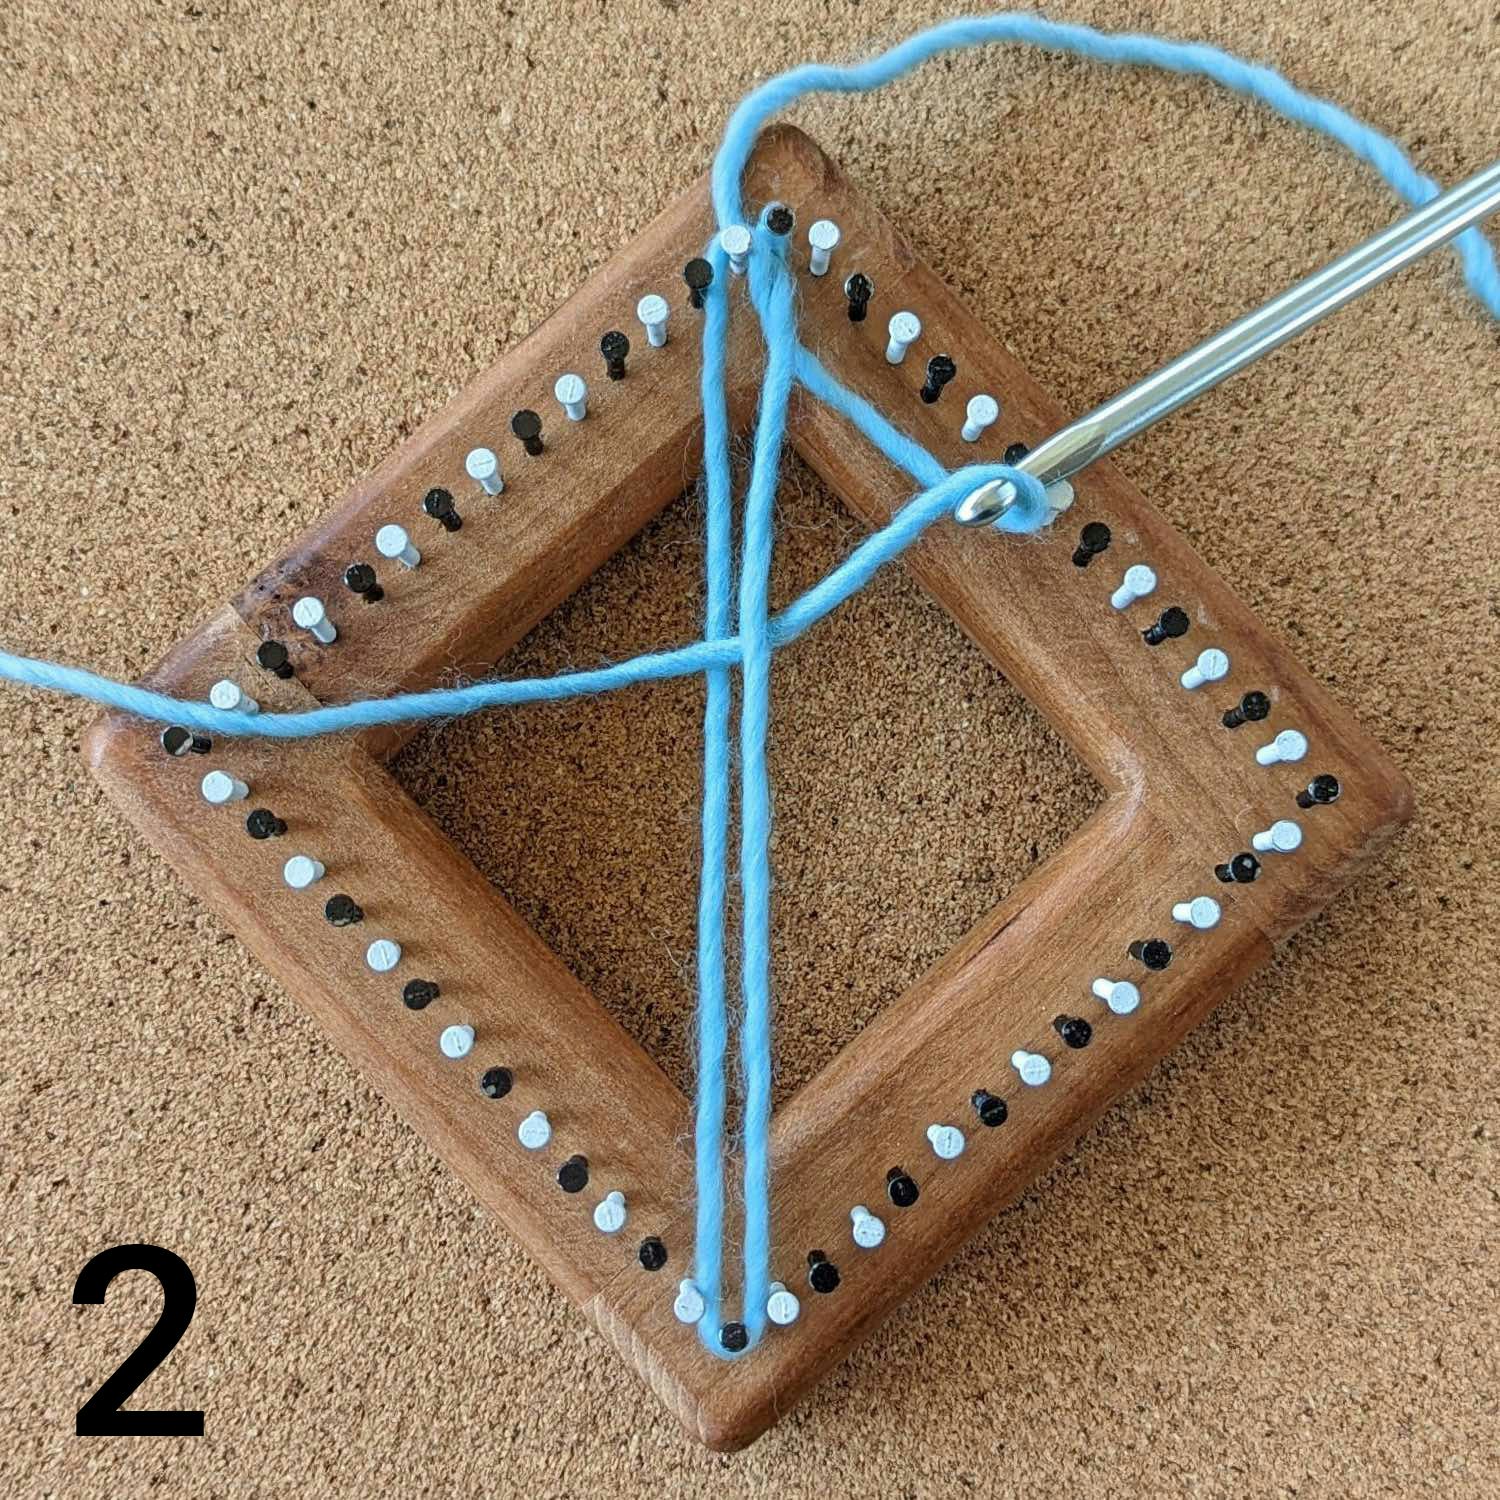
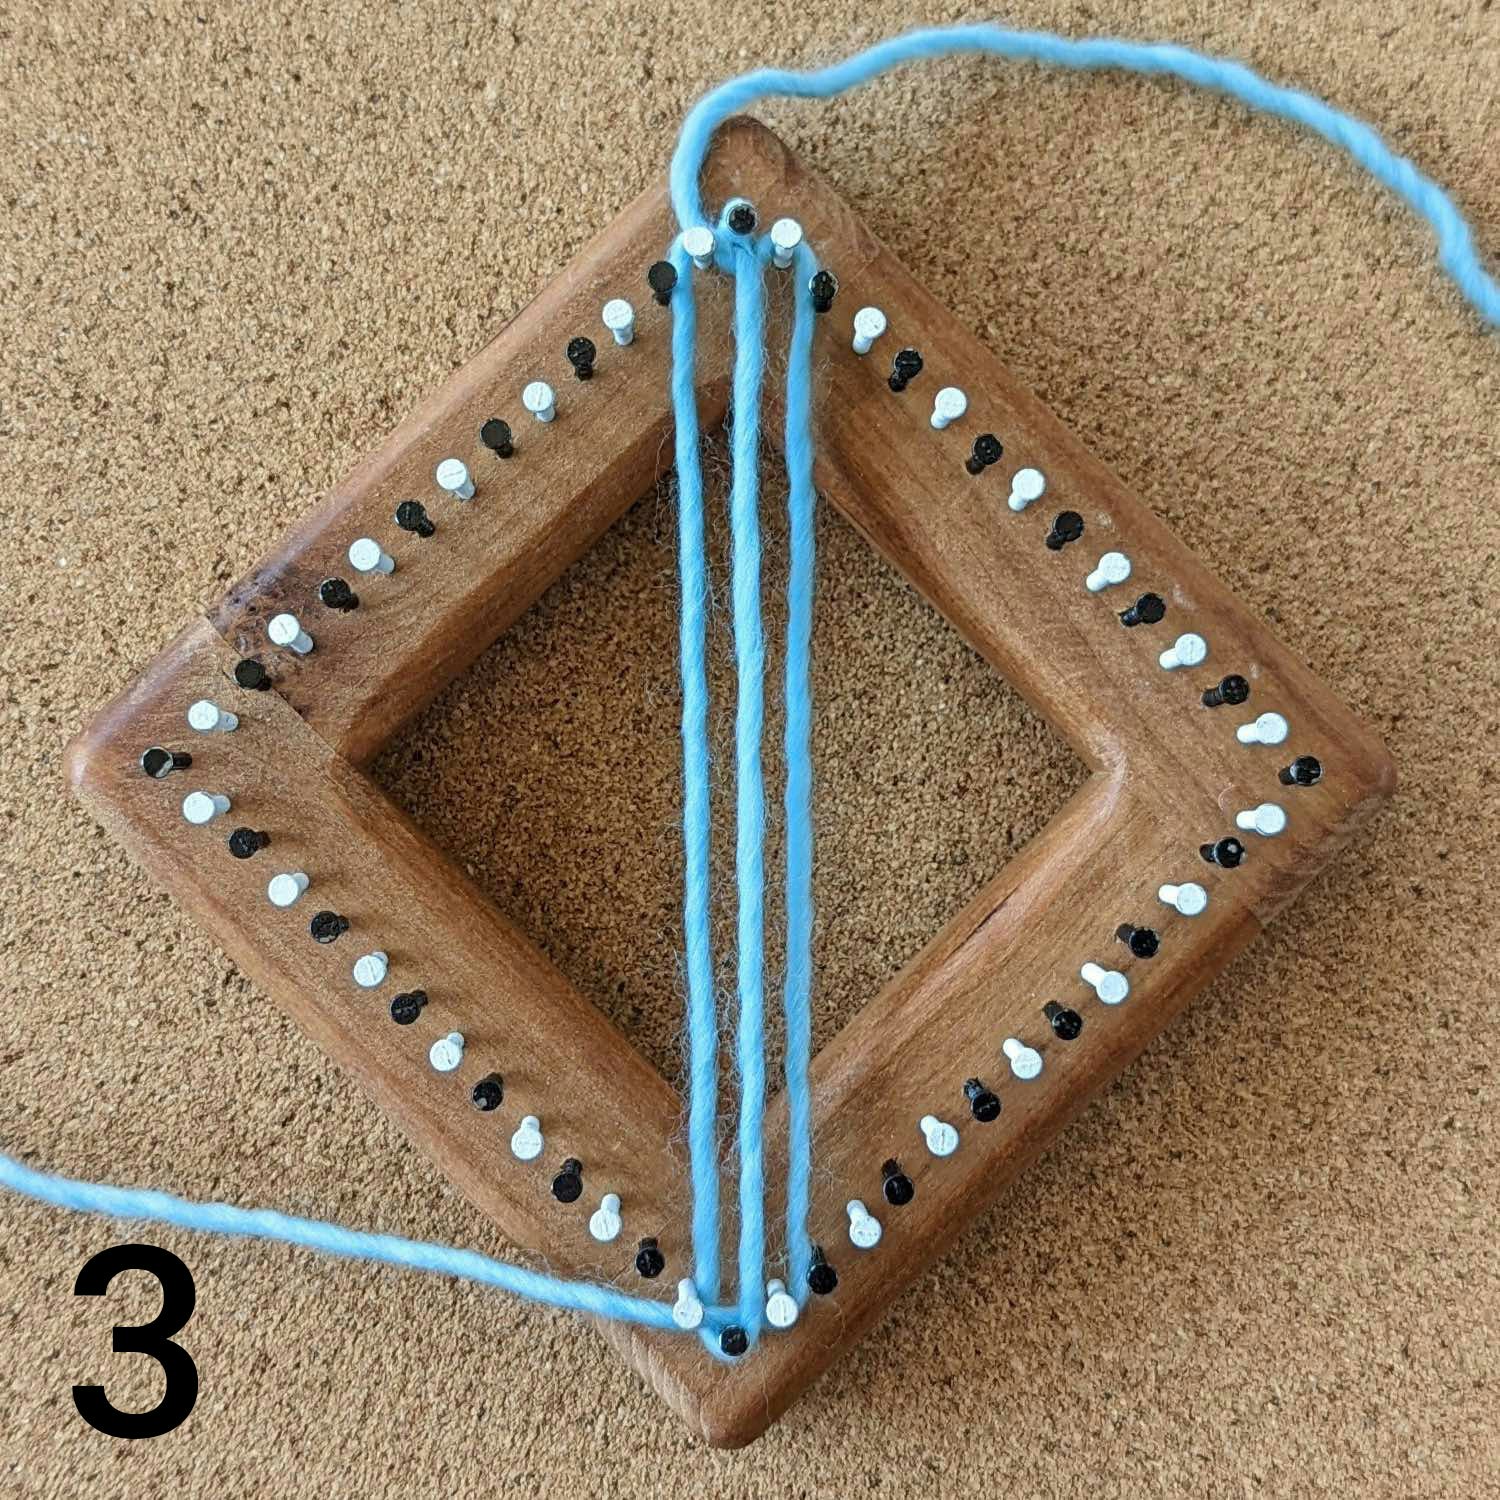
Steps 1-3. Click on each photo in the gallery to see it larger. Process photos by Jennifer Chapman
1.) Orient the loom as a diamond and attach the yarn onto the top nail with a slipknot.
2.) Bring the yarn down to the right side of the bottom nail and around it clockwise, heading back up to the left side of the nail to the left of the starting nail (photo 1).
3.) Move the yarn clockwise around the nail.
4.) Using a long crochet or locker hook, from the right, weave under the first strand and grab your working yarn (photo 2).
5.) Pull the yarn across and loop it over the nail to the right side of the starting nail.
6.) Bring the working yarn down and hook it around the nail to the right of the bottom nail (note that the weaving comes down with you) and across to the nail to the left of the bottom nail (leave a slight arc in the yarn). The first pass is now completed (photo 3).
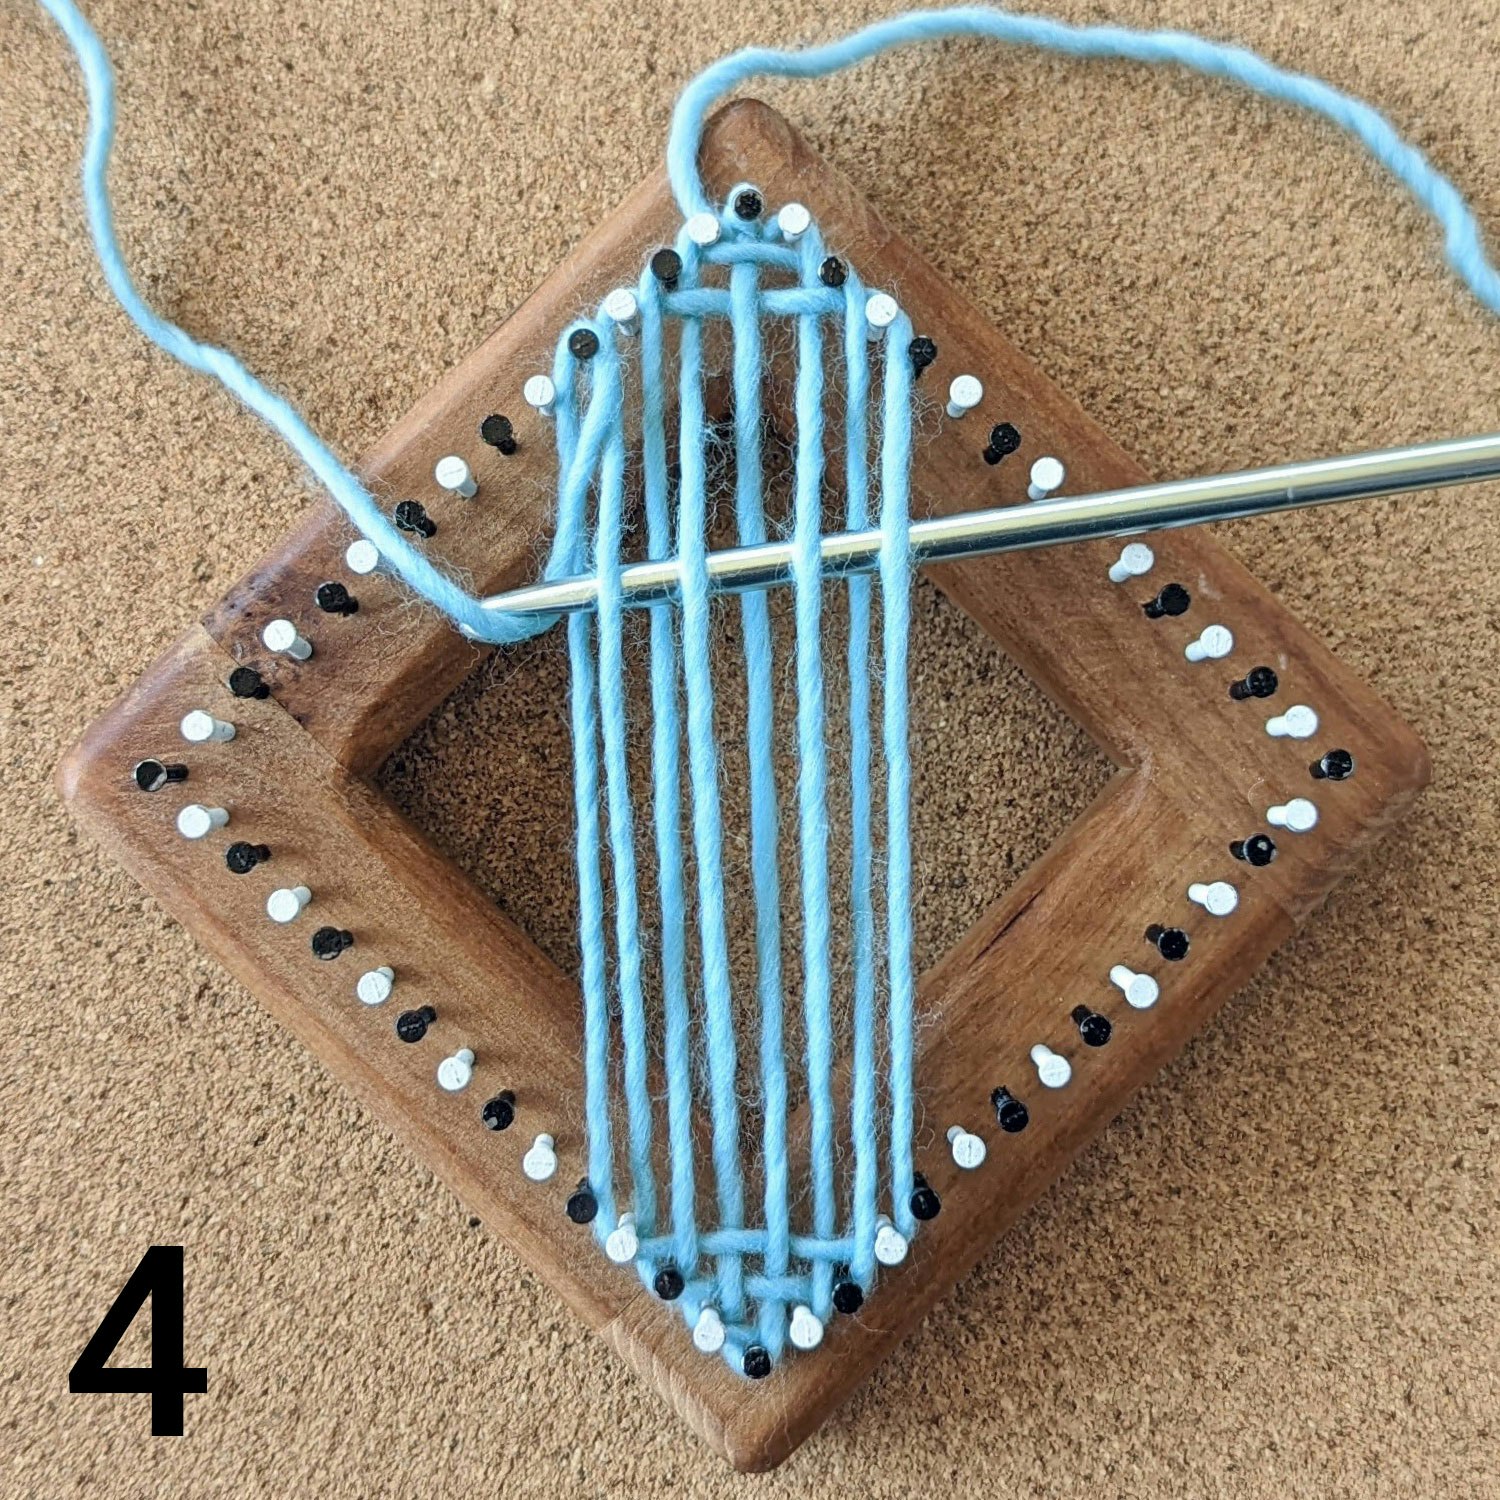
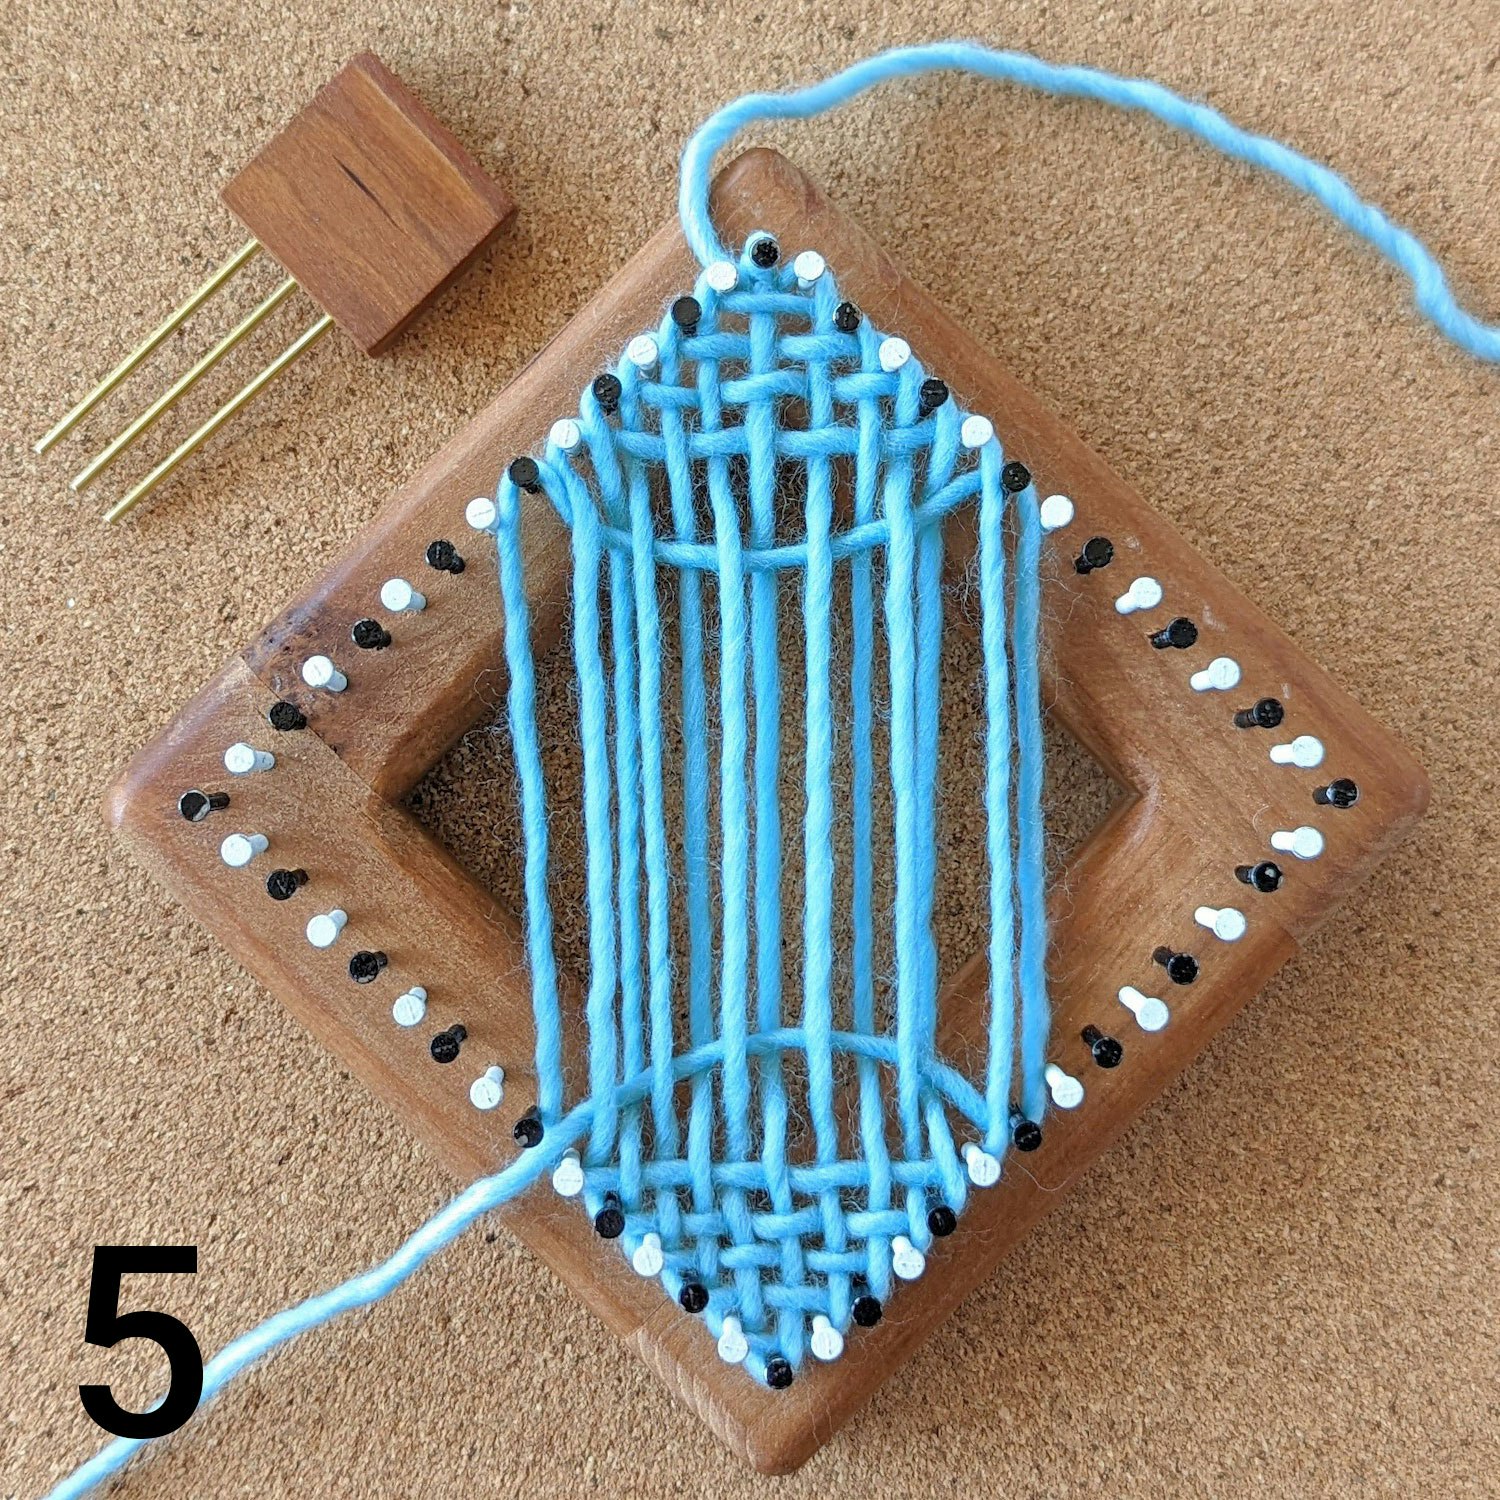
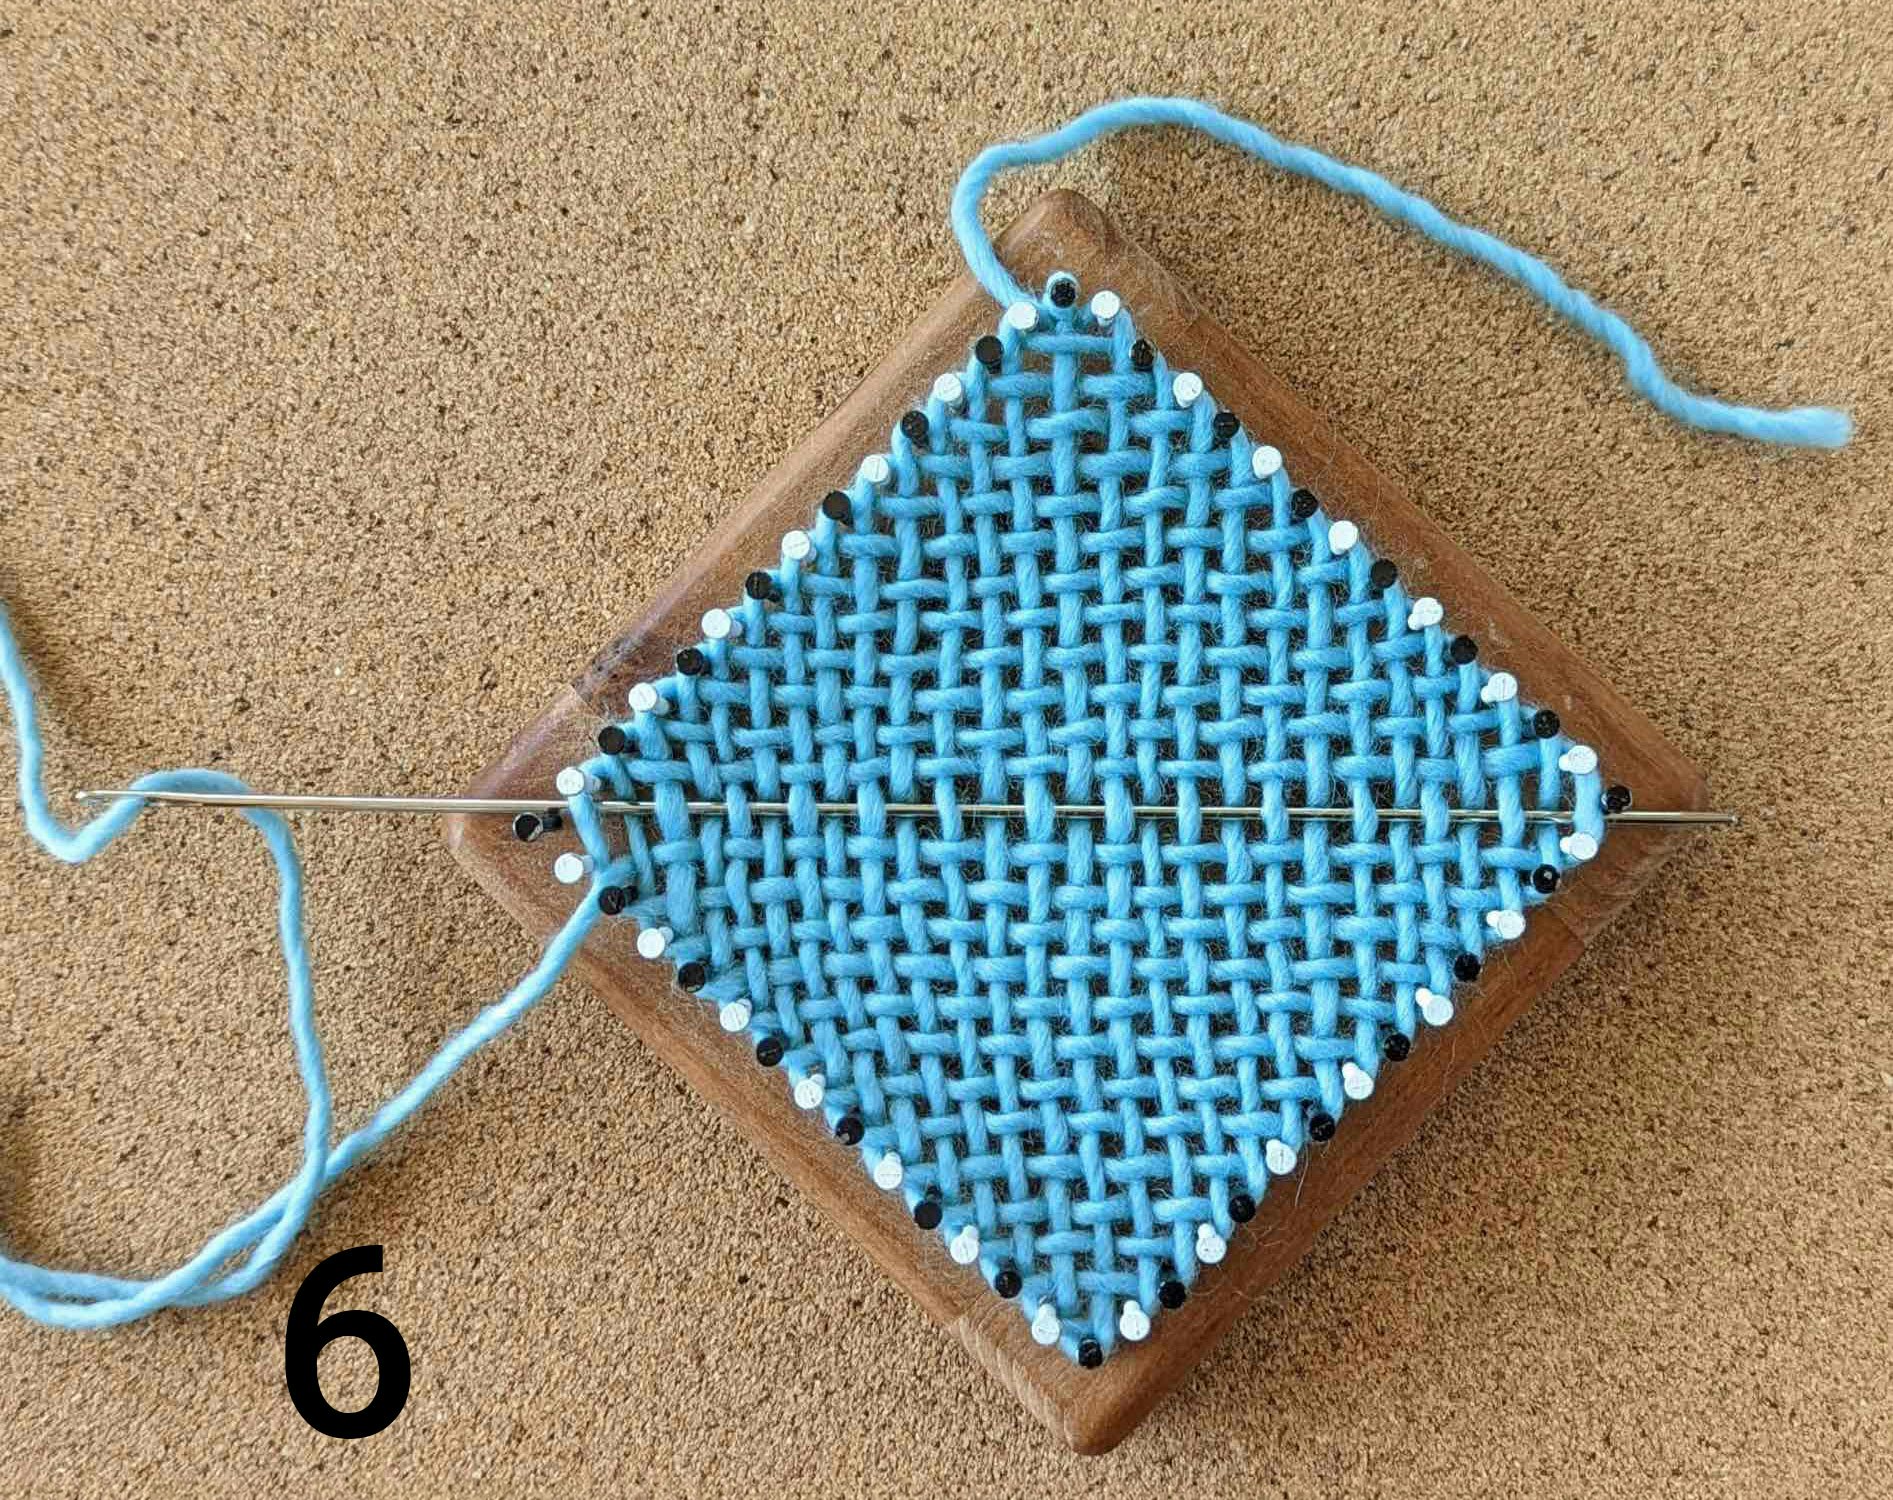
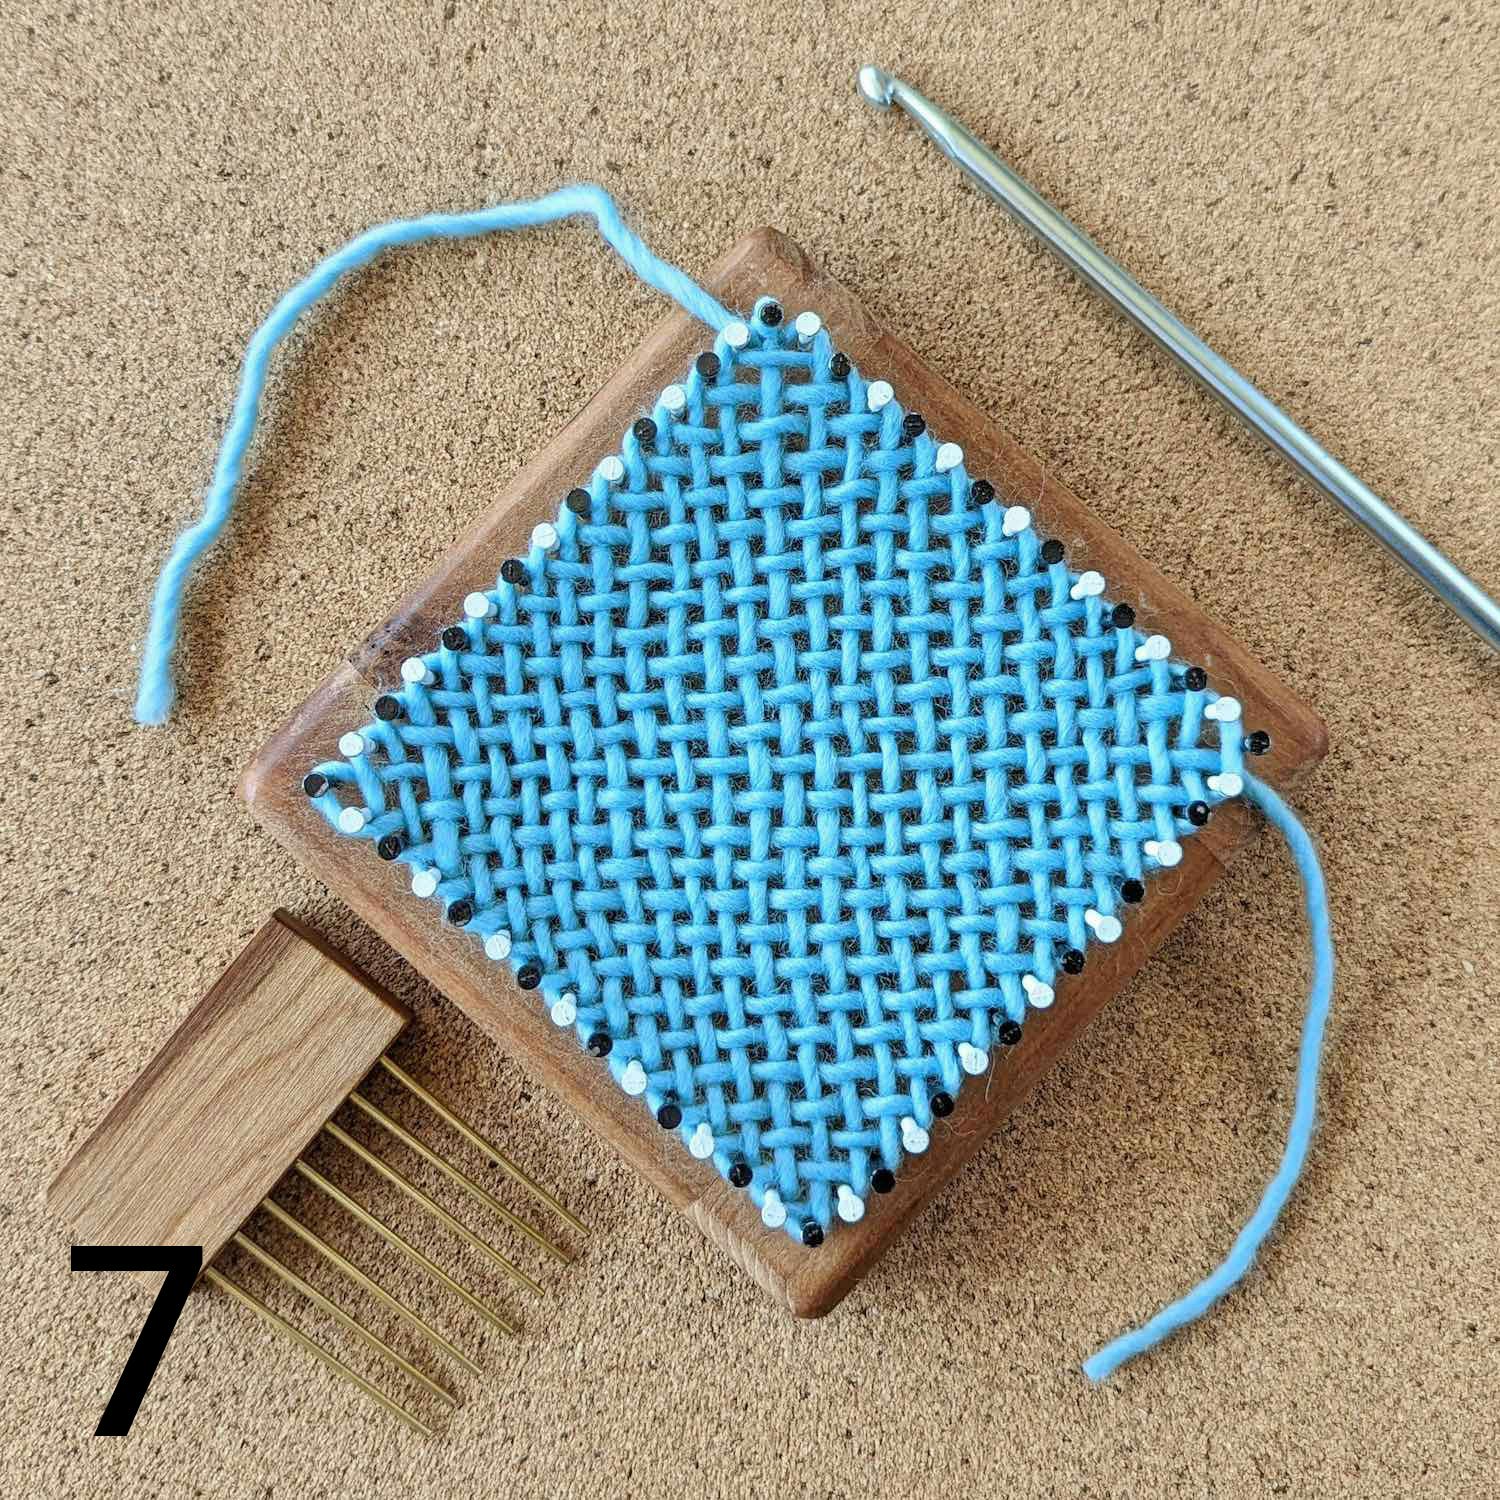
Steps 4-7. Click on each photo in the gallery to see it larger. Process photos by Jennifer Chapman
7.) Bring the yarn back up and hook it around the nail to the left of the previous nail used.
8.) Repeat this process, going around and around the square. Weave under and over the existing rows with the hook to place each new row, and use a packing fork to push down the arc in each row and to make sure the rows stay level and even (photos 4 and 5).
9.) When there is just one row left to weave, cut the yarn, leaving enough to weave the last row. Thread the yarn tail on a long needle or locker hook and weave across (photos 6 and 7).
10.) Carefully remove the completed fabric from the loom.
Now, enjoy testing out your continuous strand–weaving skills with the Ebb and Flow Pillow by Kay Meadors. This gorgeous pillow gets its painterly color changes within each square by weaving with a variegated yarn using the continuous-strand method.
Originally published 6/1/2023; updated 7/30/2026