

Contents
Statistically, about 10 percent of the world’s population is left-handed, but in my family, the percentage is higher: my grandfather, my oldest daughter, and I are all left-handed. What does it mean to be left-handed in a right-handed world—especially as somebody who weaves and does other fiber arts and crafts? Unless you really look at or know the difference, the handedness of the person doesn’t show in most finished works. One exception is crochet.
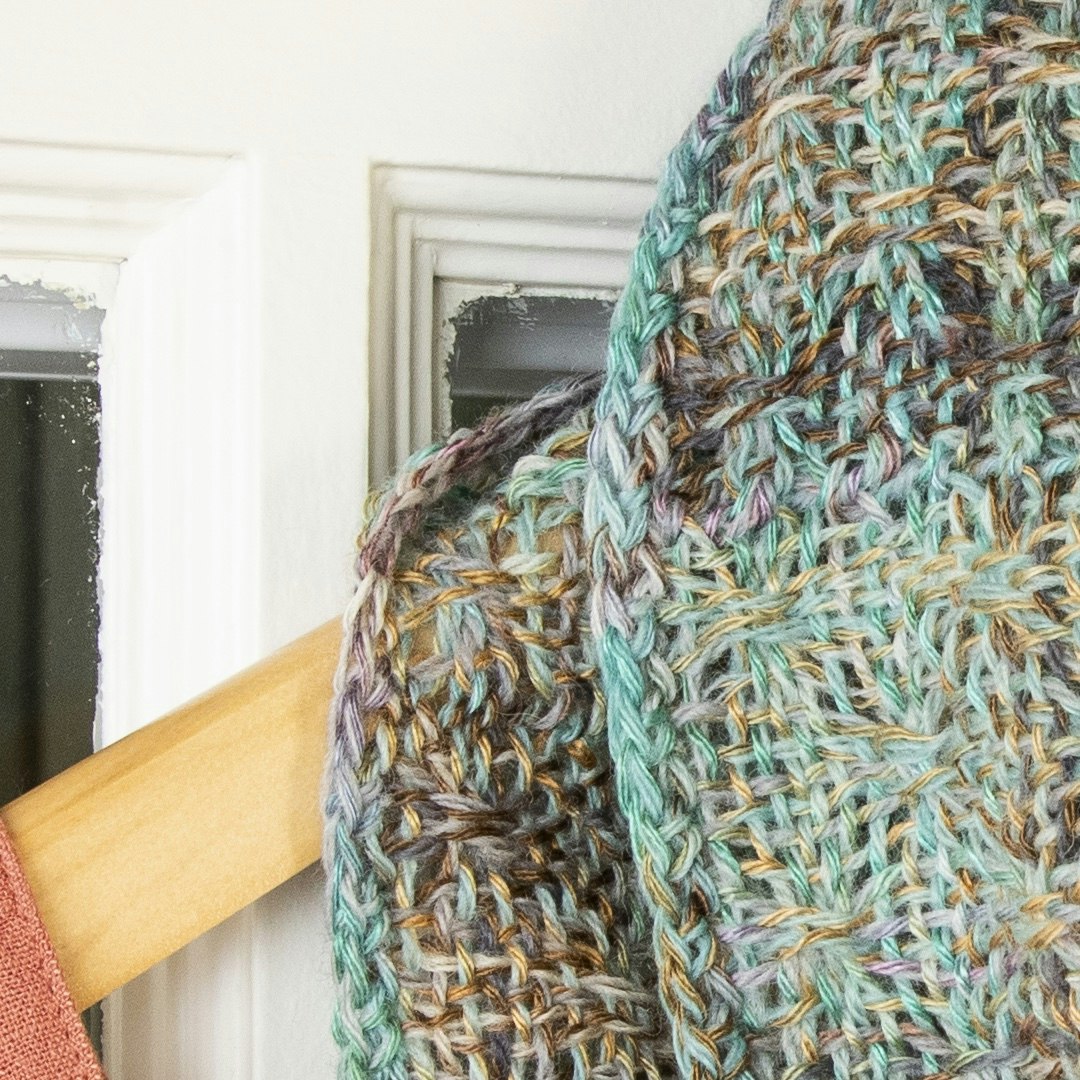
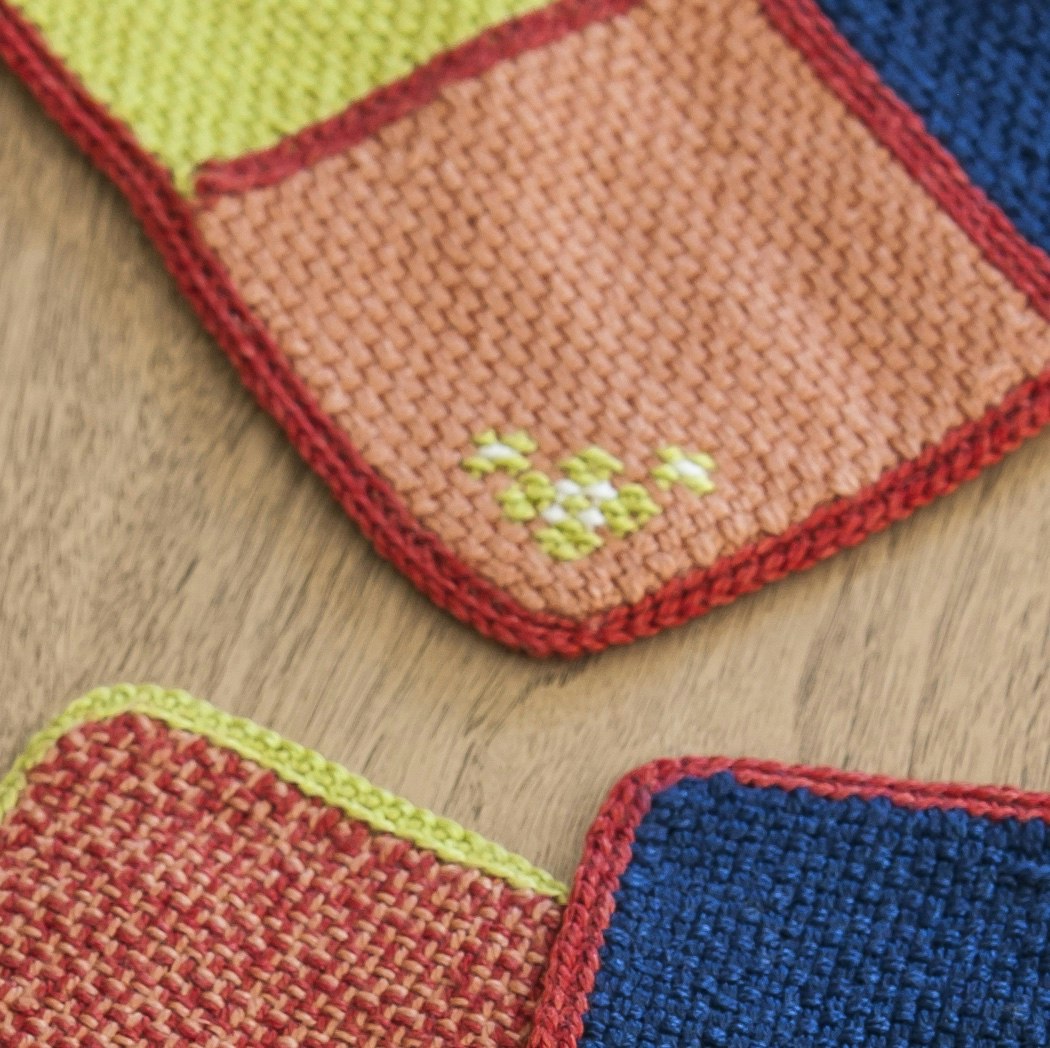
Crochet makes an elegant join and trim for woven projects. Click each photo to see it closer and get more information about each project.
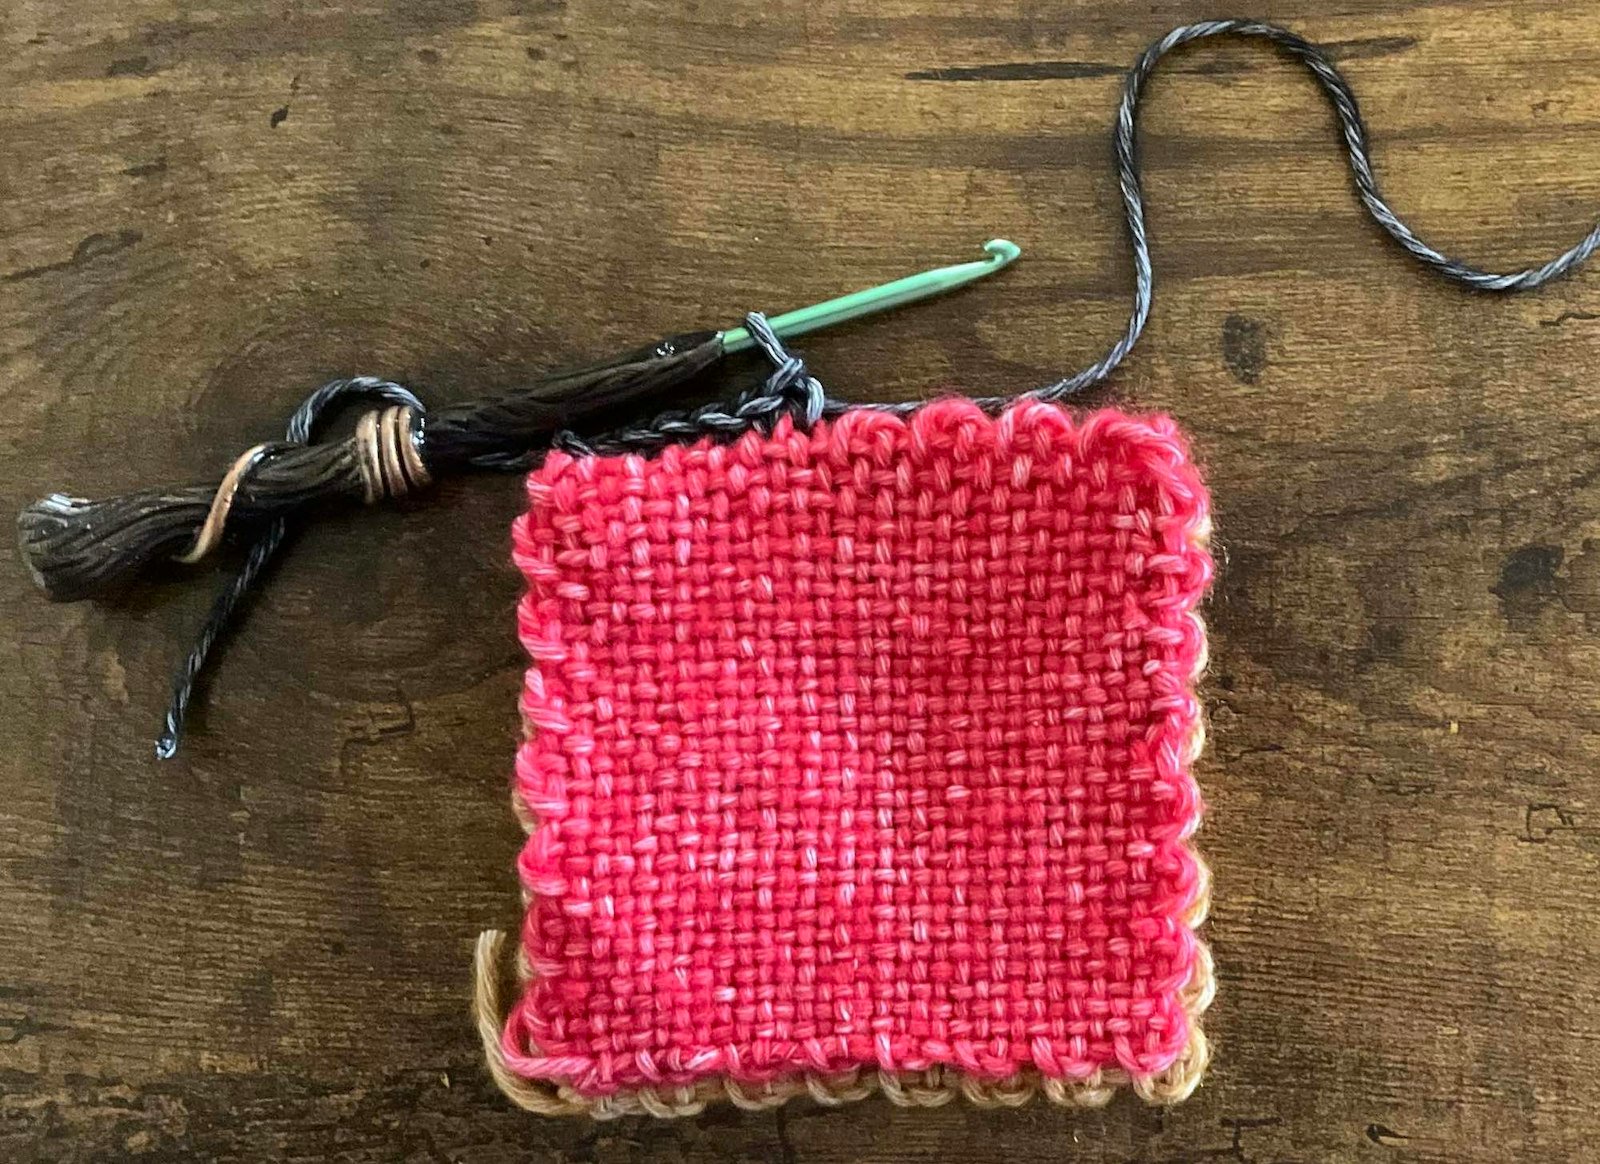
In crochet pieces, the loops will go in a counterclockwise direction when worked by a right-handed crocheter and clockwise when done by a left-handed one. I work the crochet in the same way a right-handed person would—just in the opposite direction. For example, instead of beginning at the top right corner to join pieces, I begin at the left. If you look closely at the photo below, you can see the loops in the join move clockwise.
 You can tell the join used on these pin-loom pieces was worked by a left-handed crocheter because the loops point right and move in a clockwise direction. Photo by Katrina King.
Learning Crochet as a Leftie
Learning how to crochet as a left-handed person isn’t always easy; most books and resources available tell left-handed people to do the opposite of the instructions or to use a mirror to understand the differences. While this does work in some cases—I learned crochet sitting across from my mom rather than beside her—it still requires extra work. Plus, if you’re trying to teach yourself crochet, trying to work the stitches while looking at the illustrations or photos in a mirror doesn’t make things easy.
If you’re a left-handed weaver don’t worry—we’ve got you covered! We’ve got left-handed friendly illustrations and instructions for some of the most common crochet techniques you’ll find in Little Looms. If you're not left-handed, you can find the same information with right-handed illustrations on our Crochet and Knitting Abbreviations page.
Crochet Tutorials
Each of these crochet techniques can be used individually or combined to create decorative borders, attractive joins, and clever closures in your weaving.
Crochet Chain or Chain Stitch
The crochet chain, also known as the chain stitch, is one of the building blocks of crochet. Use it as a foundation for further crochet work or on its own as a length of finished cord.
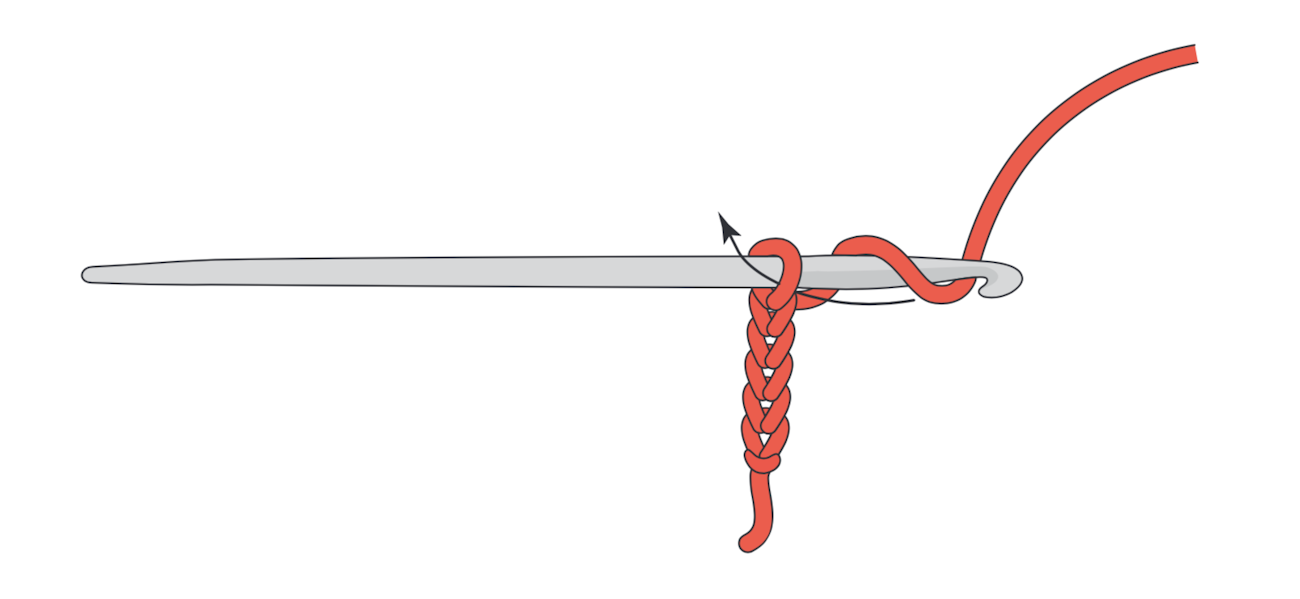
Step 1: Tie a slipknot and place it on the crochet hook.
Step 2: Hold the crochet hook in your dominant hand and the working yarn in your other hand.
Step 3: “Yarn over” the hook: wrap the working yarn over the hook from back to front. Use the hook to pull the working yarn though the slipknot, making the first chain stitch.
Step 4: Yarn over, and draw a new loop through the loop on the hook.
Step 5: Repeat Step 4 for the desired length of chain.
Step 6: To end the chain, draw the yarn completely through the final loop, leaving no loops on the hook.
Slip Stitch
Use slip stitches to join a new yarn before starting a crochet element, to end a round of crochet, as a border, or to join pieces. While you can use slip stitch on rigid heddle–woven fabric, pin-loom fabric lends itself especially well to the technique, as the loops on the selvedges provide the perfect base for anchoring the crochet to the cloth. Slip stitching can be used by itself or in combination with other stitches.

Step 1: Start with a loop on the hook. Insert the hook into the fabric edge or into the crochet stitch to be joined.
Step 2: Yarn over, and draw a new loop through both the edge or the stitch to be joined and the loop on the hook (1 loop remains). Repeat as needed.
Step 3: To end, draw the yarn completely through the loop on the hook, leaving no loops.
Single Crochet
Single crochet makes a tidy and attractive border or a dense fabric when worked in rows. Like slip stitch, it can be used to join a new yarn or to connect pieces of fabric in an easy and elegant way.

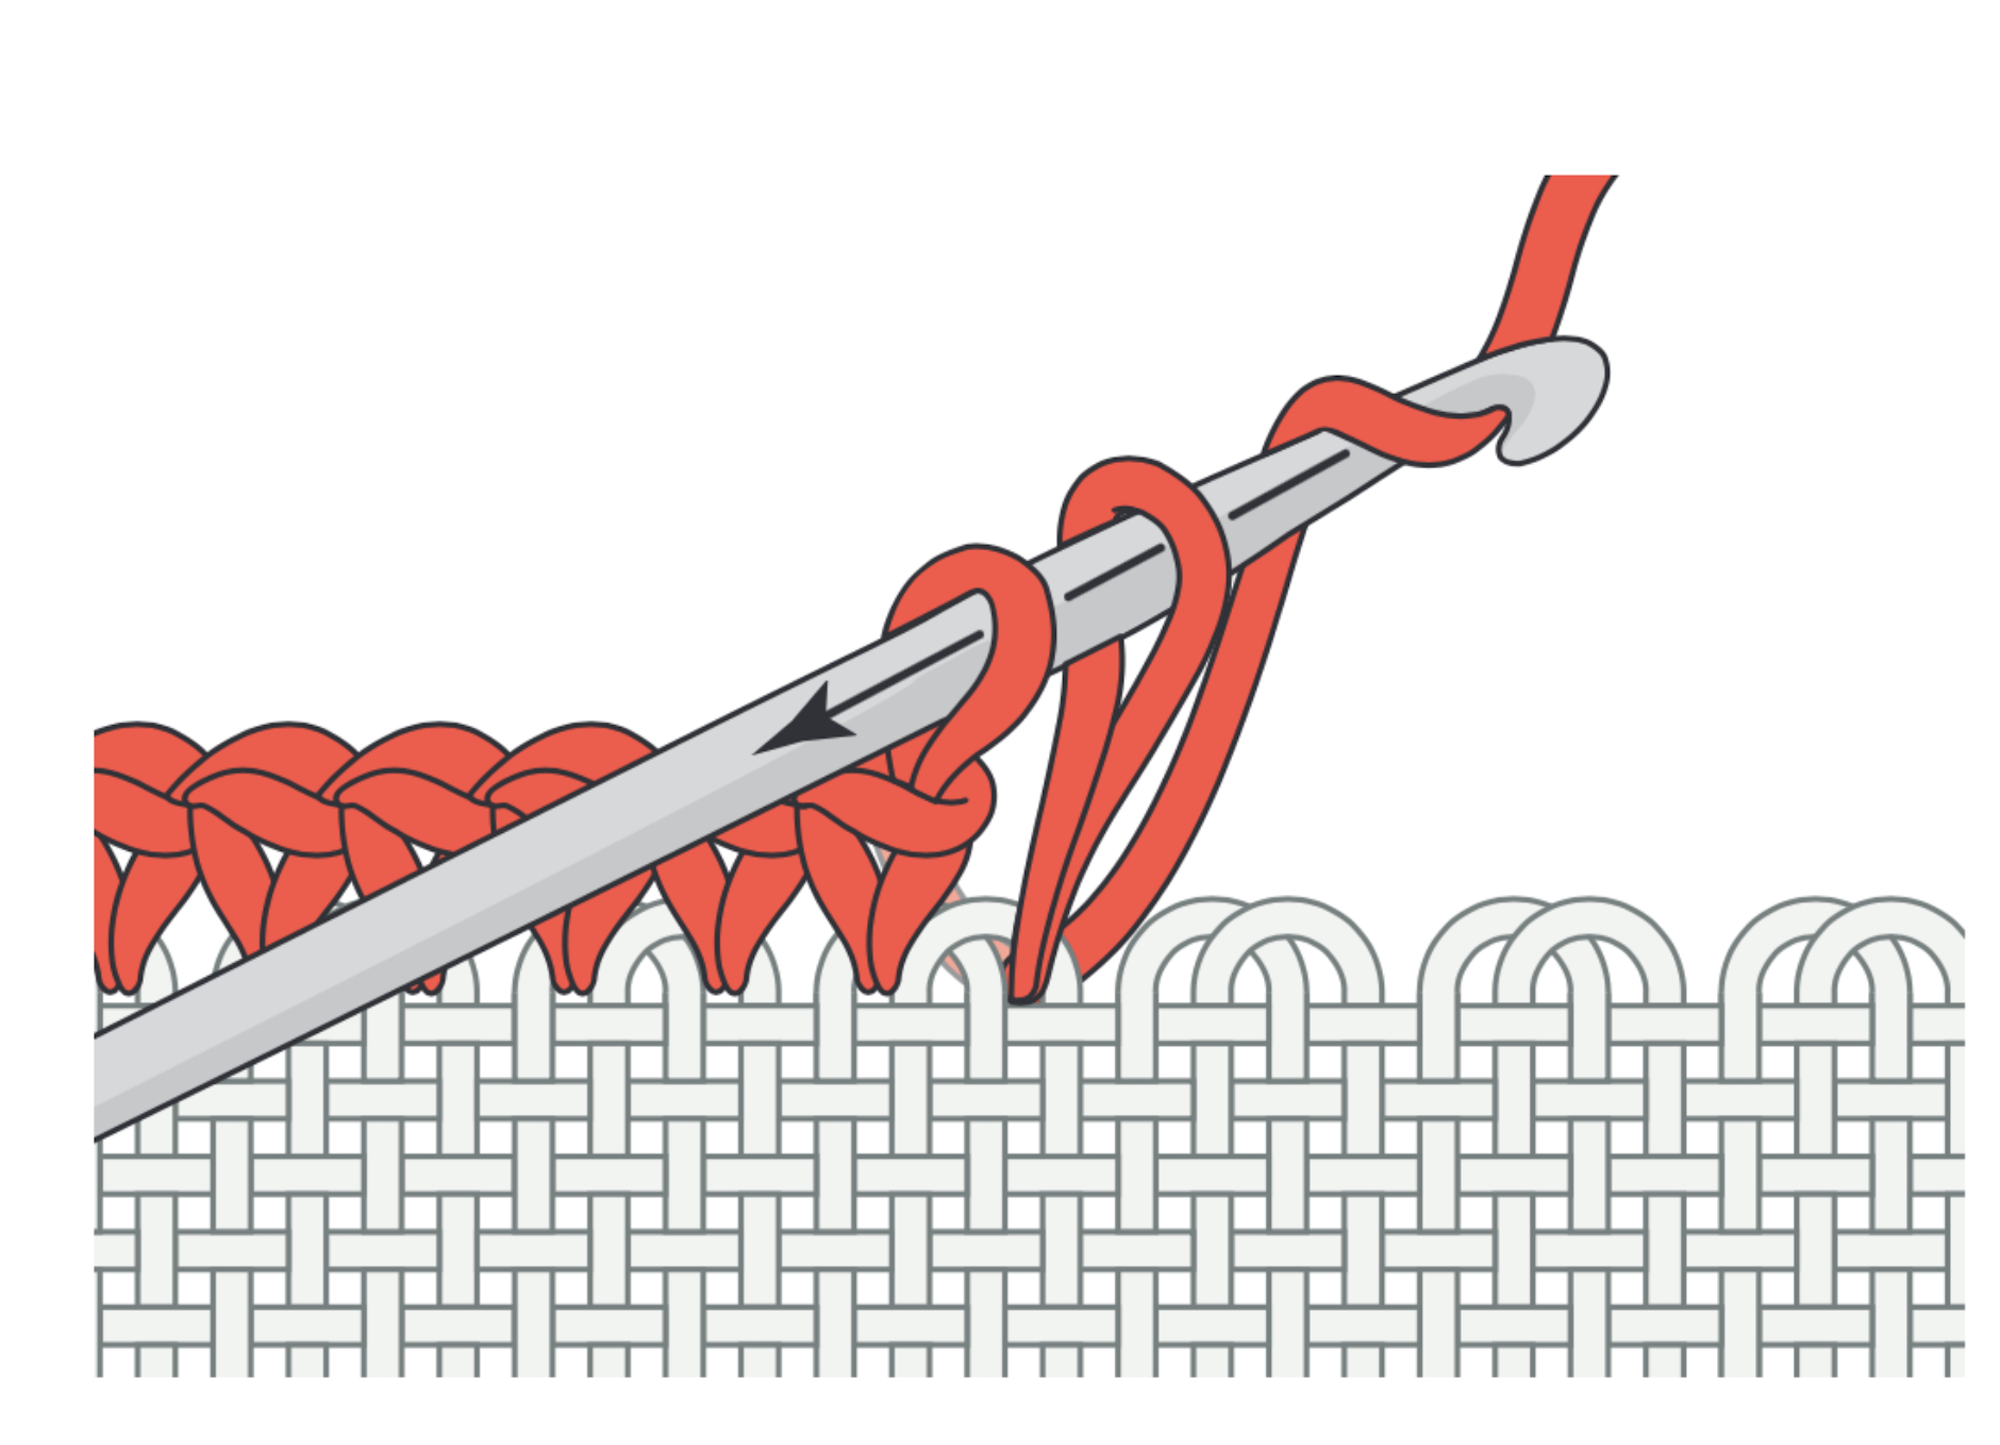
Click each illustration to see the step close-up.
Step 1: Start with a loop on the hook.
Step 2: Insert the hook into the next stitch (or fabric edge), yarn over, pull this loop through the stitch to the front, yarn over, and draw the second yarn over through both loops on the hook (1 loop remains on hook).
Step 3: Repeat for desired length.
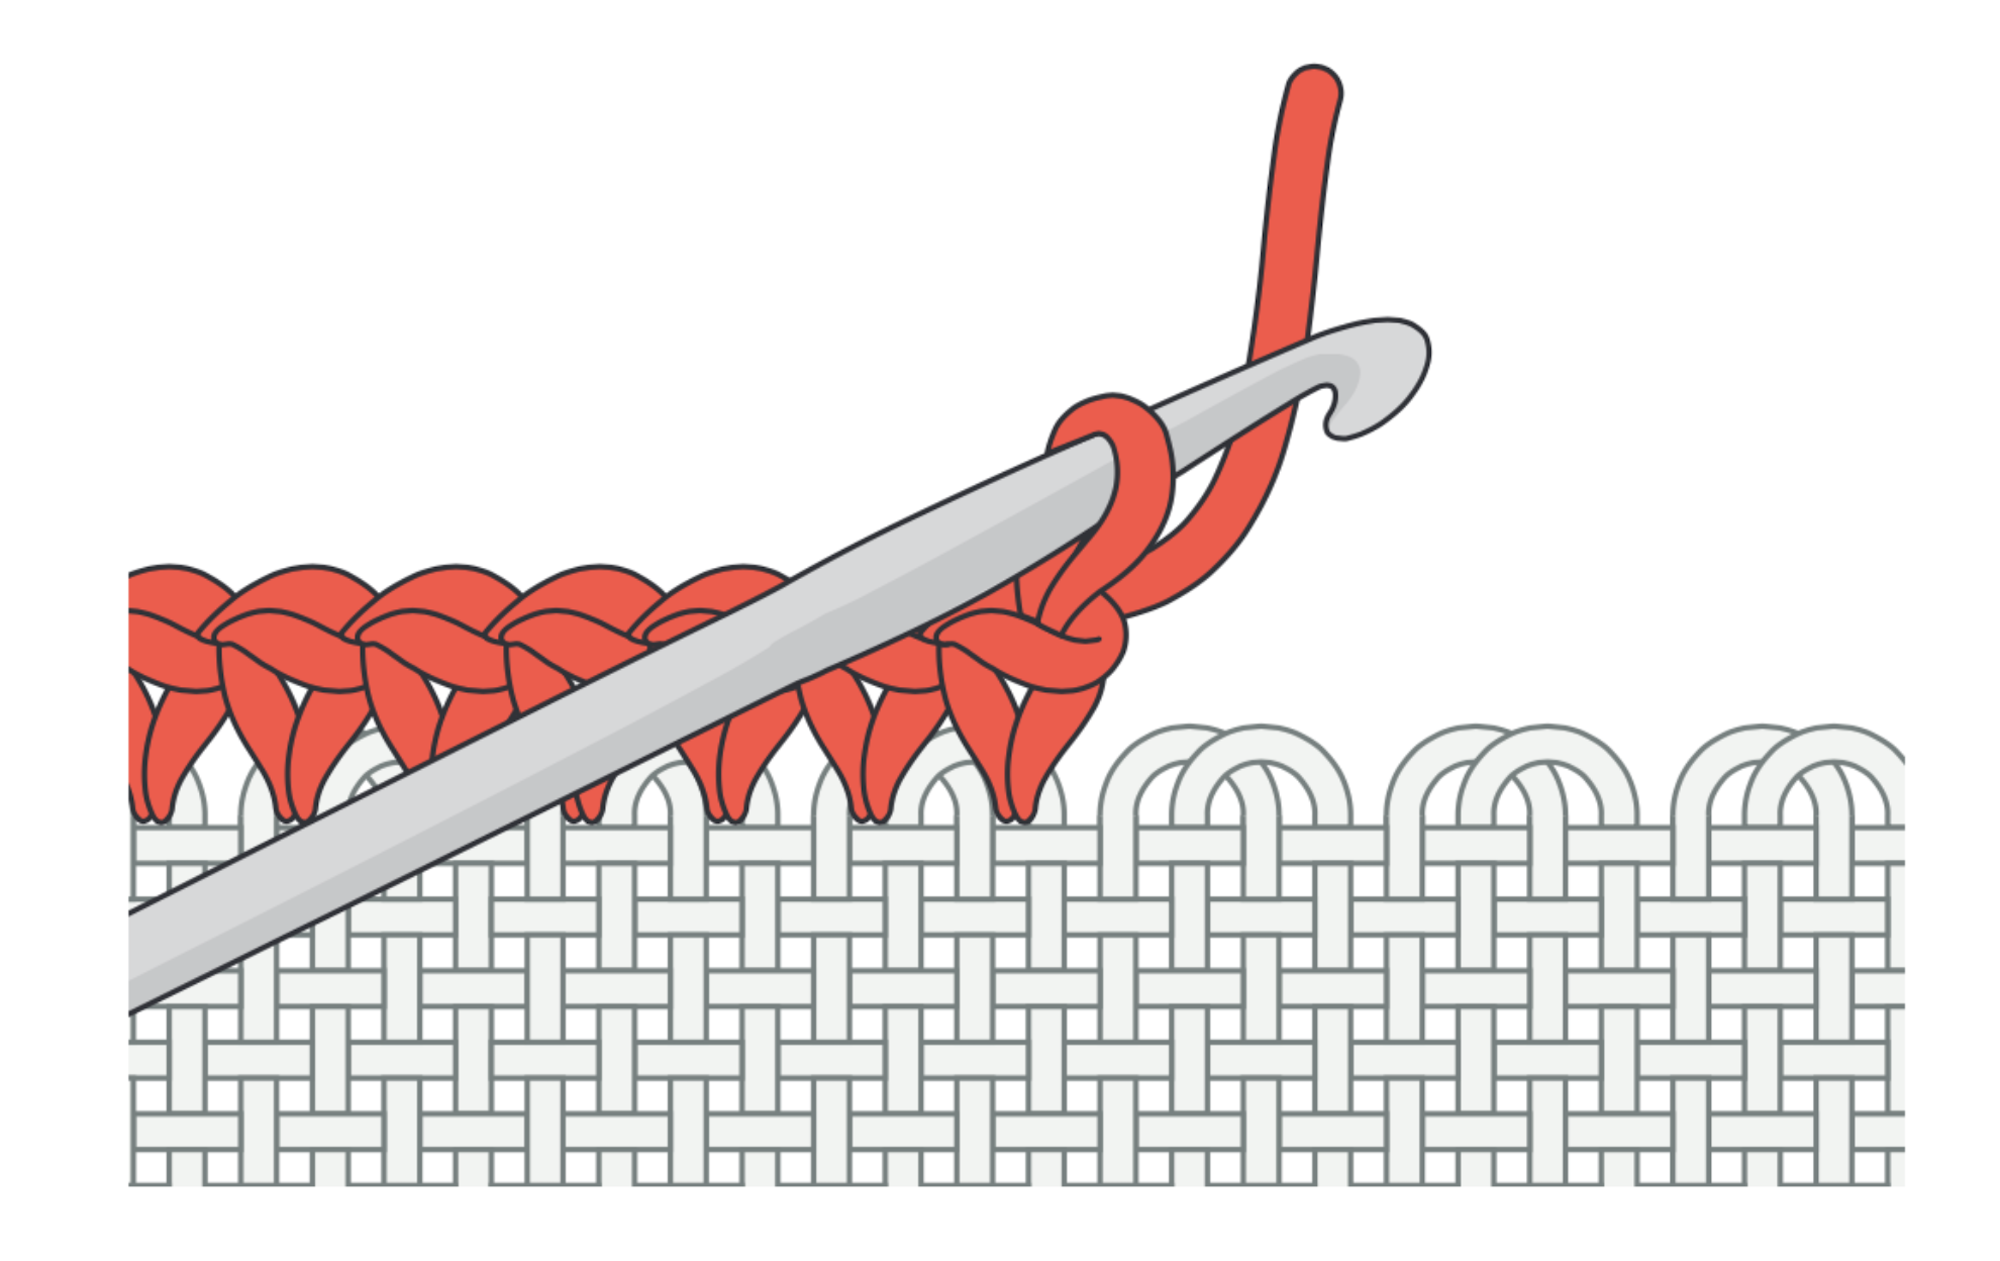
Adding Single Crochet Edging to Pin-Loom Pieces
Pin-loom projects in Easy Weaving with Little Looms frequently include single crochet as a simple, clean border using the paired loops that pin-loom pieces have along their edges. Each pair of loops has 2 spaces under a single loop and 1 space under both loops. Work a single-crochet stitch into each of the 2 spaces under the single loops as shown in the illustrations above, and the stitch size will usually be correct. If your single-crochet stitches are too big or loose, causing ruffled edges, try using a smaller hook. If the stitches are too small or tight, causing gathered edges, try using a larger hook.
Final Thoughts
While I’ve learned a variety of fiber-techniques using instructions written for right-handed individuals, I appreciate the times when something is written especially for me. Being able to adapt and reverse instructions is handy, but having left-handed instructions is even better.