Subscriber Exclusive
Designing Borders for Pick-Up Bands
Learn tips and tricks for designing borders for your pick-up bands, from simple stripes to more complex color-and-weave designs.
Learn tips and tricks for designing borders for your pick-up bands, from simple stripes to more complex color-and-weave designs. <a href="https://littlelooms.com/designing-borders-for-pick-up-bands/">Continue reading.</a>
https://littlelooms.com/cdn-cgi/image/format=auto/https://www.datocms-assets.com/70931/1694643415-hw316-0003_rubsamen_guitar-strap-header.jpg?auto=format&w=900
Contents
Recently, a reader emailed a question about designing borders for pick-up inkle bands. While projects in Little Looms have the borders built into the design, most pattern book drafts only include the pick-up pattern—not the border. If you’ve been weaving inkle bands for a while, it can feel like second nature to add on a border, but when you’re a new weaver, it can seem daunting. I should know—I was once a new bandweaver who also felt a bit lost when designing my first sampler bands. After answering the reader, I thought it would be fun to put that same information into an article to help others.
General Guidelines
The short answer on how to approach designing a border is “it depends.” Which, while accurate, is not very helpful. Instead, I prefer to give some general guidelines. These guidelines are at least partially based on my own personal preferences. They are by no means rules set in stone, so you can feel free to pick and choose what works for you and your designs.
Christina’s Border Basics
To make your pick-up stand out better, use a thread the same thickness as your background thread for most or all of the border.
I’ve found having at least six warp ends for each border works well in my designs. You can use more, but if you go below six, the border feels too narrow.
However many border ends you add to your band, make sure your selvedge ends are both heddled.
Now, these are merely the barest of bones to get you started designing—there’s a whole world of different ways to design borders from basic stripes to more elaborate patterning. Let’s take a look at some fun examples.
Simple Stripes
If you want more to your border than just a few extra ends of your background warp, adding a stripe of a contrasting color is an easy and elegant way to elevate your edges.
Just keep in mind: if you add a contrasting color to your border, one end will give you a dashed line while adding two or more ends will give you a solid line.
Simple striped borders are a classic choice for pick-up bands. Click on either photo in the gallery to get more information and a closer look. Photos by Christina Garton
SUBSCRIBER EXCLUSIVE
Recently, a reader emailed a question about designing borders for pick-up inkle bands. While projects in Little Looms have the borders built into the design, most pattern book drafts only include the pick-up pattern—not the border. If you’ve been weaving inkle bands for a while, it can feel like second nature to add on a border, but when you’re a new weaver, it can seem daunting. I should know—I was once a new bandweaver who also felt a bit lost when designing my first sampler bands. After answering the reader, I thought it would be fun to put that same information into an article to help others.
General Guidelines
The short answer on how to approach designing a border is “it depends.” Which, while accurate, is not very helpful. Instead, I prefer to give some general guidelines. These guidelines are at least partially based on my own personal preferences. They are by no means rules set in stone, so you can feel free to pick and choose what works for you and your designs.
Christina’s Border Basics
To make your pick-up stand out better, use a thread the same thickness as your background thread for most or all of the border.
I’ve found having at least six warp ends for each border works well in my designs. You can use more, but if you go below six, the border feels too narrow.
However many border ends you add to your band, make sure your selvedge ends are both heddled.
Now, these are merely the barest of bones to get you started designing—there’s a whole world of different ways to design borders from basic stripes to more elaborate patterning. Let’s take a look at some fun examples.
Simple Stripes
If you want more to your border than just a few extra ends of your background warp, adding a stripe of a contrasting color is an easy and elegant way to elevate your edges.
Just keep in mind: if you add a contrasting color to your border, one end will give you a dashed line while adding two or more ends will give you a solid line.
Simple striped borders are a classic choice for pick-up bands. Click on either photo in the gallery to get more information and a closer look. Photos by Christina Garton
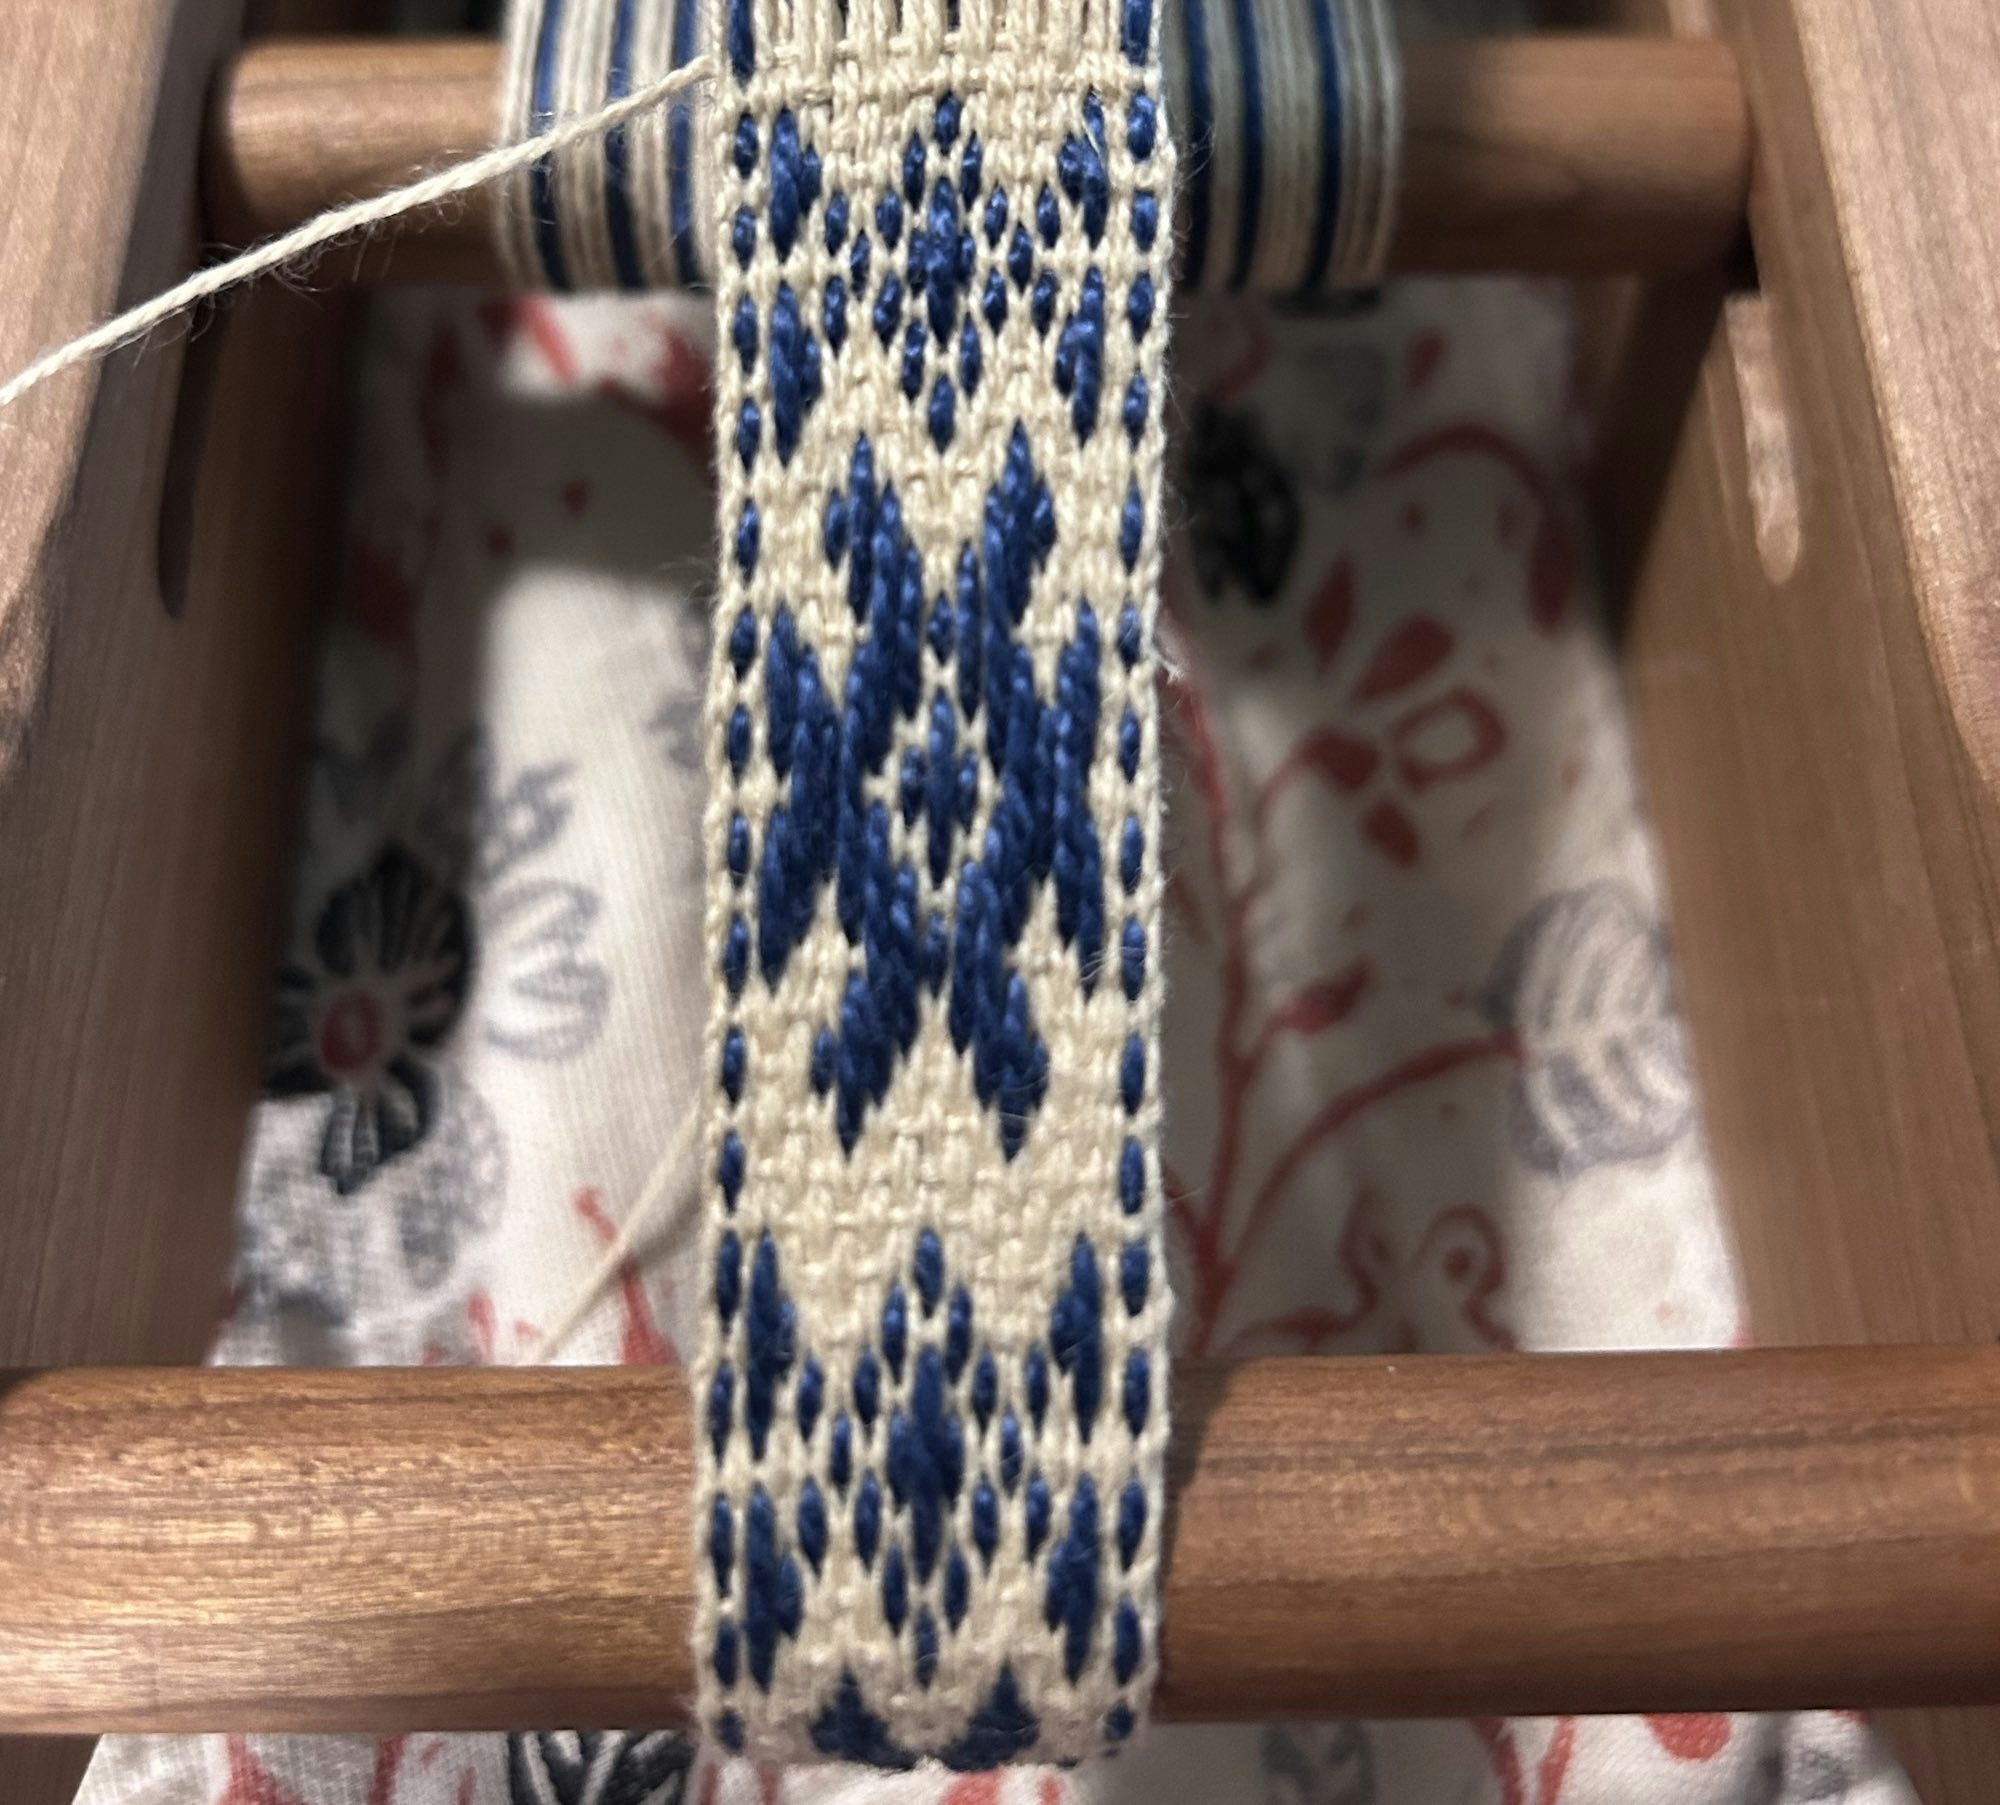
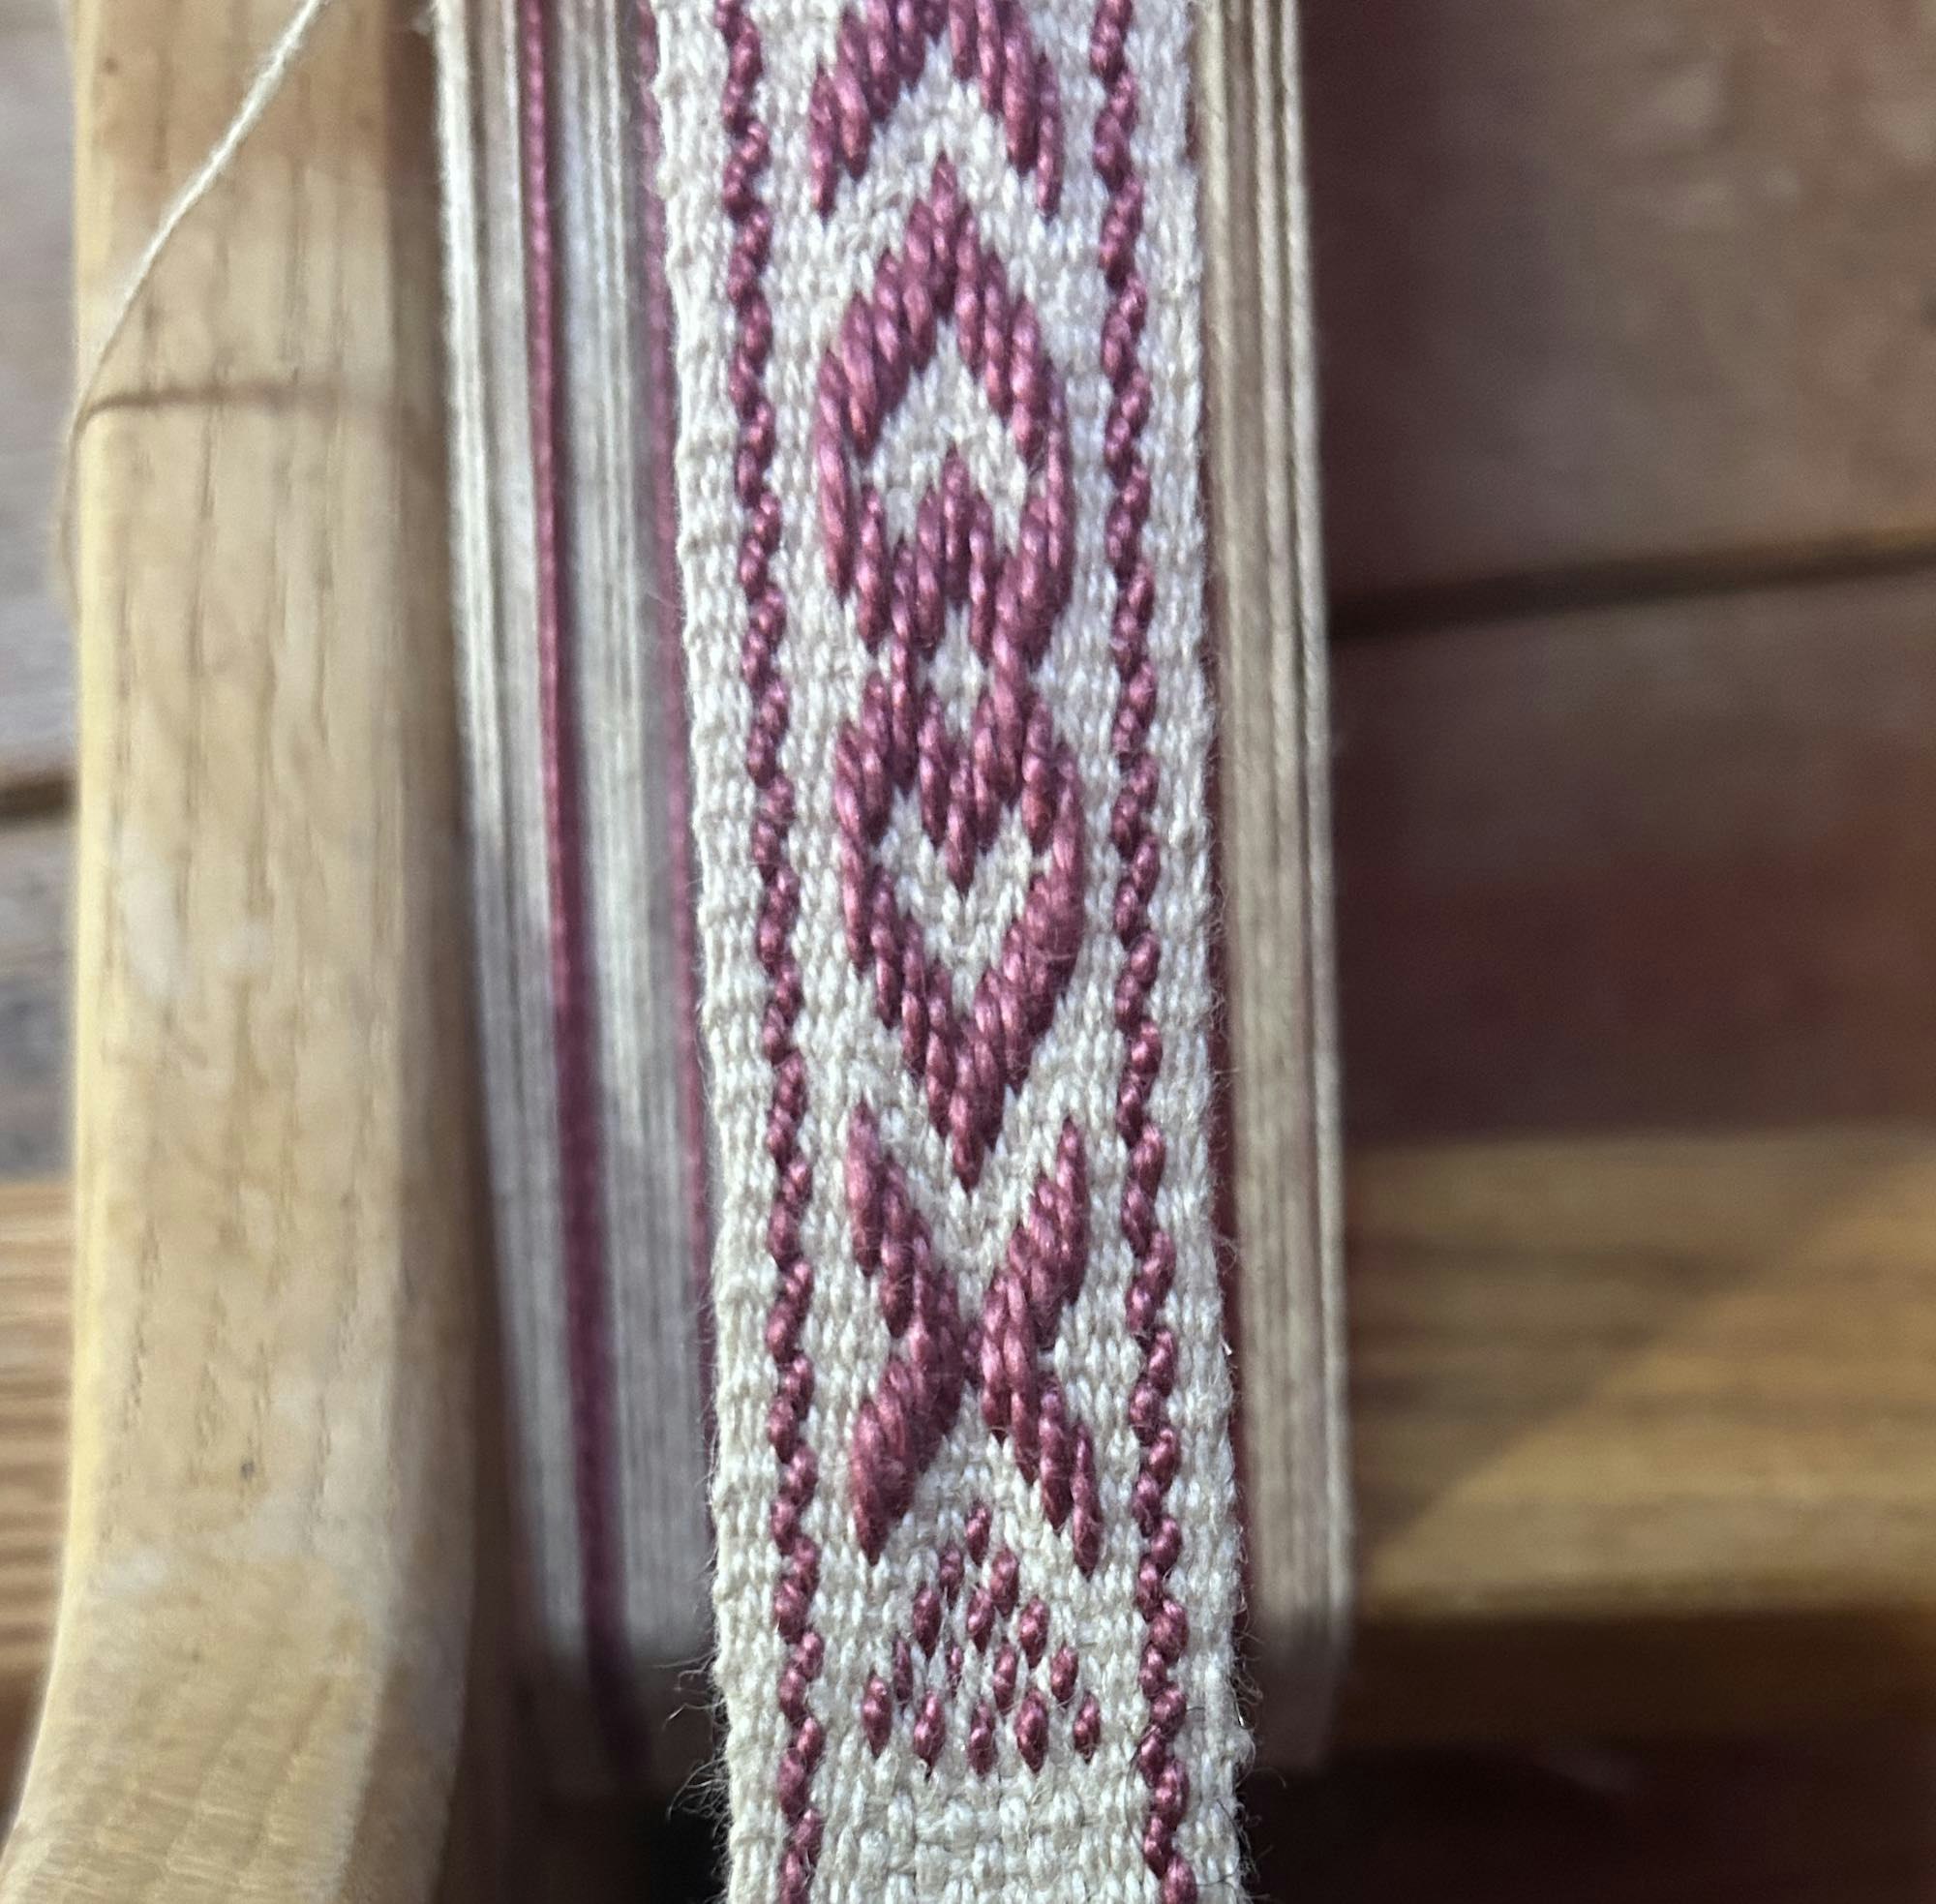
[PAYWALL]In the gallery above, I have photos of two different samplers I wove when I started weaving pick-up patterns. The blue sampler on the left has a single end of blue in each border, while the pink pick-up band on the right has two ends used side-by-side (one heddled and one unheddled).
As another option, if you were to use two (or more) ends of a contrasting color and alternated them with a background color, you’d get a wider dashed motif. Just be sure the contrasting color is always heddled, and the other color is always unheddled (or vice versa).
While my examples, shown above, feature a contrasting border stripe flanked on either side by the background color, you can also place the contrasting color on the selvedge, as shown below in Laia Robichaux’s Estonian Folk Bands from the Summer 2024 issue. Just keep in mind that your weft will be visible at the border. So, if your border is a different color from your weft, you’ll end up with a speckled effect. This is not a bad thing, but something to keep in mind.
In her Estonian Folk Bands from the Summer 2024 issue, Laia Robichaux used a weft that contrasted with the border color. The result is an eye-catching speckled effect. Click on either photo in the gallery to get a closer look. Photos by Matt Graves
Patterned Borders
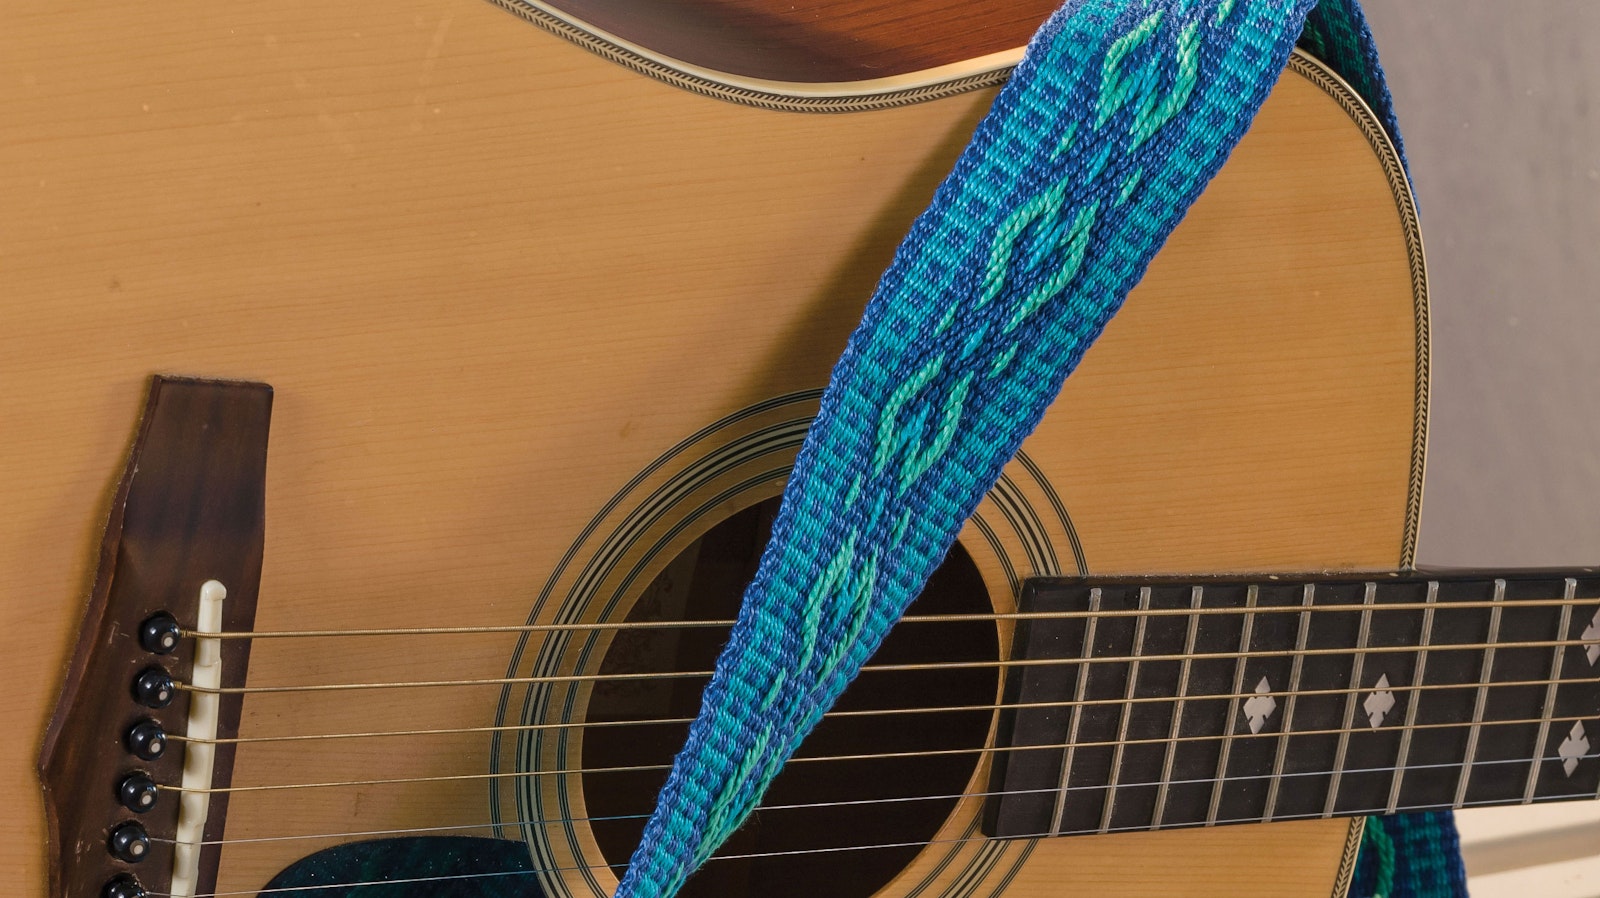
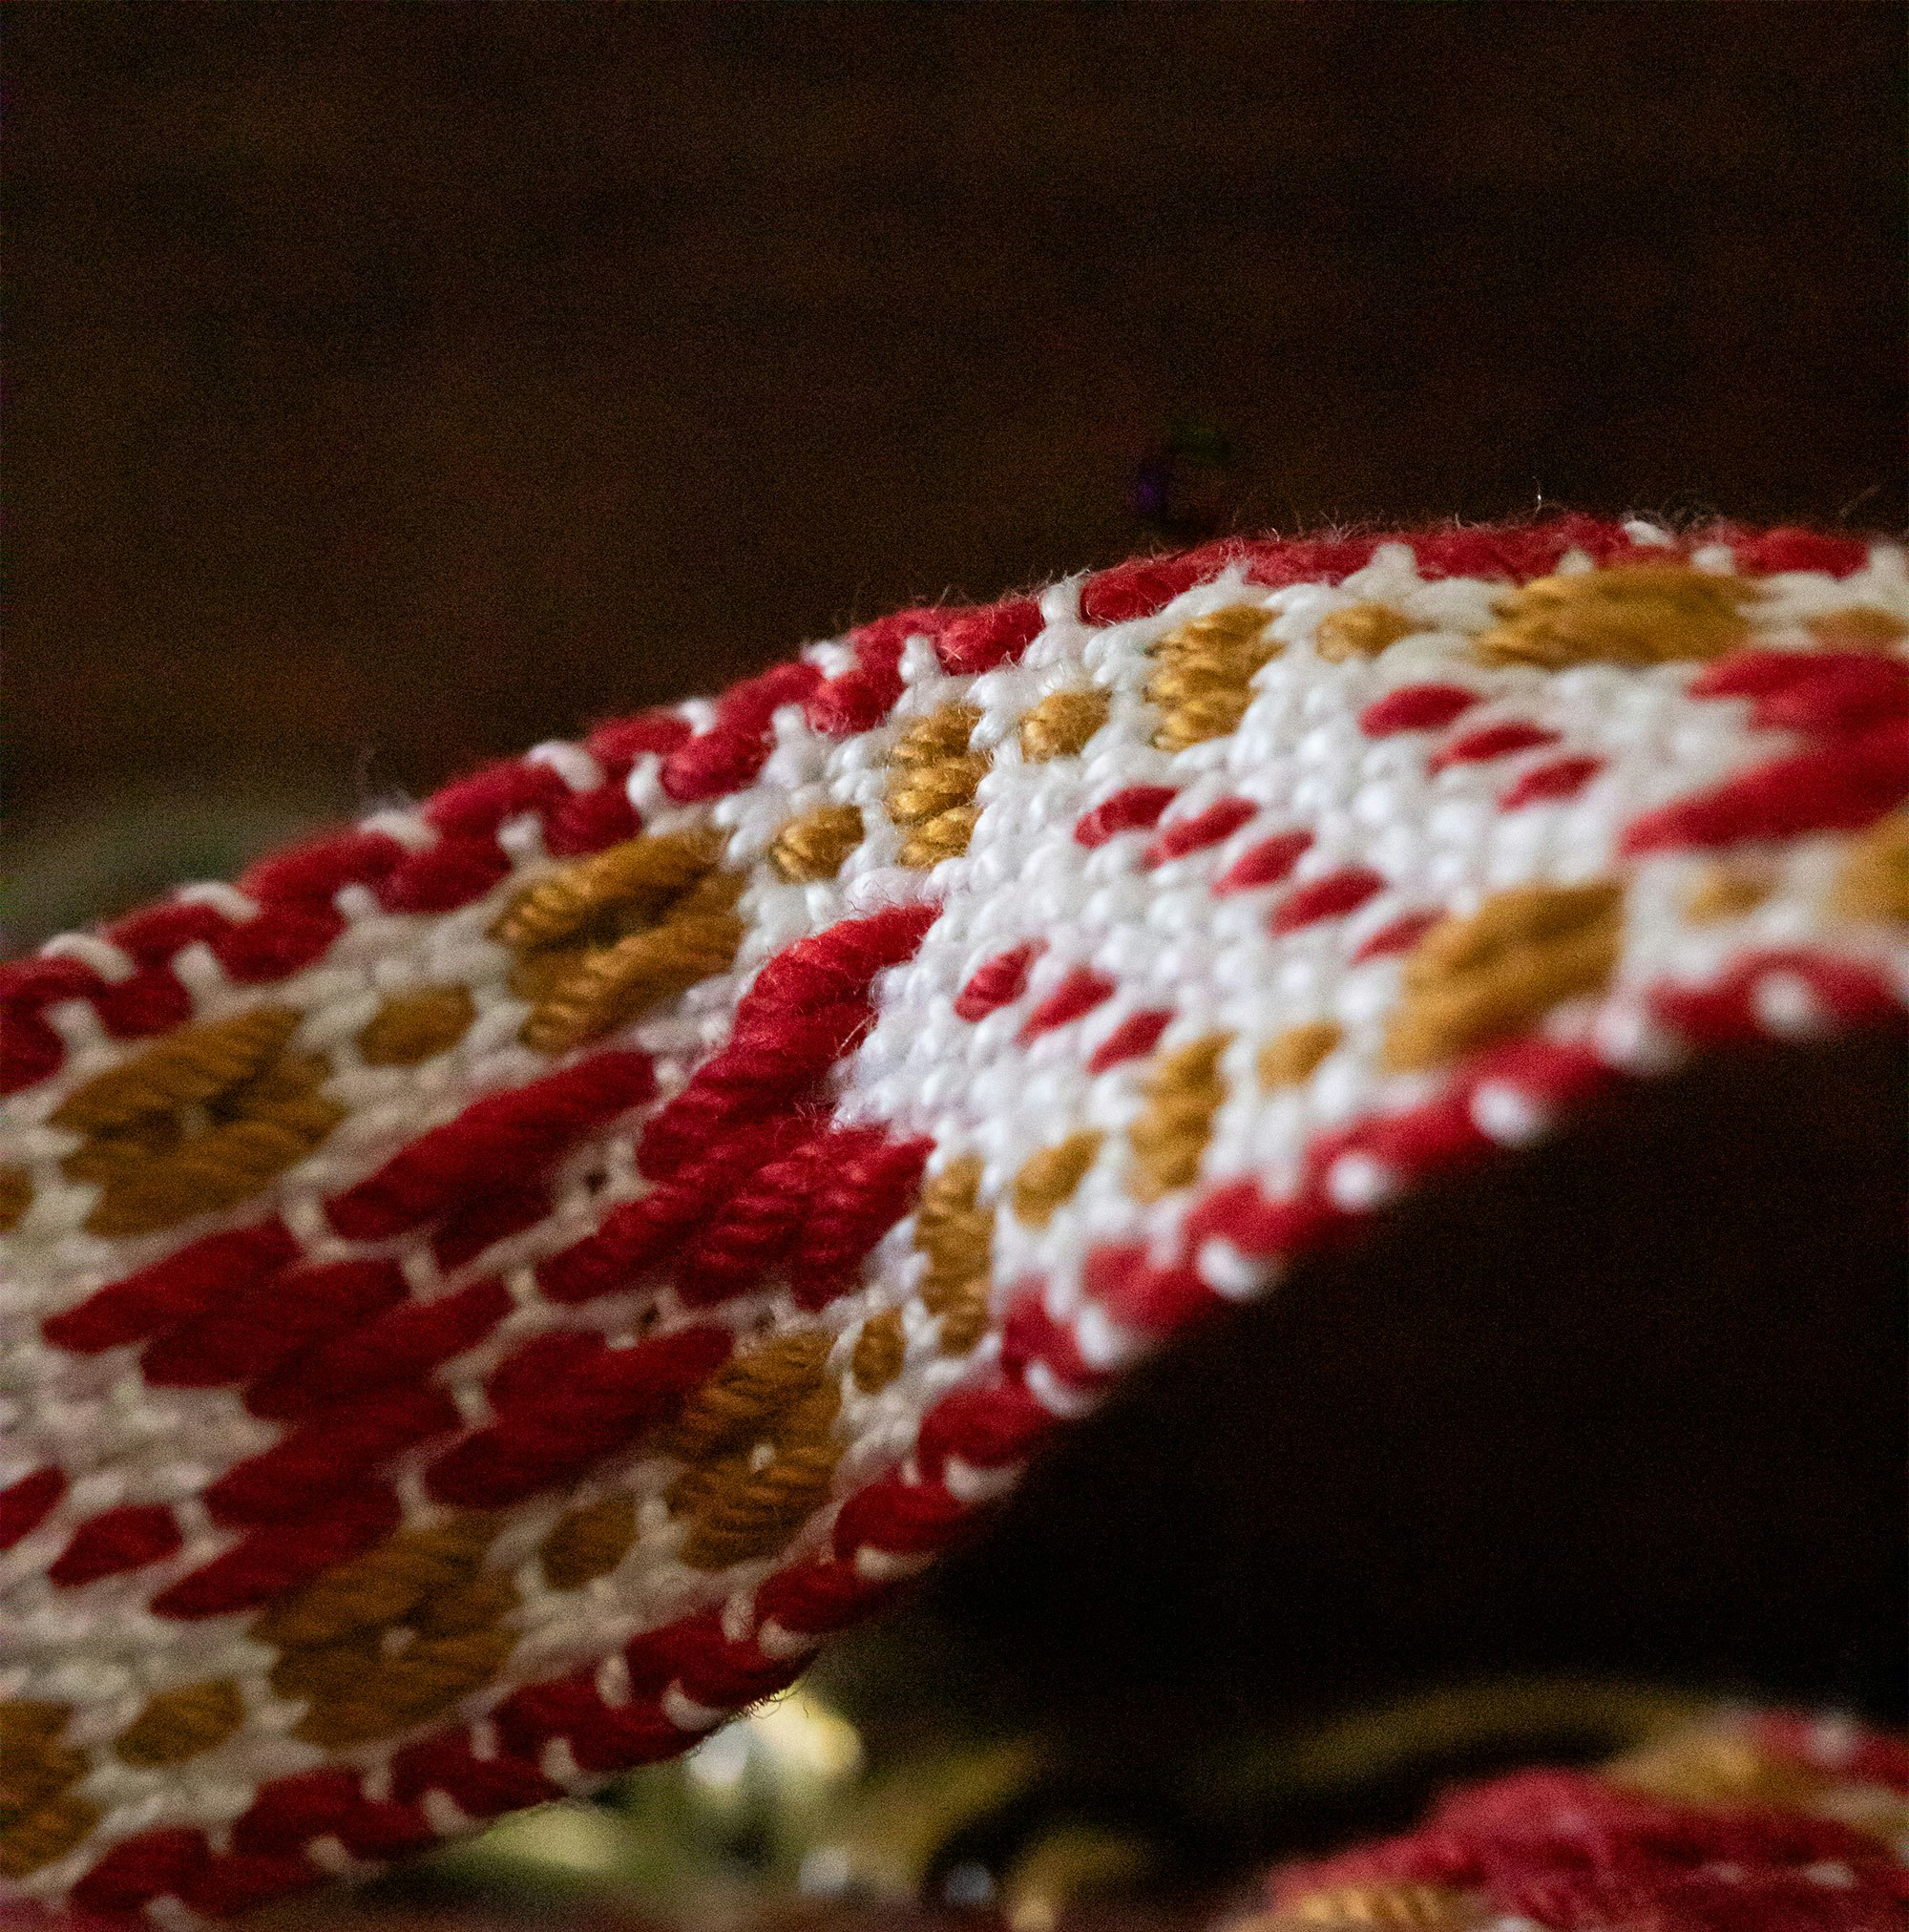
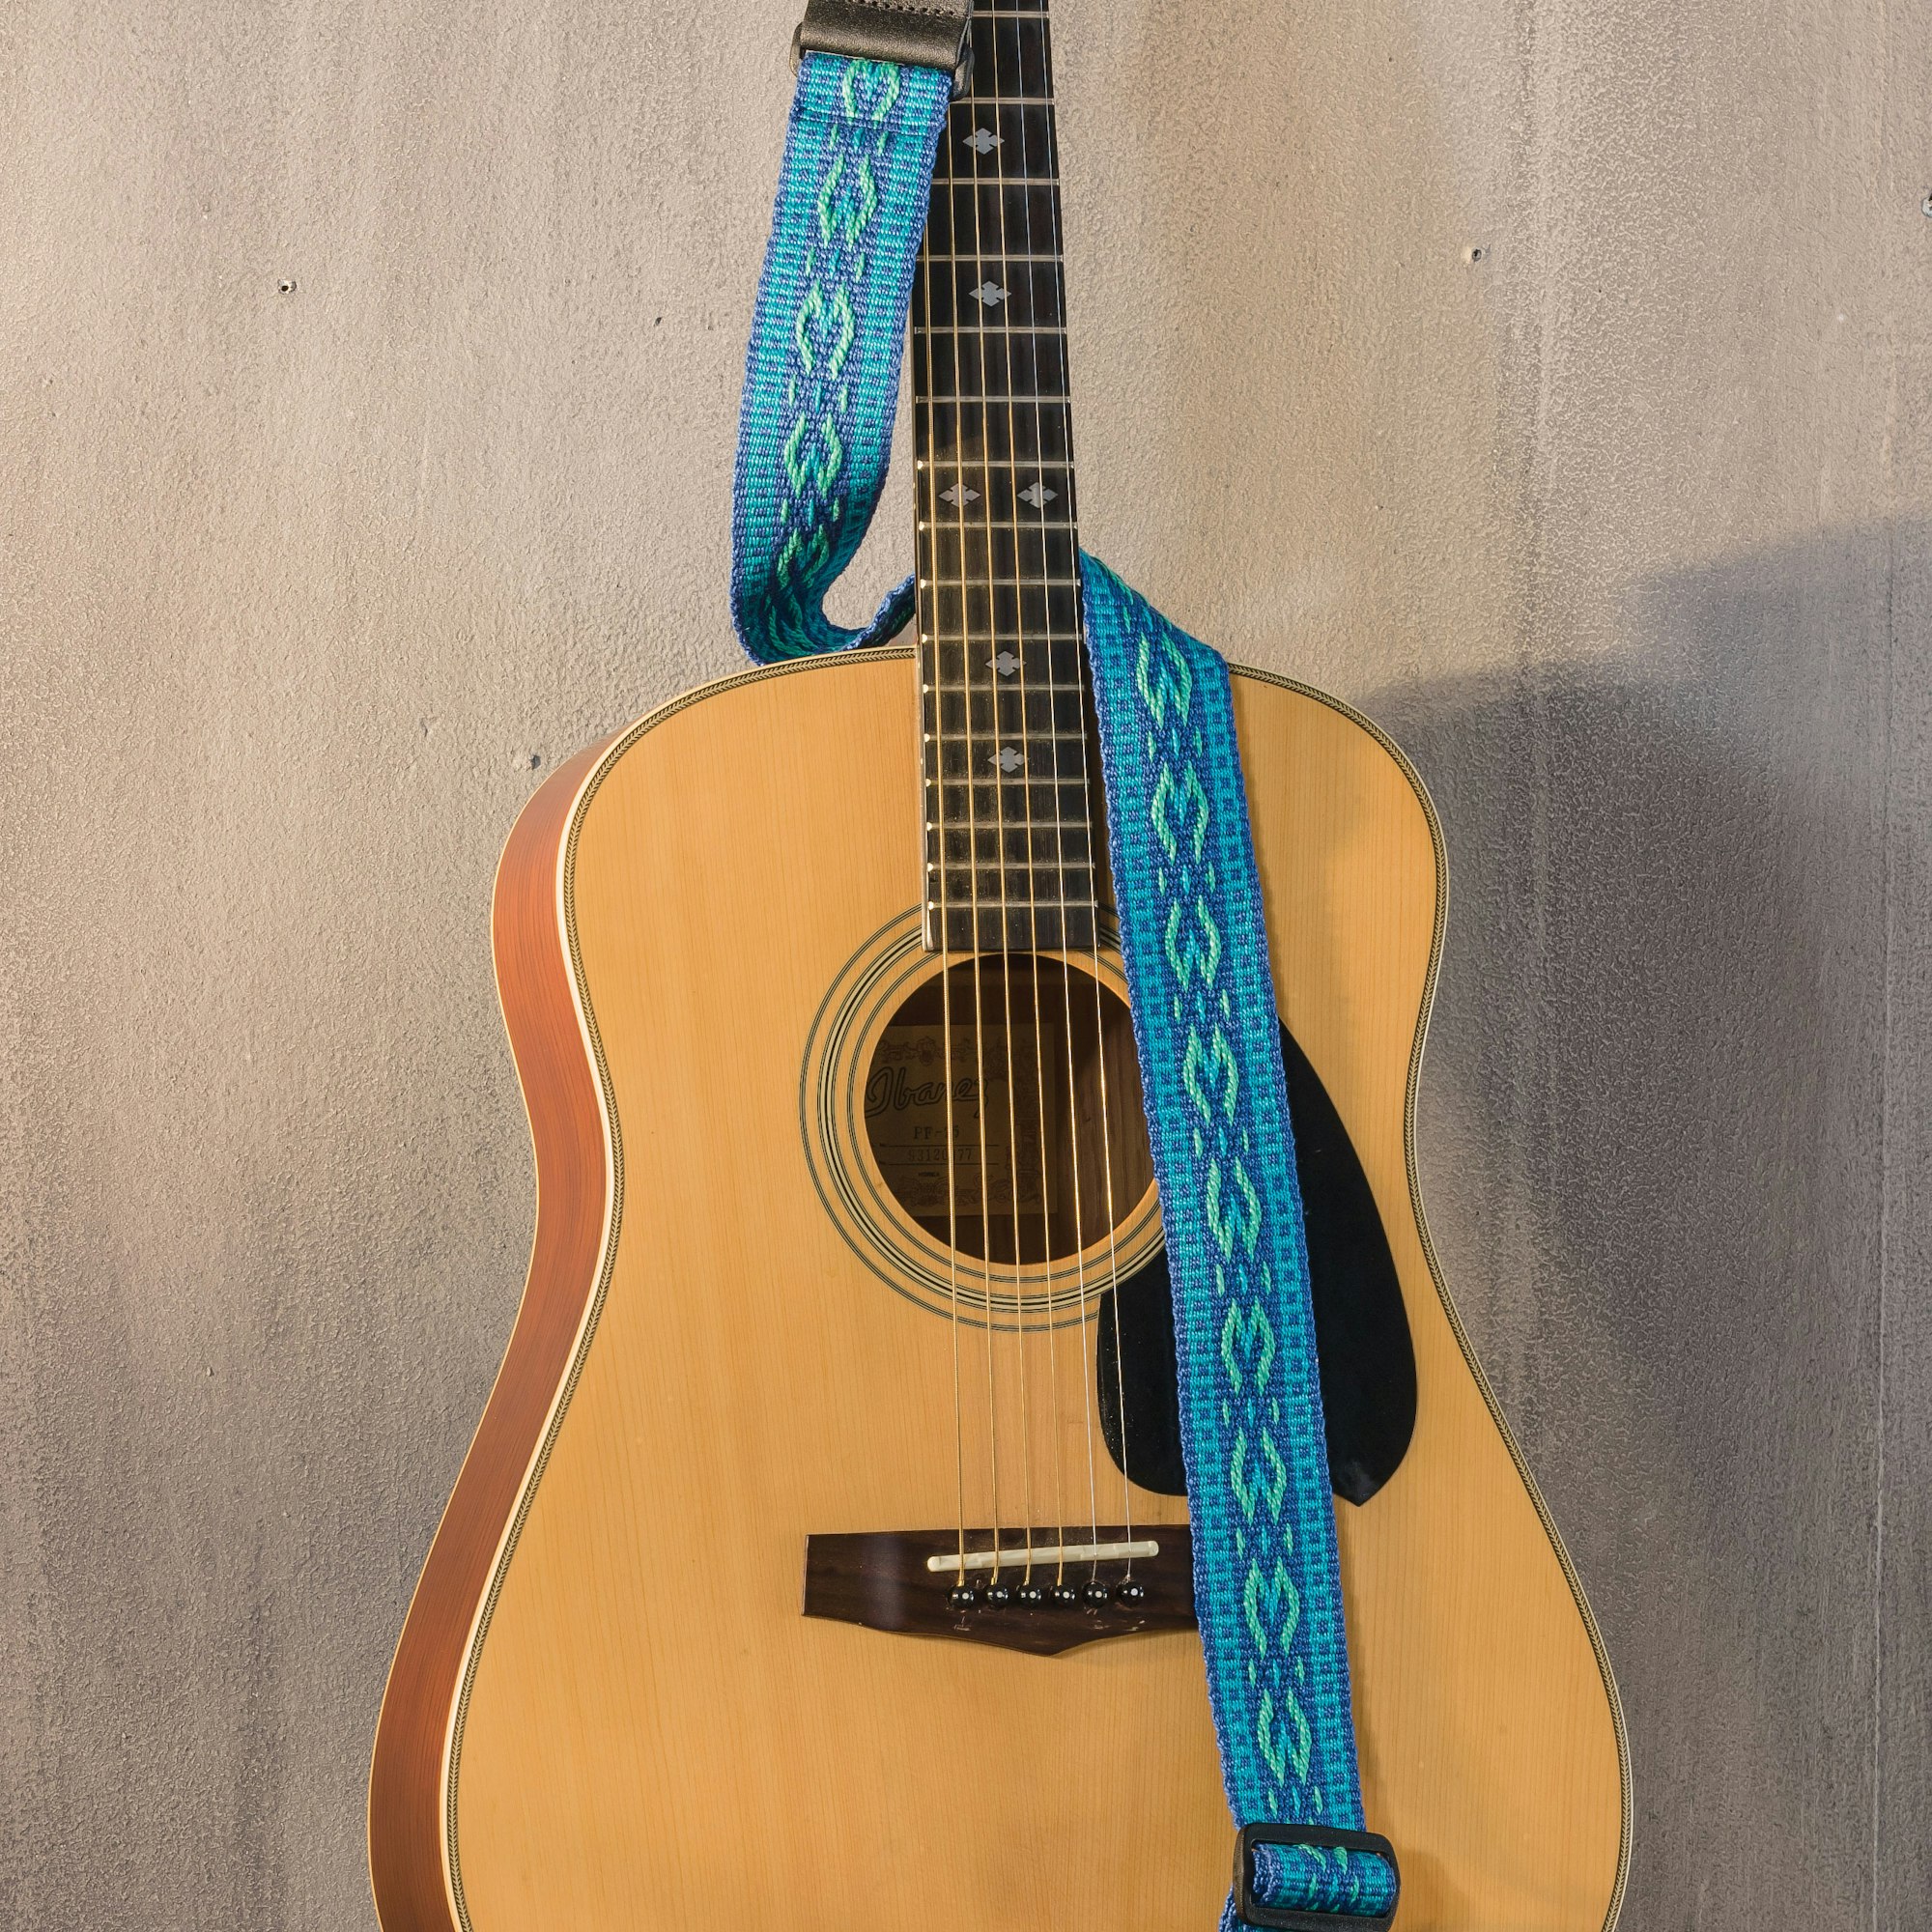
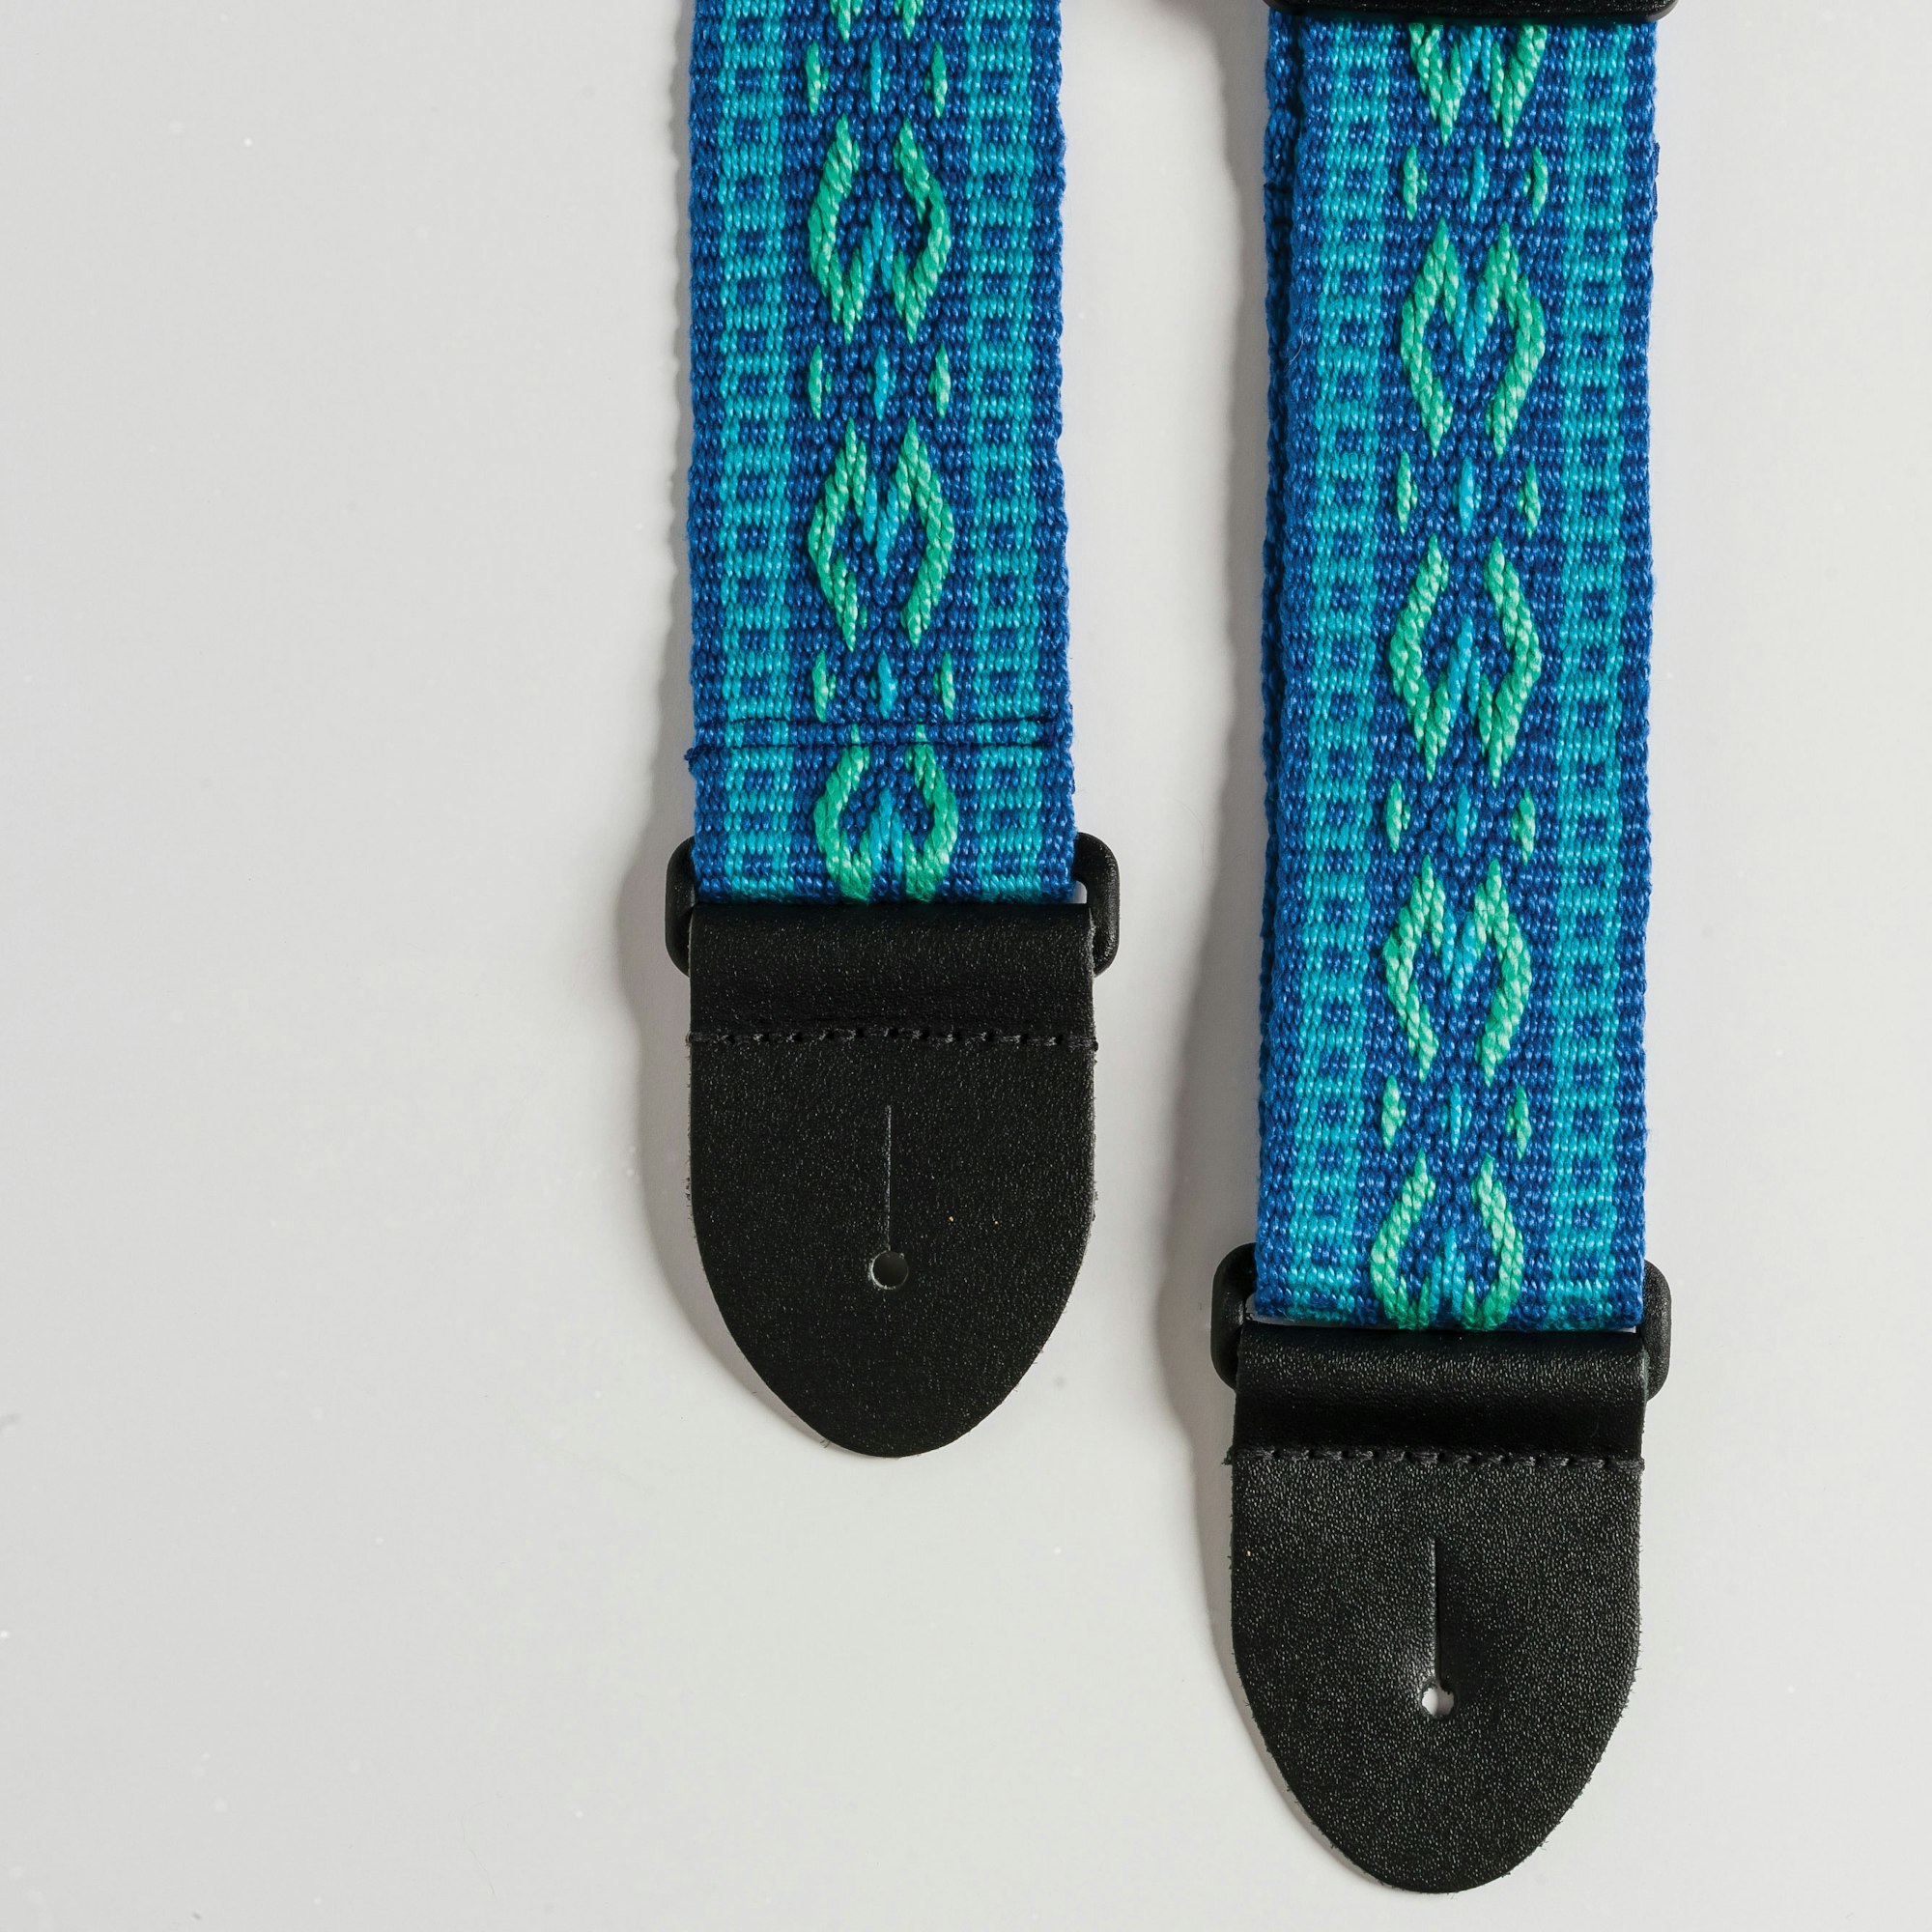
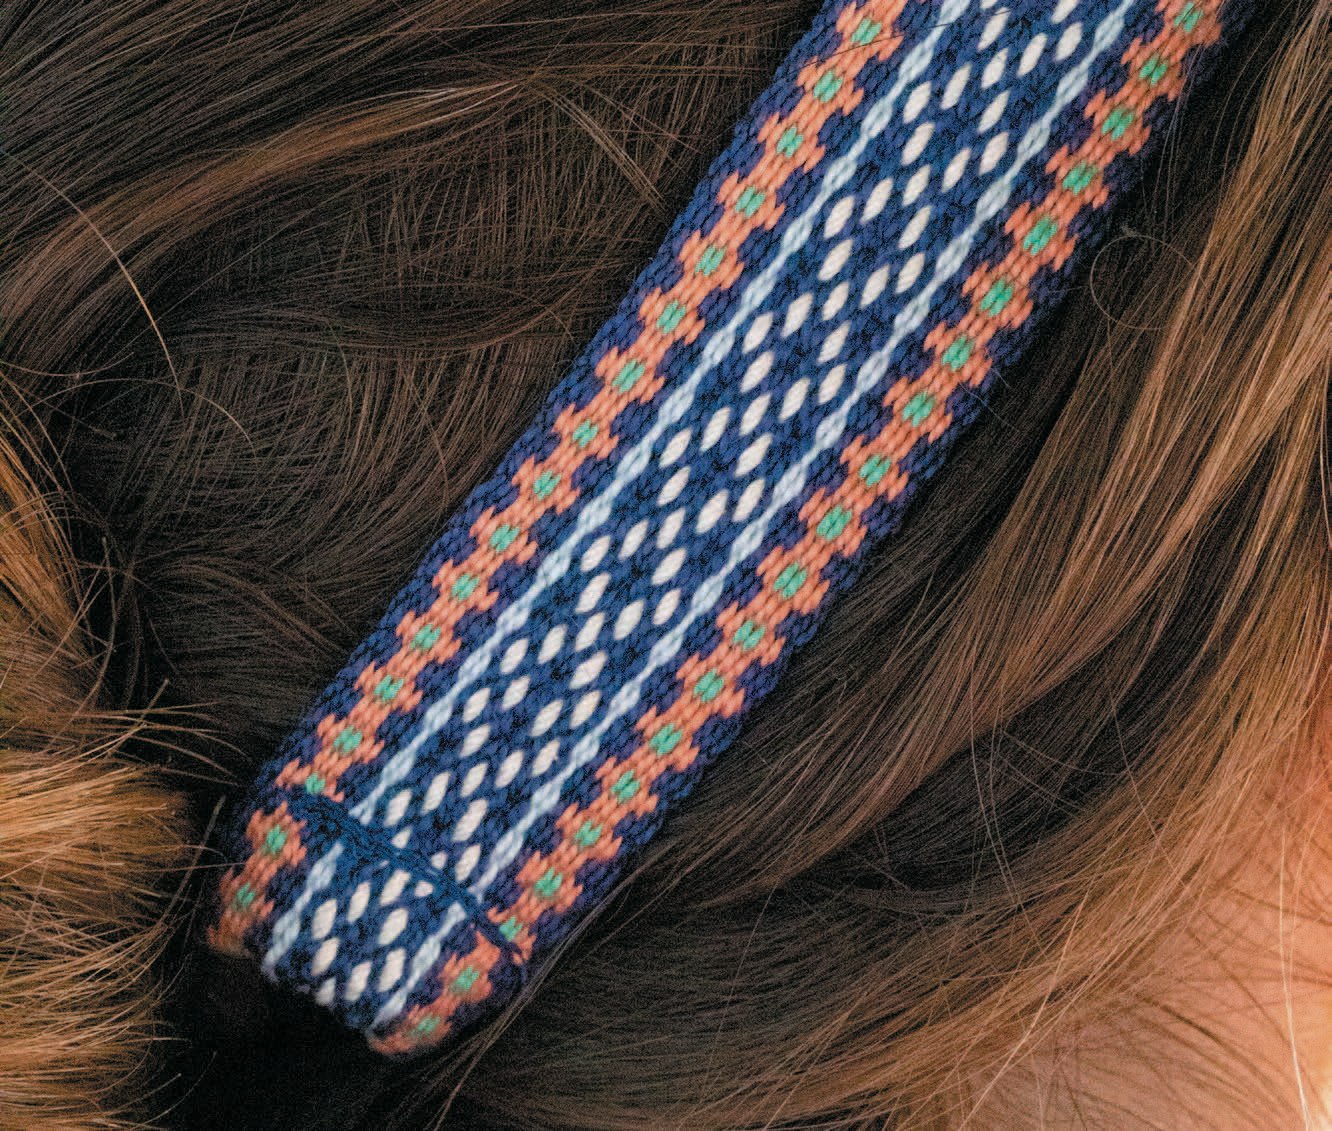
A simple color-and-weave chain motif elevates the borders in Connecticut Rubsamen’s Nordic Note’s Guitar Strap into something truly spectacular—without distracting from the main pick-up pattern. Click on either photo in the gallery to get a closer look. Photos by George Boe
Borders do not have to be simple—you can employ the same techniques for adding color-and-weave patterns to plain-weave bands in your borders. You can also switch up which color is heddle or unheddled after a few repeats to create color-and-weave designs.
In her Nordic Notes Guitar Strap project (shown above), designer Connie Rubsamen used this method to create a beautiful chain pattern. The chain adds just the right amount of extra interest while still highlighting the gorgeous pick-up motif in the center.
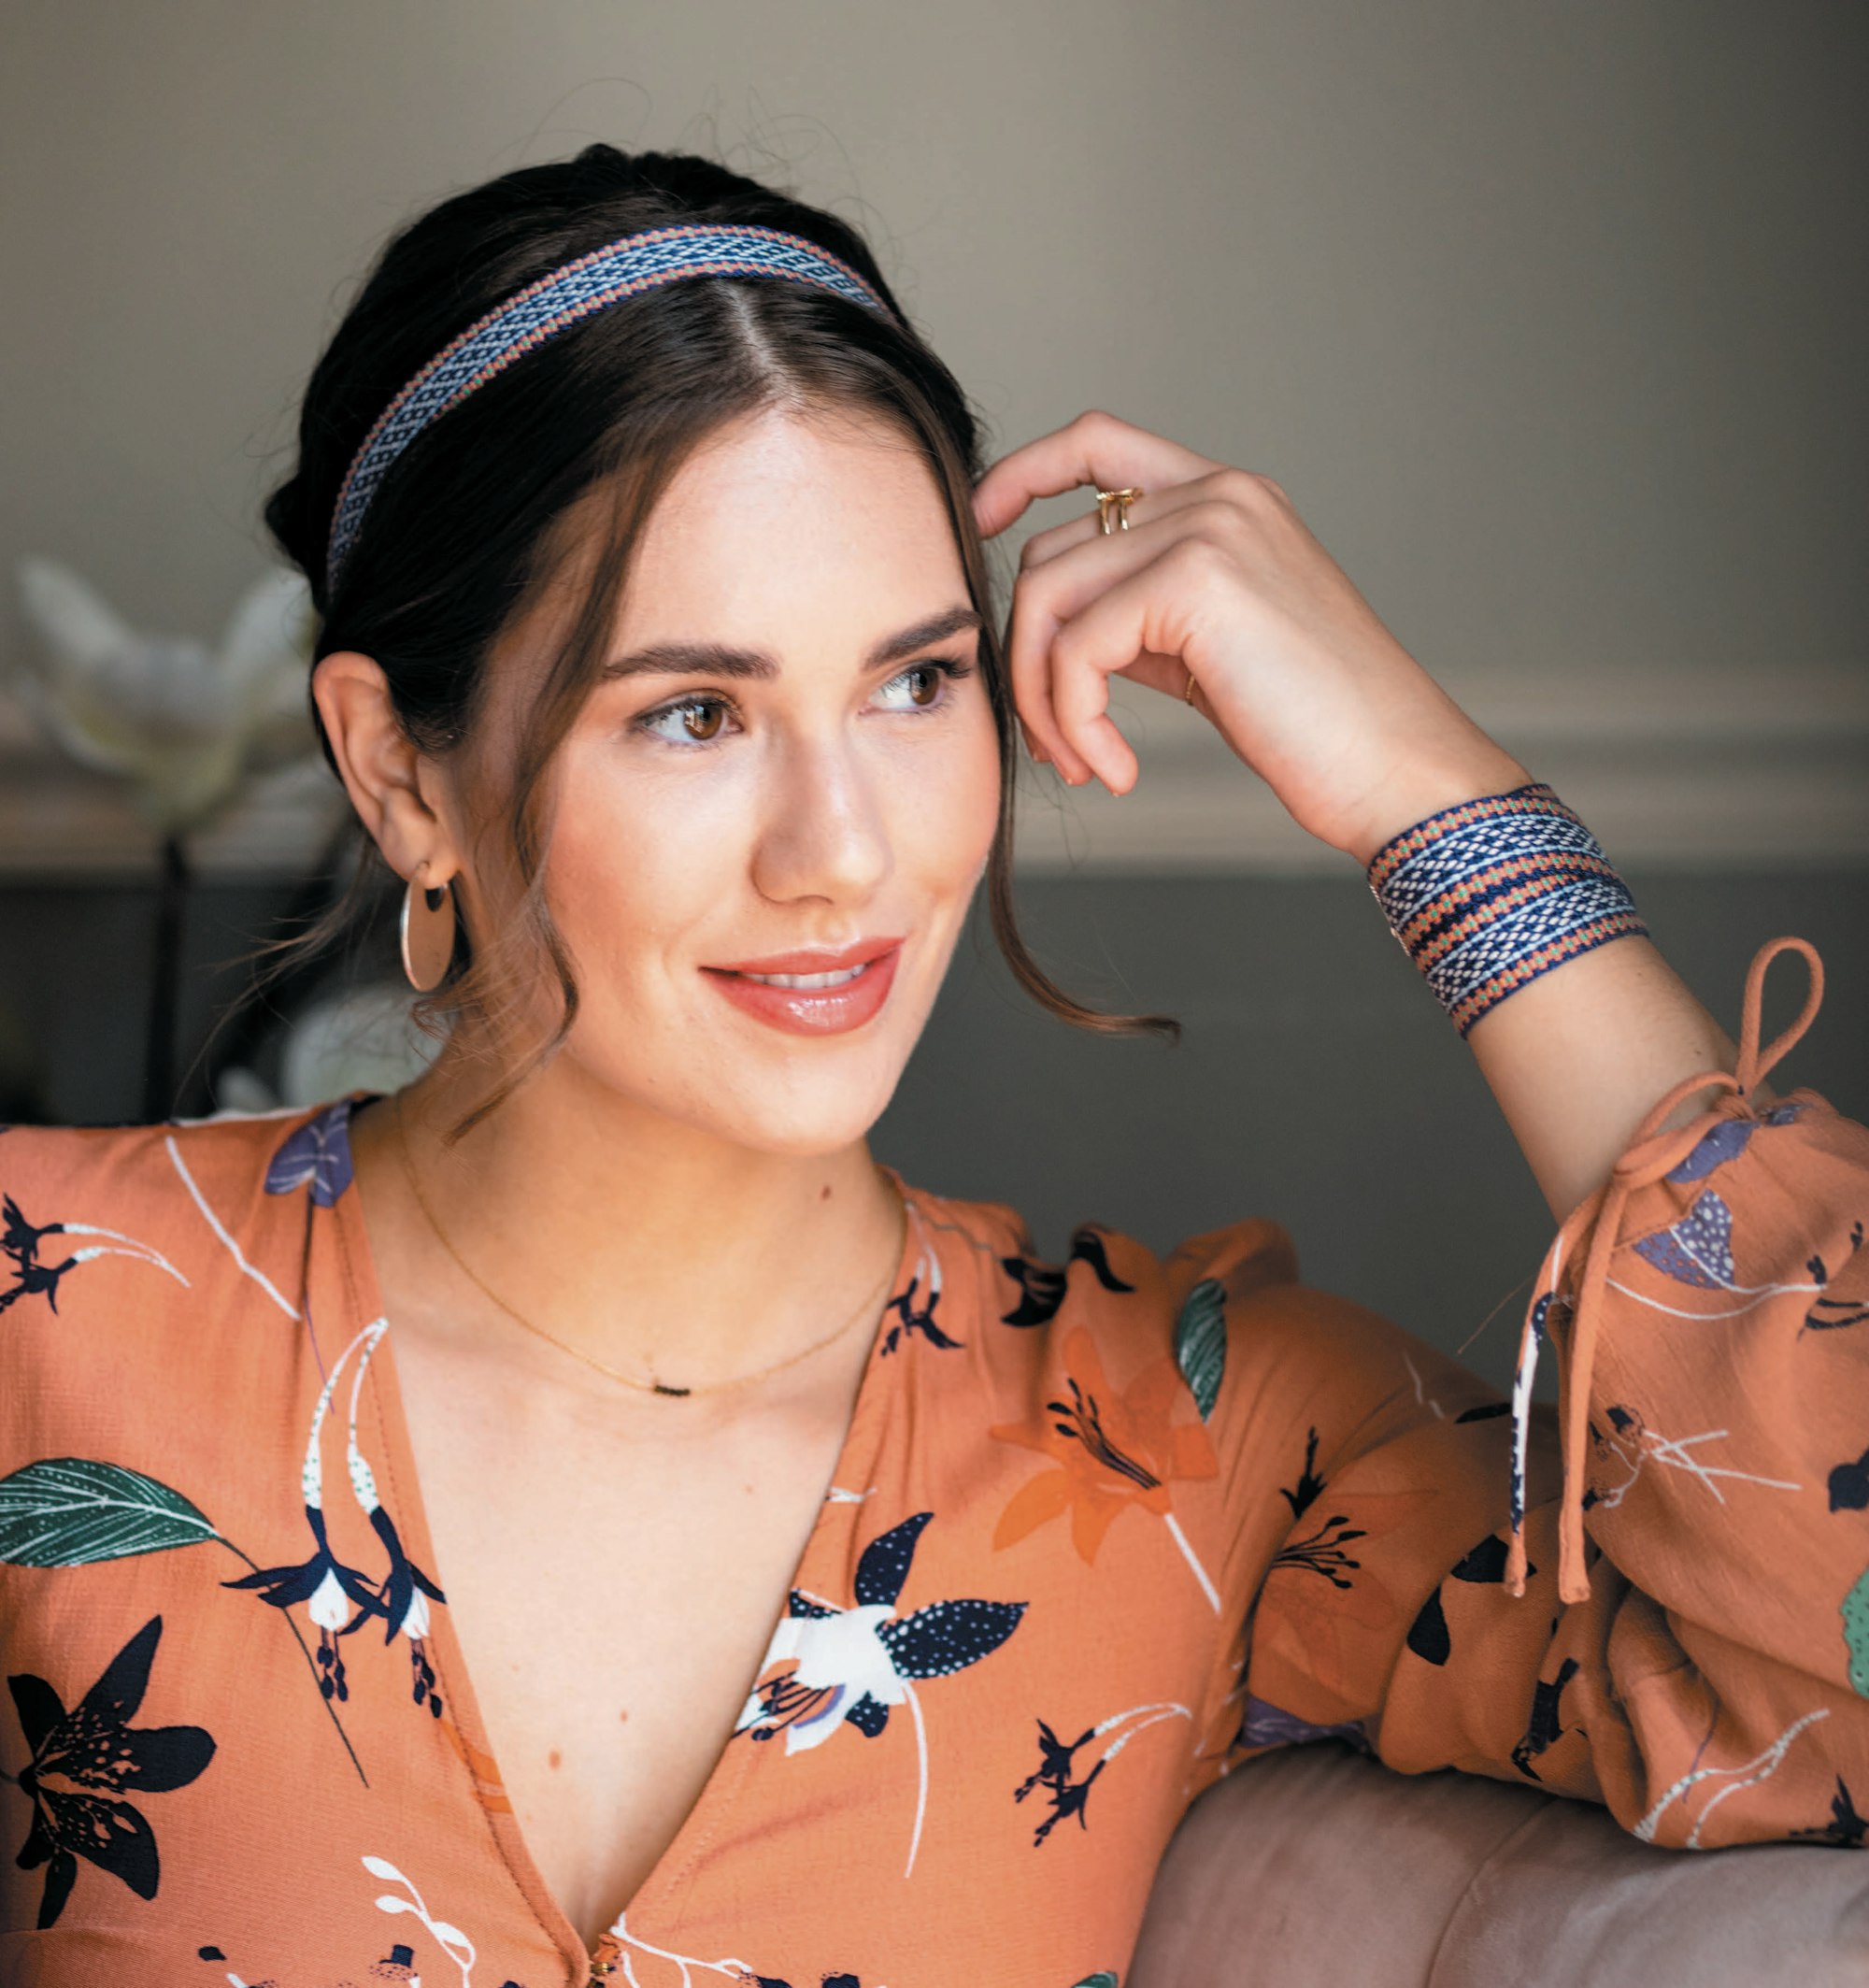
You also don’t have to stick to the same colors as the rest of your band. For her Portland Spring Inkle-Woven Headband and Bracelet from the Spring 2023 issue, Laia Robichaux added vivid color-and-weave “flowers” to her borders. The flower border contrasts beautifully with the otherwise cool-blue design, providing the perfect frame to an already elegant band.
In her Portland Spring Inkle-Woven Headband and Bracelet, designer Laia Robichaux used a simple color-and-weave pattern in colors that contrasted with the main design to create a beautiful floral frame for her band. Click on either photo in the gallery to get a closer look. Photos by Matt Graves
Creative Color Choices
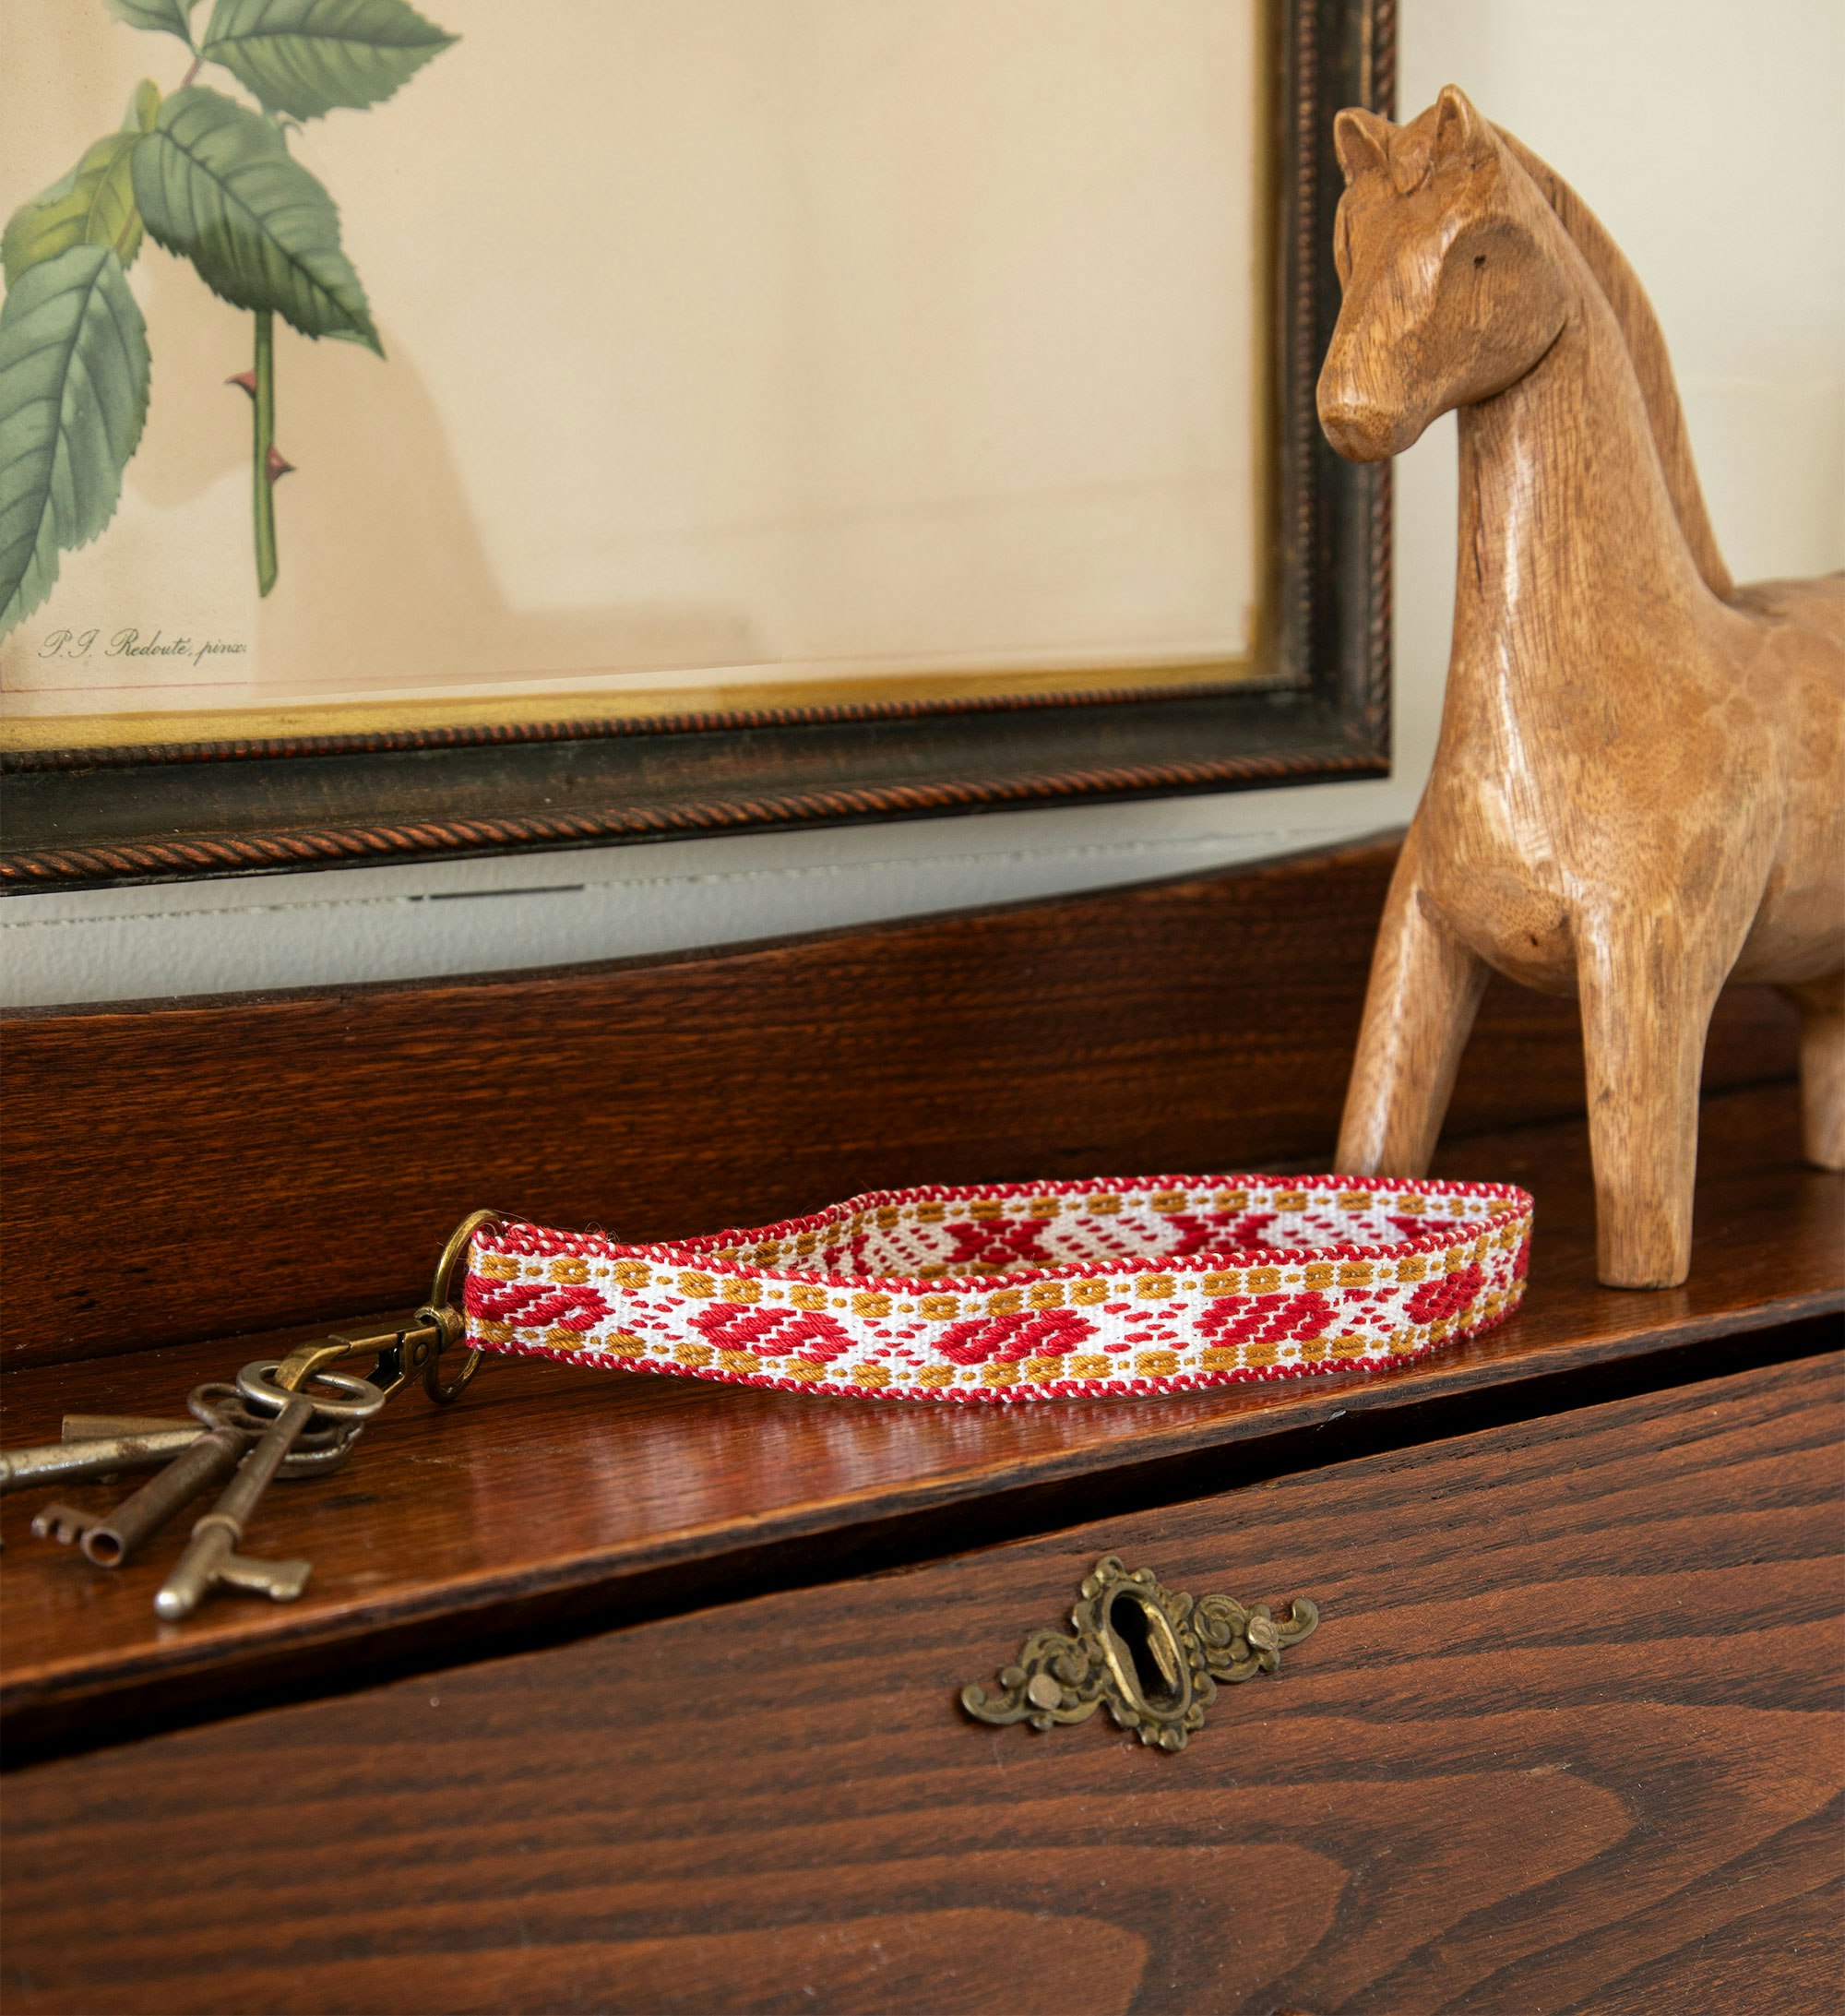
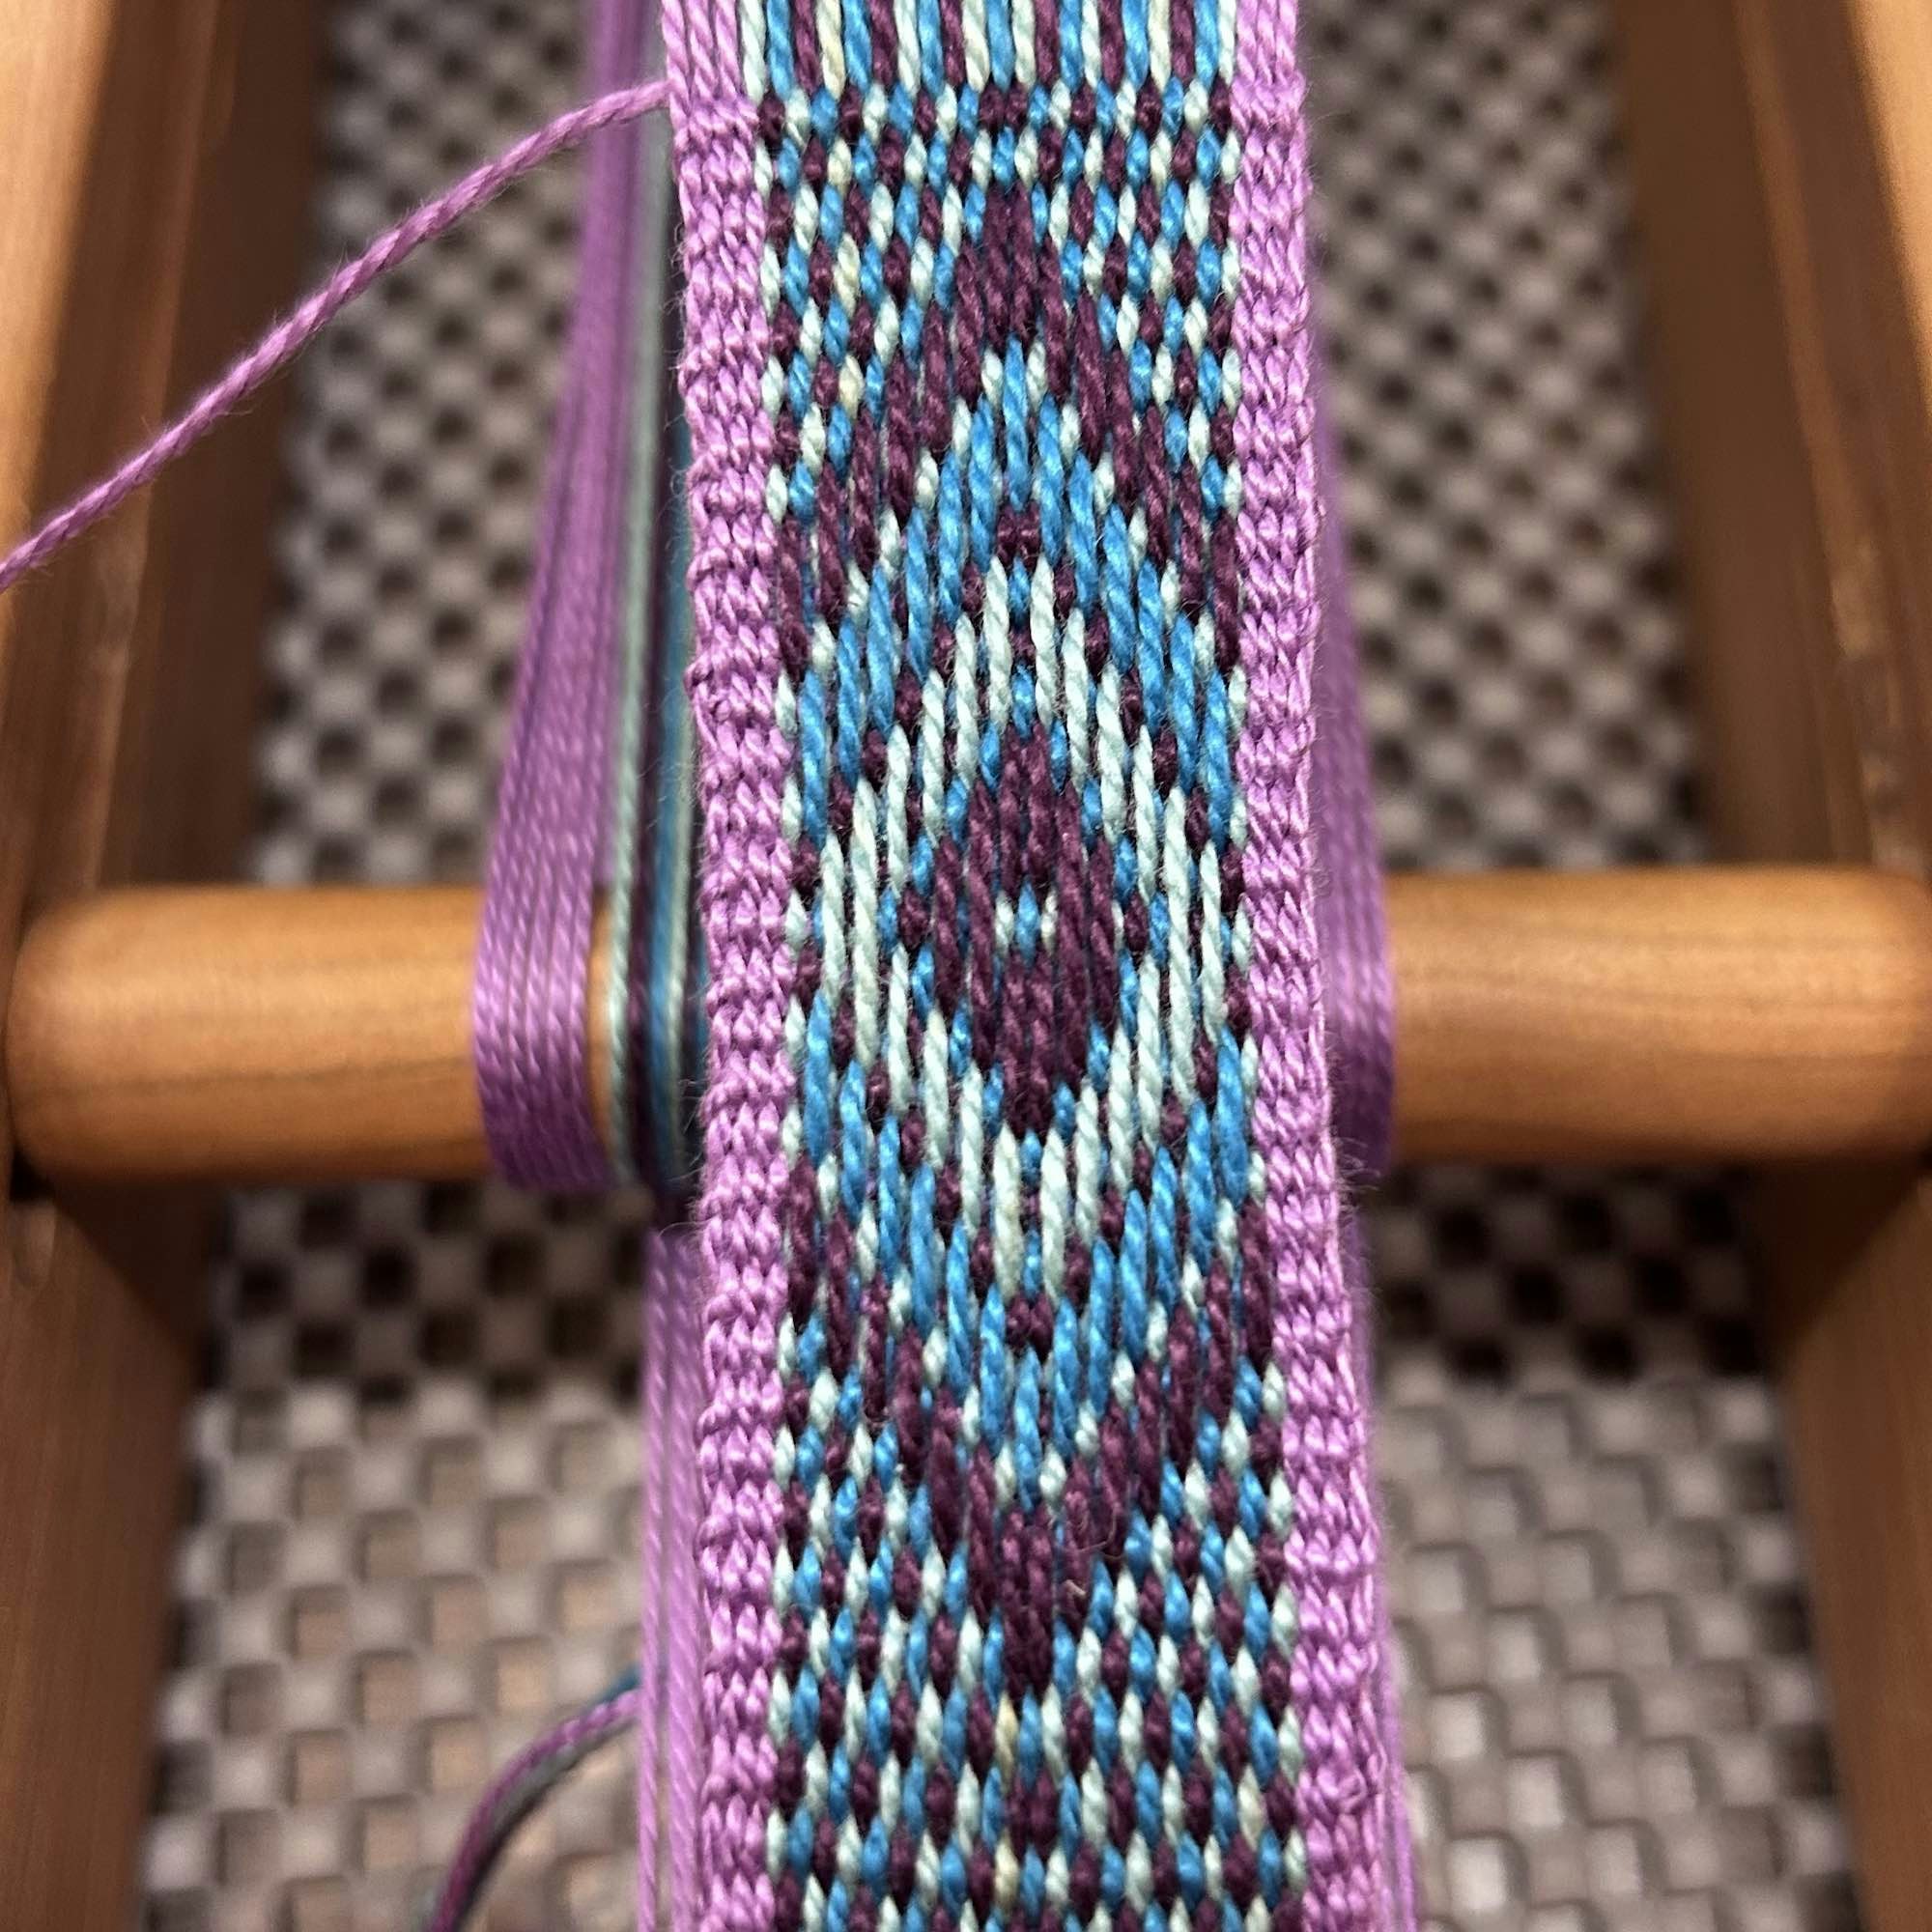
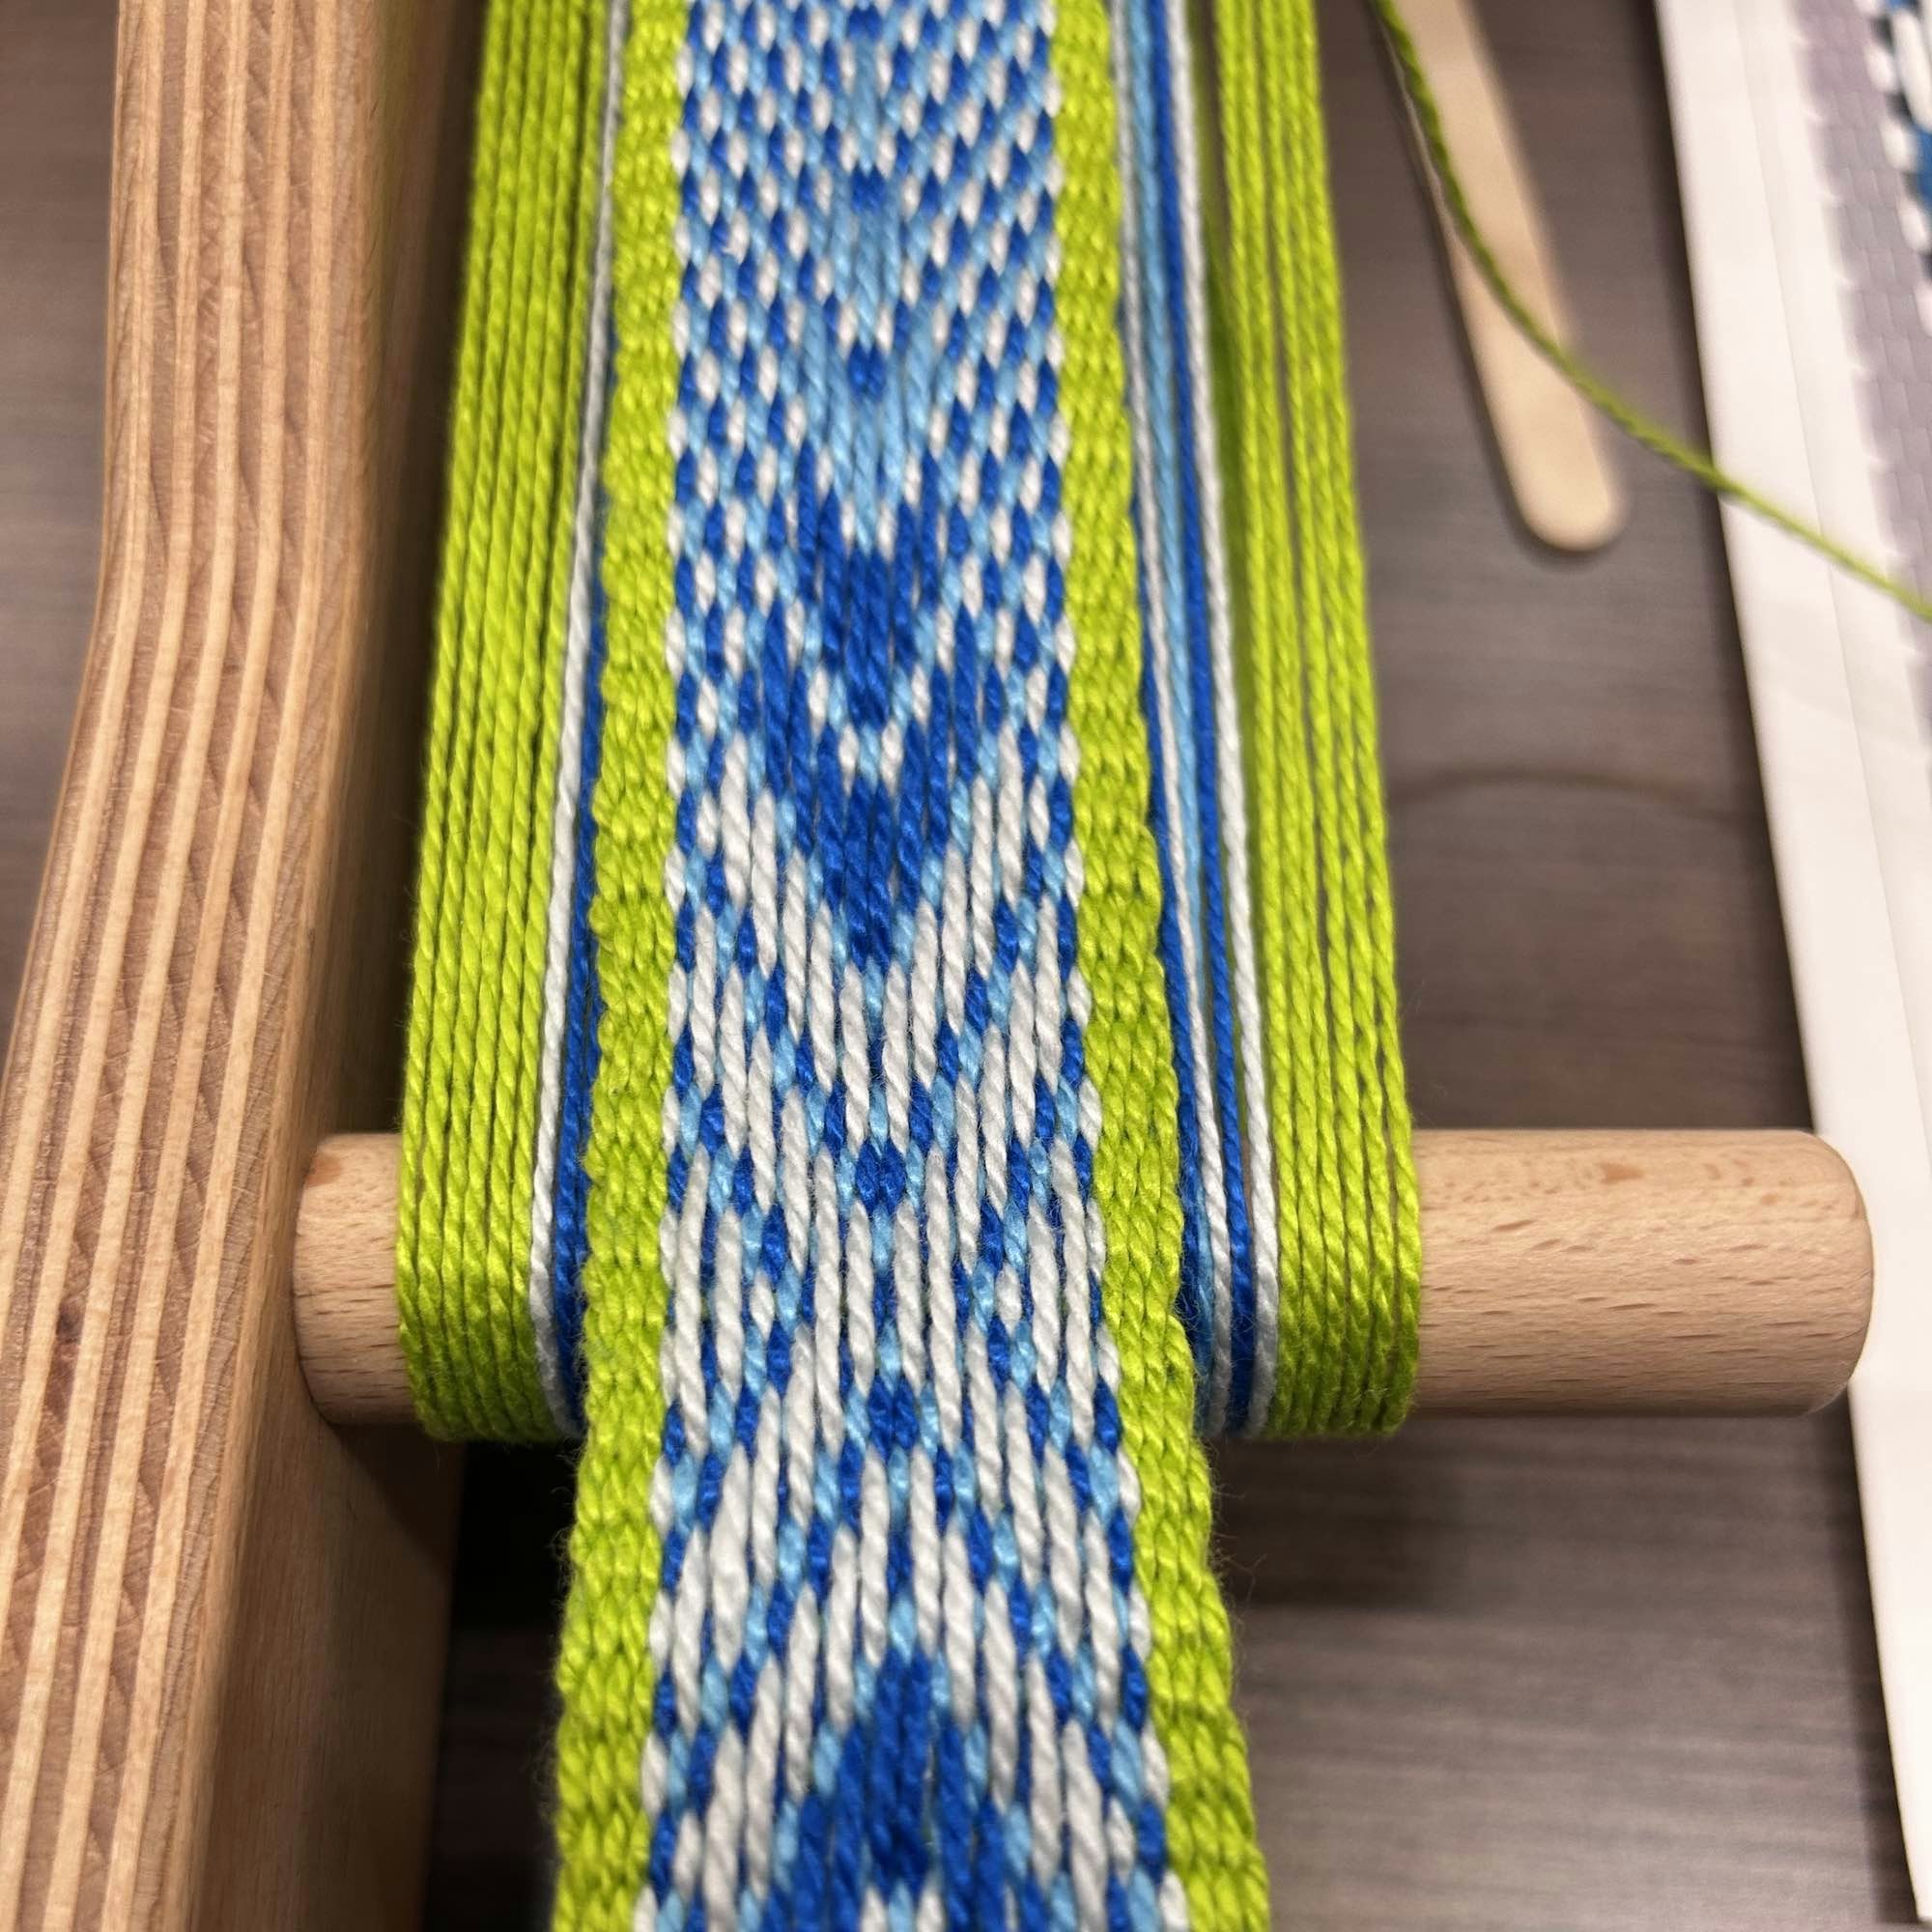
Borders can be any color or combination of colors you like—you do not need to use the same colors as in the pick-up portion of the band. When I took Annie MacHale’s class on three color pick-up, I chose a light purple border to offset the patterned portion of my band. The weaver next to me chose something similar, opting for a striking lime green that perfectly complemented the cool blues and silver of her pattern. While we both went with light colors, you can also use darker colors for your border—or even try for a gradient. The world is your oyster!
In both bands, the designers chose to use border colors not found in the rest of the pick-up pattern. Click on either photo in the gallery to get more information and a closer look. Photos by Christina Garton
Final Advice
My last bit of advice on borders is one of my favorite tips for designing in general: steal like an artist. What this means is look at what others have done for their borders and take the elements you like and try them out in your own weaving. You can even mix and match different designs and techniques.
If you’re new to bandweaving, I hope this article helps make designing borders a bit easier. If you’ve been weaving for a while but only using solid or simple striped borders, I hope you learned some new-to-you approaches you’d like to try. The only thing I can’t help with is narrowing down which options to choose.
Happy Weaving!
Christina