

Ready to go beyond plain weave on the pin loom, but not sure how to read and follow a weaving pattern? If you’ve never used one of these patterns, they can feel a bit intimidating. I am very happy to tell you that once you learn how to translate these patterns into your weaving, you’ll realize just how easy—and fun!—creating patterned cloth can be.
Reading a Weaving Pattern
Let’s go through everything you need to know to read weaving patterns with confidence, so you can weave lace, twill, and so much more!
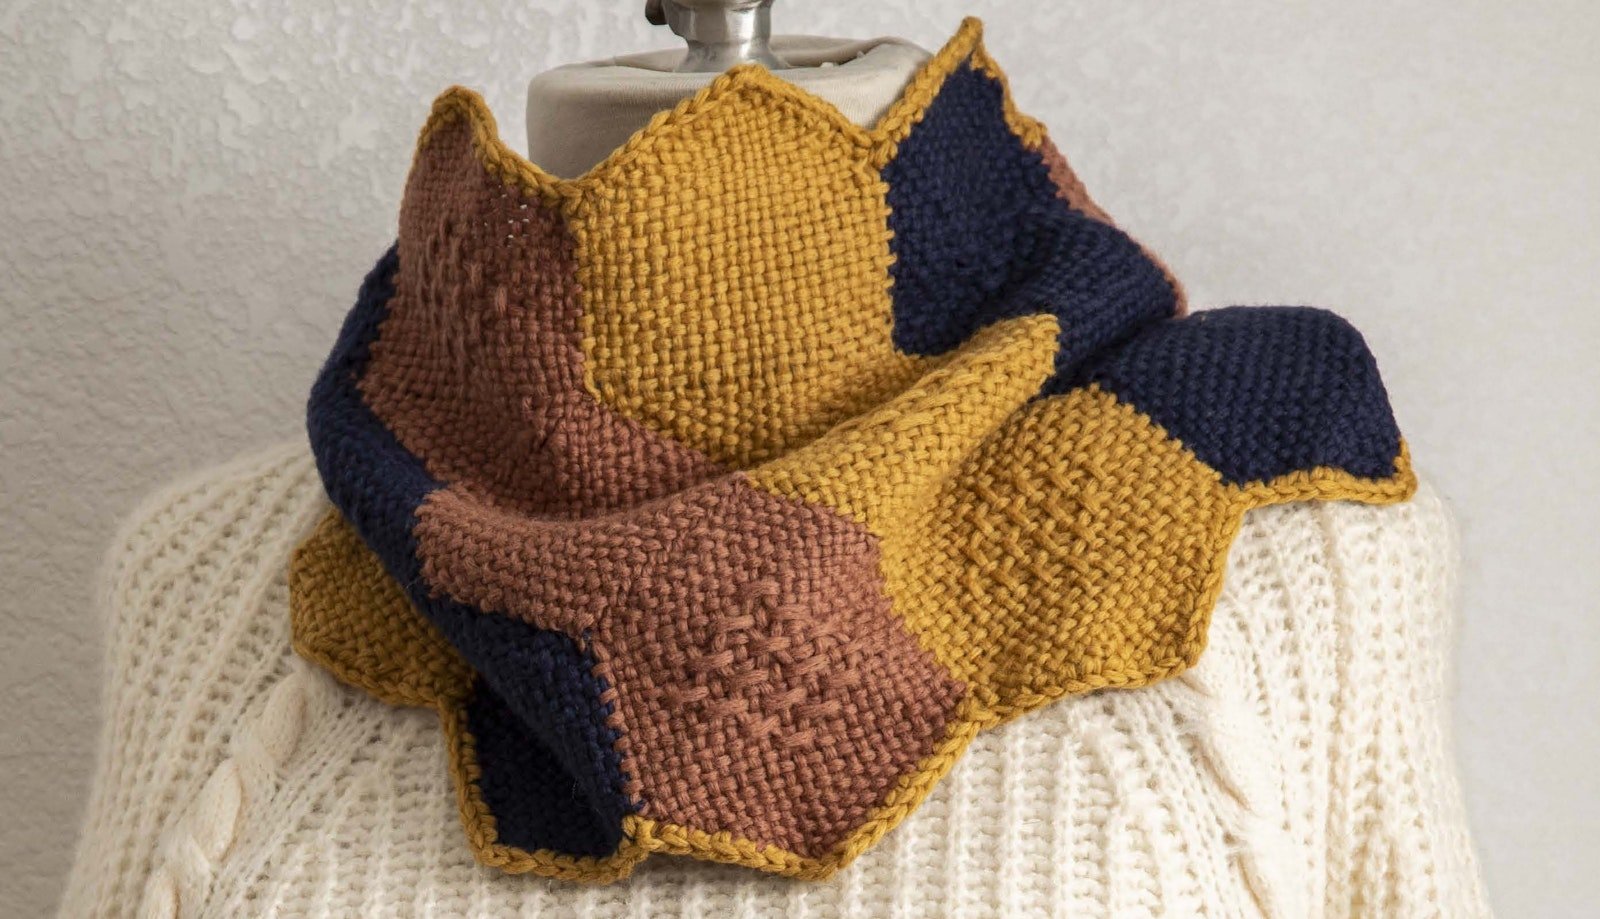
 Learning how to weave patterns on the pin loom will let you create interesting textured weaves, such as the ones shown here. Photo courtesy of Long Thread Media.
Abbreviations
All pin-loom weaving patterns in Little Looms use the same three one-letter abbreviations followed by a number. The abbreviation tells you what action you should take with your weft and the number tells you how many warp ends to do the action to:
- O stands for Over. When you see O, that tells you to take your weft over a specified number of warp ends.
- U is for Under. When you see U, you’ll take your weft under your warp for a specified number of ends.
- W stands for Plain Weave. When you see W, you’ll switch to plain weave for a specified number of picks. If the W occurs at the beginning of a step, you’ll weave as normal. If it occurs after you’ve woven over warp ends, you’ll begin plain weave by going under. Vice versa if you it occurs after going under warp ends.
If you’re weaving on a 3-pin-style loom, the loop at the start of the row doesn’t count as a warp end. You will always take your needle over the loop.
Let’s walk through an example: U2, O6, W5, O6, U2
Step 1. Start by taking your weft under two warp ends.
Step 2. Take your needle up through the warp between the second and third warp ends and go over 6 ends.
Step 3. Starting by going under, alternate weaving plain weave (under, over) for a total of five ends. You will finish your plain weave by going under the fifth end.
Step 4. Take your needle back up through the warp and weave over six ends.
Step 5. Finish the row by weaving under the last two ends.
Brackets
More often than not, you’ll see brackets used in pin-loom weaving patterns, including in the pattern shown below. Brackets are always followed by the total number of times you should weave the bracket. When you come across a bracket, weave everything within the bracket before repeating it. Once you’ve woven the bracket for the total number of times indicated, you can finish the rest of the row or round.
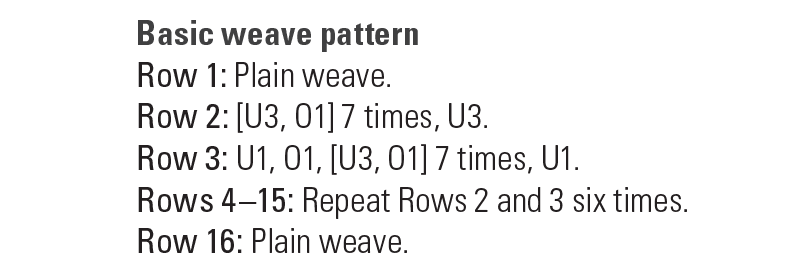
Let’s go step-by-step to see how to handle a bracket by walking through Row 2 of the pattern shown above.
Step 1. Weave everything in the bracket:
- Weave under 3 ends
- Weave over 1 end
Step 2. The step tells you the bracket needs to be woven seven times, so you’ll repeat weaving the bracket starting from the U3 six more times for a total of seven repeats. If we were to write this out without the brackets, it would be: U3, O1, U3, O1, U3, O1, U3, O1, U3, O1, U3, O1, U3, O1.
Step 3. Finish the row by weaving under 3 ends.
Continuous Strand Looms
If you’re using a continuous strand loom, there’s a little more nuance to reading weaving patterns. On a continuous strand loom you weave in rounds instead of rows for most if not all of the weaving process. Some shapes, including hexagons, are partially woven in rounds and then finished with needle-woven rows.
 On some shapes of continous strand looms, including the hexagon loom shown here, pieces are woven first using rounds and then are finished by needle weaving in rows of weft. Photo by George Boe
Weaving patterns written for continuous-strand looms can be written for rounds, rows, or both. The pattern will let you know at what point in the weaving process you should start following the steps. If a pattern involves both rounds and rows, each step will be labeled accordingly.
Because of this difference in weaving methods, it’s important to make sure your loom is the right style for the pattern you’re using—even if it's the same size and shape.
Next Steps
If you’re a visual learner and would like to see somebody walk you through the steps of weaving different patterns, Angela Tong’s video course Weave Patterns on the Pin Loom covers everything you need to know to read and weave four different patterns on a 4" square 3-pin-style loom.
Now that you know how to read a pin-loom weaving pattern, your next step is to try one out for yourself. You can find weaving patterns for different looms in the Little Looms library, in pattern books written for pin looms, and sometimes even on loom-manufacturer websites.
You can also read Hazel Spencer’s article “Beyond Plain Weave” from the Fall 2023 issue. Hazel goes into detail about weaving patterns on continuous-strand looms. (Do note that in her article, Hazel refers to rounds as rows.)
Once you’re confident in your ability to read and weave patterns, you can even try creating some of your own!
Happy Weaving,
Christina