Subscriber Exclusive
How to Use a Lucet
Learn step-by-step how to use a lucet to make braided cord using this simple tool.
Learn step-by-step how to use a lucet to make braided cord using this simple tool. <a href="https://littlelooms.com/how-to-use-a-lucet/">Continue reading.</a>
https://littlelooms.com/cdn-cgi/image/format=auto/https://www.datocms-assets.com/70931/1718222444-04-how-1.jpg?auto=format&w=900
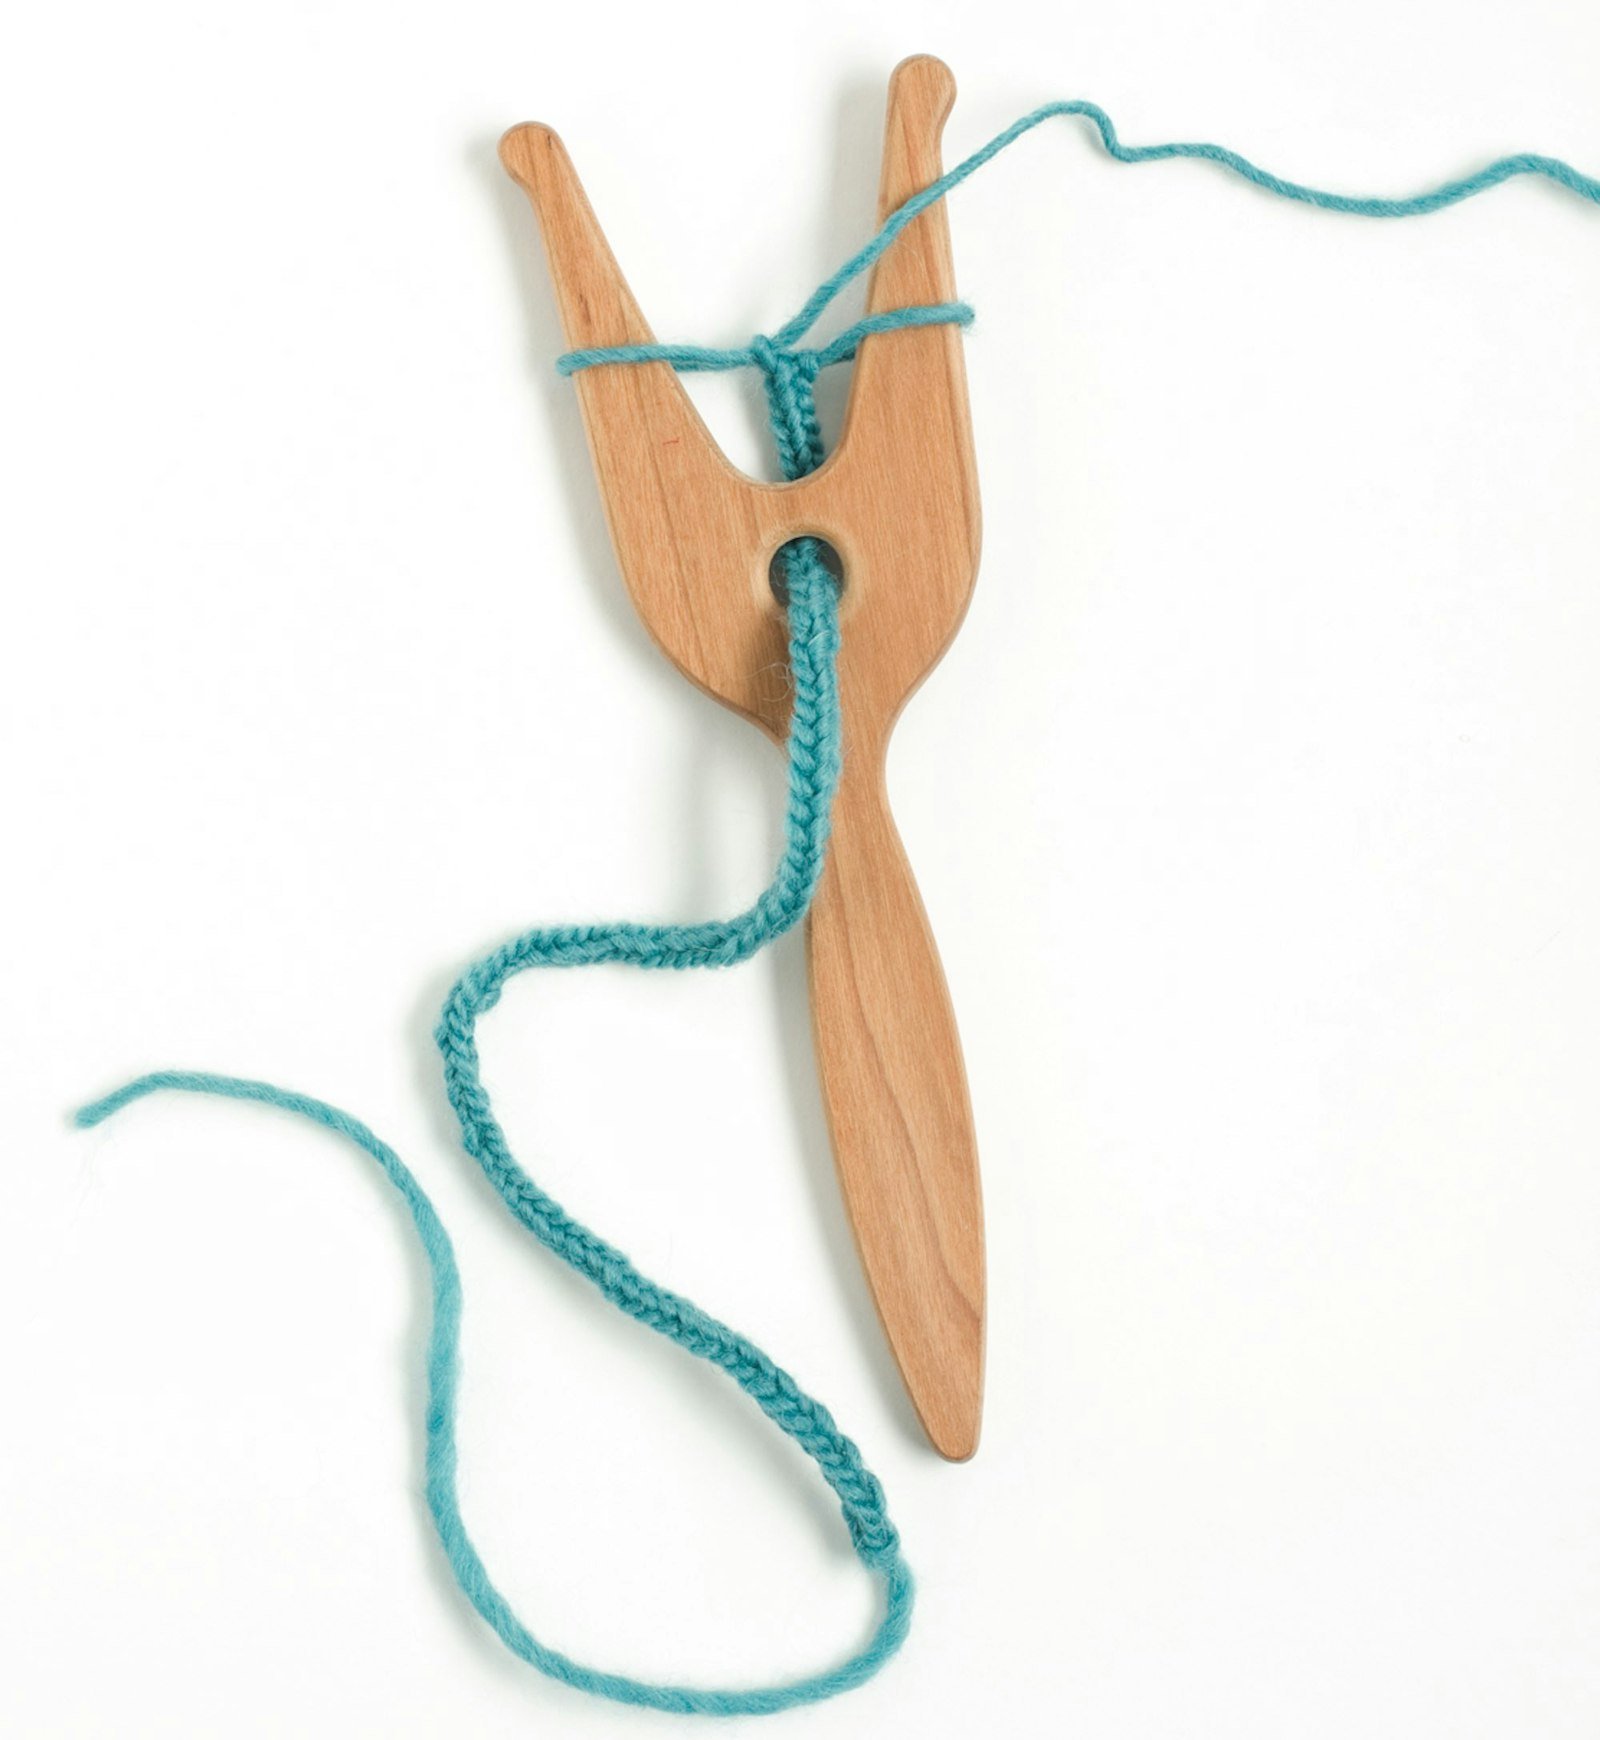
Lucets are simple tools that allow you to create a square-ish braided cord. They also have a long history, although how long is still up for debate. Photo by Ann Swanson
The lucet is an ancient fiber tool used to make braids. While it’s thought these tools originated in Scandinavia around the Viking age, they eventually spread to other parts of Europe. Countless lucets and possible lucets have been found in archaeological excavations and throughout history, these braids had many uses: trim, closures, laces, bag straps, and so much more. Lucets are simple tools and braiding with them is easy and fun. This subscriber exclusive excerpt of Catarina Ferreira’s article “How to Make a Lucet Braid” from the Summer 2024 issue details exactly what you need to know and do to use these fun and forklike tools. —Christina
MAKING A LUCET BRAID
Materials Needed
•Yarn of choice
•Lucet
•Patience
First, a disclaimer. Though this may seem very straightforward, I have seen variations of the lucet braiding process. The one described here is the one I was taught and the one that has worked comfortably for me over the years. I am right-handed; therefore, these instructions and images are shown for using a lucet with a right hand. However, you should be able to mirror the instructions for the left hand.
SUBSCRIBER EXCLUSIVE
Unlock the Full Article with a Little Looms Subscription
Get instant access to this article and the entire Little Looms library of weaving projects, techniques, and expert instruction. With your subscription, you’ll receive:
Step-by-step project guides
Skill-building tutorials and design inspiration
Access to premium weaving content, updated regularly
Little Looms Magazine
Easy Weaving with Little Looms offers education and inspiration for weavers on rigid-heddle, inkle, tapestry, pin looms and more.
Plans start at just $4.99/month. Cancel anytime.
The lucet is an ancient fiber tool used to make braids. While it’s thought these tools originated in Scandinavia around the Viking age, they eventually spread to other parts of Europe. Countless lucets and possible lucets have been found in archaeological excavations and throughout history, these braids had many uses: trim, closures, laces, bag straps, and so much more. Lucets are simple tools and braiding with them is easy and fun. This subscriber exclusive excerpt of Catarina Ferreira’s article “How to Make a Lucet Braid” from the Summer 2024 issue details exactly what you need to know and do to use these fun and forklike tools. —Christina
MAKING A LUCET BRAID
Materials Needed
•Yarn of choice
•Lucet
•Patience
First, a disclaimer. Though this may seem very straightforward, I have seen variations of the lucet braiding process. The one described here is the one I was taught and the one that has worked comfortably for me over the years. I am right-handed; therefore, these instructions and images are shown for using a lucet with a right hand. However, you should be able to mirror the instructions for the left hand.
[PAYWALL]
BRAIDING
 Photo by Catarina Ferreira
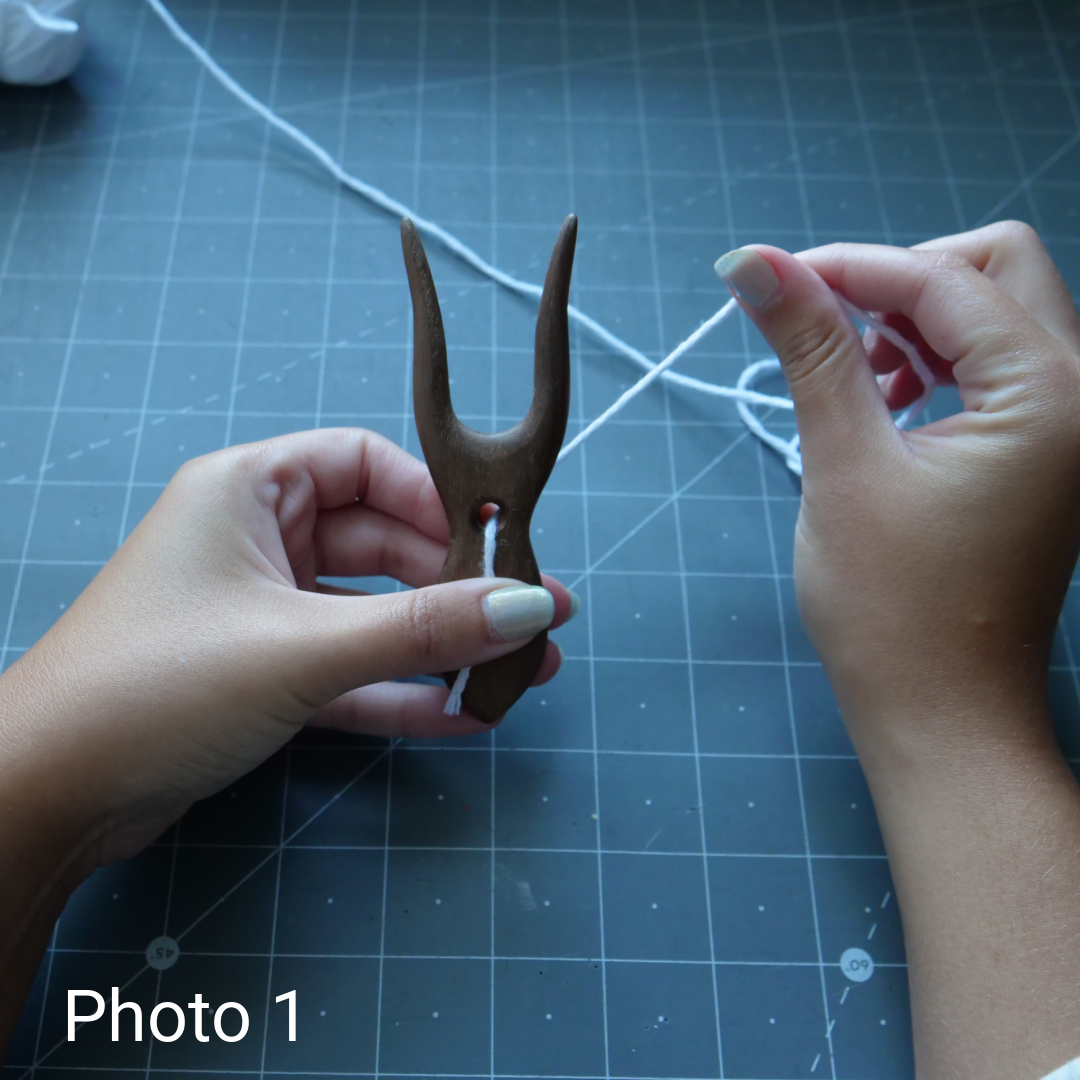
- Place your yarn through the middle hole of the lucet and hold it so that you can keep the yarn tail in place either at the back or the front of the lucet, as you prefer. Make sure to leave this tail a few inches long (Photo 1).
- Loop the yarn around the right-side tine of the fork, then through the middle of the tines (Photo 2), and around the left-side tine, counterclockwise (Photo 3), then around the right-side tine to lie over the loop formed on the right tine. There should be a Z-shape in the middle (see Photo 4).
- Lift the lower loop on the right tine over the top of the tine. You may need to let go of the yarn tail to give it a little slack (see Photo 5).
Photos by Catarina Ferreira. Get a closer look at each step by clicking any image in the gallery above to open it in full-screen mode.
- Rotate the lucet in your hand clockwise, keeping hold of the working yarn to keep the tension (Photos 6 and 7). Try to keep this tension as even as possible. An alternative can be to hold the working yarn on the same hand as the lucet, as if to crochet. I’ve found this makes my hand cramp after a while, but you might have better luck if you’re an experienced knitter or crocheter!
- That is it for the motion. You’ll just have to repeat looping the working yarn around the right tine and then lifting the lower loop over the top loop and the top of the right tine and rotating the lucet in your hand. The first few turns may look like nothing, but it comes together quite quickly (Photo 8).
- Once you have the desired length of braid, remove the loops from the tines and cut the working yarn with a few inches of tail. Gently work the loops until they’re small (Photo 9). Feed the tail through the opposite loop and pull slowly, then feed through the final loop and pull (Photo 10). Your braid should now be secured (Photo 11).
Photos by Catarina Ferreira. Get a closer look at each step by clicking any image in the gallery above to open it in full-screen mode.
A FEW FINAL TIPS
I typically keep my tension very tight. The tighter you pull the working yarn, the more defined and smaller the square shape of the braid. However, it’ll also make any changes in tension more obvious.
Once your braid is done, you can gently pull on either end, which helps smooth out any twists or tension problems. A word of warning: if the loops fall off the tines, it is very hard to reposition them properly. If you need to put the project down, I have found that putting a rubber band across the loops and the working yarn keeps everything in place.
Depending on your yarn and tension, it may be quite difficult to lift the loop over the right tine. Some archaeologists and makers have suggested that some sort of hook implement may have been used in the past to help with this motion. I’ve found fingernails can be helpful, and I’m looking forward to experimenting with hooks.
Please keep in mind that this is a looped braid, which means that if it is cut in the middle, it will ravel. If the working loops fall out and you pull on the working yarn, it will ravel. However, you can ravel a small length and then try to feed the tail back through the loops to salvage a cut braid.


 Photo by Catarina Ferreira