Subscriber Exclusive
Weaving Basic Shapes in Tapestry
The meet-and-separate technique is just one beginner-friendly way to weave shapes in tapestry. Learn the basics from Tommye McClure Scanlin.
The meet-and-separate technique is just one beginner-friendly way to weave shapes in tapestry. Learn the basics from Tommye McClure Scanlin. <a href="https://littlelooms.com/weaving-basic-shapes-in-tapestry/">Continue reading.</a>
https://littlelooms.com/cdn-cgi/image/format=auto/https://www.datocms-assets.com/70931/1676401497-scanlin-sum22-header.jpg?auto=format&w=900
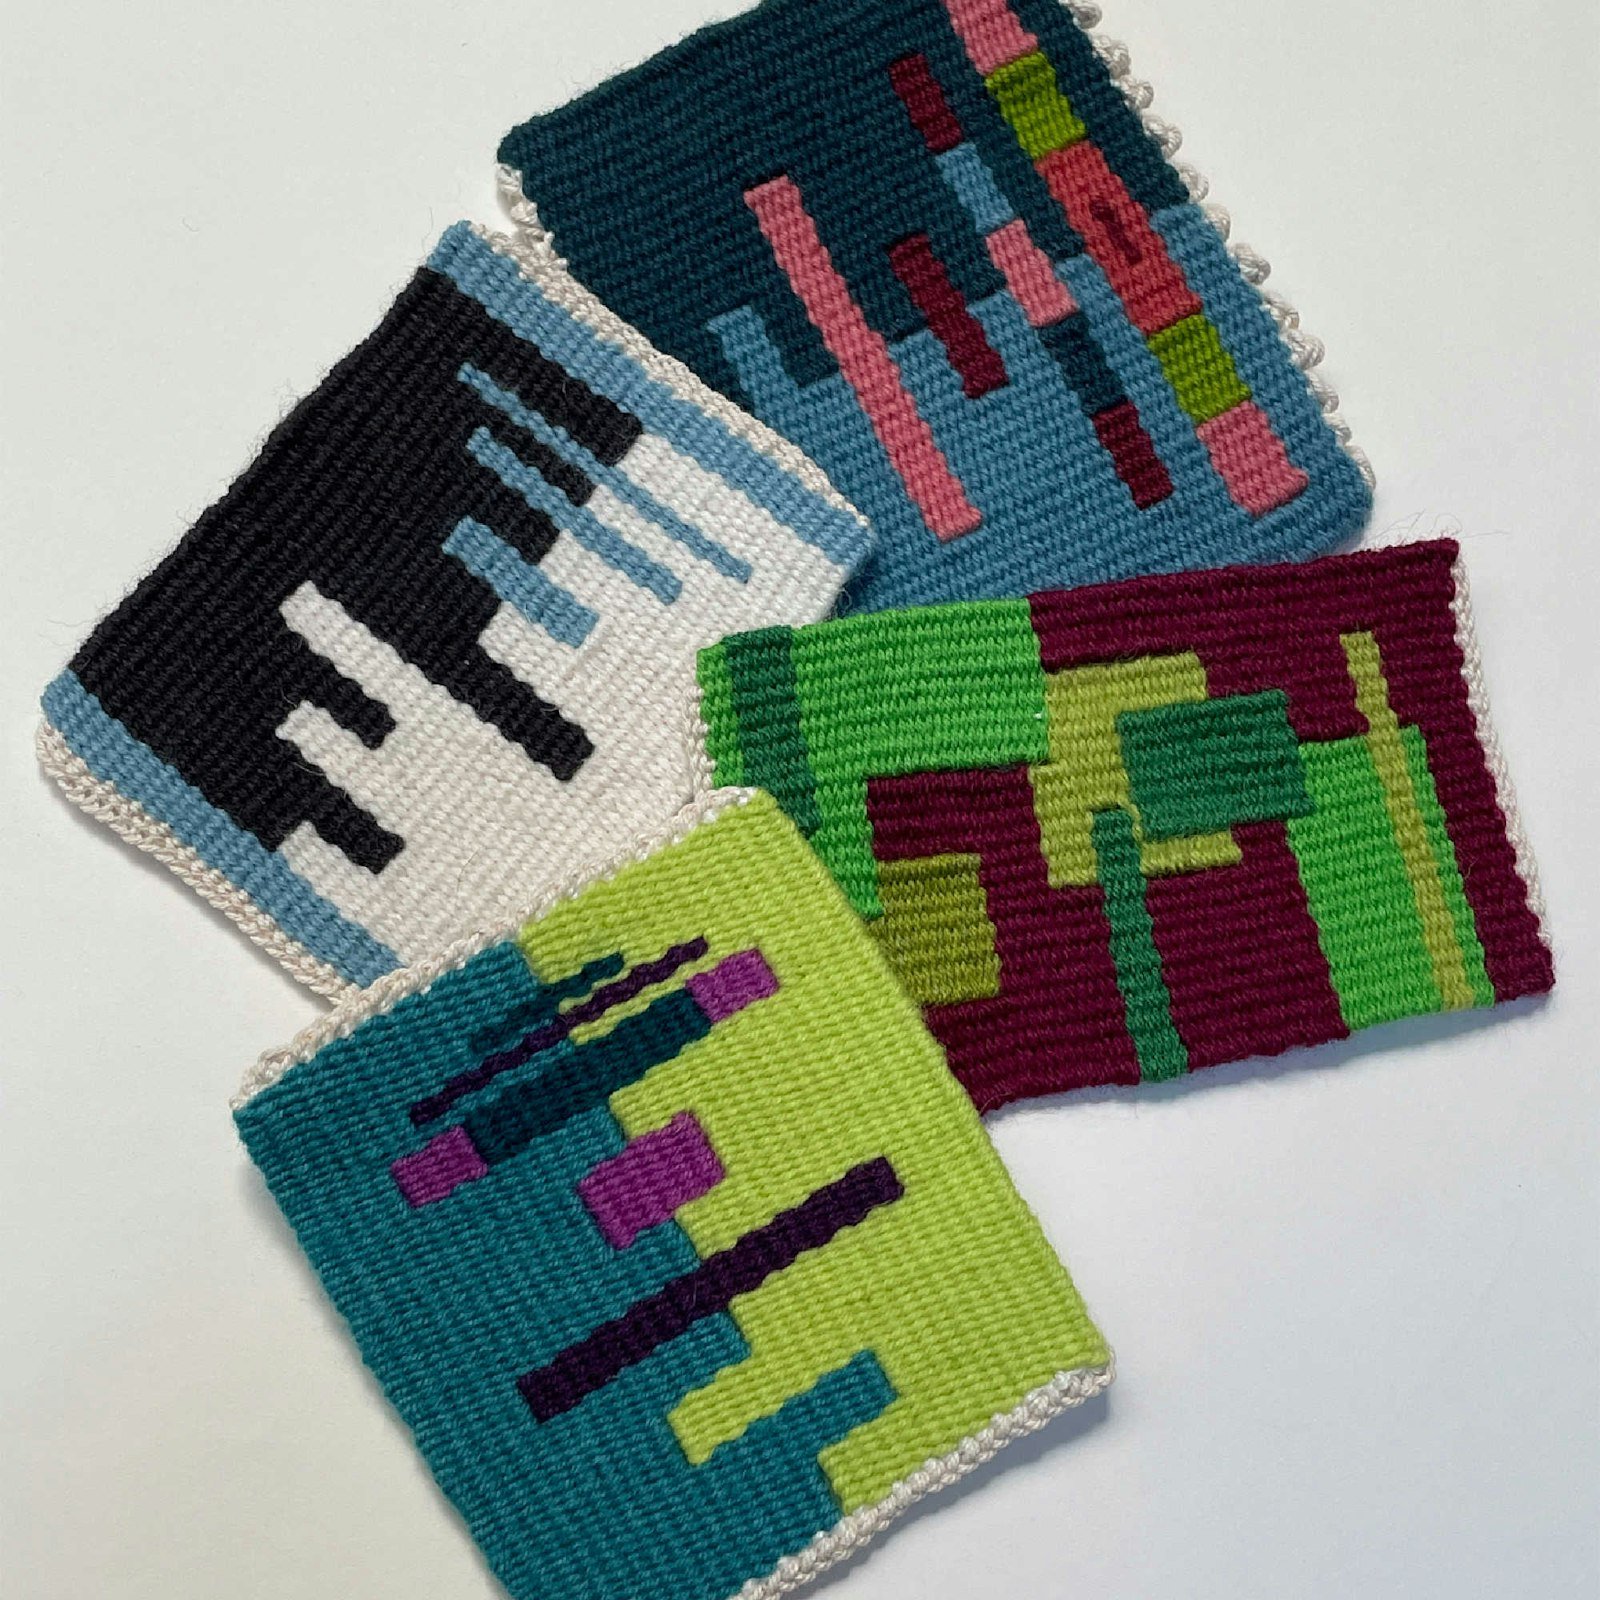
Featured in Easy Weaving with Little Loom's Summer 2022, Tommye McClure Scanlin's first installment of her Tapestry Talk series covers the meet-and-separate technique, an easy and fun way to weave shapes in tapestry. Current Easy Weaving with Little Looms subscribers can log in below to access this full article by Tommye, including step-by-step photos for meet and separate.
We usually think of handwoven tapestry as weft-faced plain weave and a fabric in which wefts don’t necessarily travel from selvedge to selvedge. In fact, there are often multiple wefts running in each row or pick of a tapestry.
Let’s look at the vocabulary that describes handwoven tapestry, starting with the structure. As mentioned, it’s usually plain weave with each row of weft woven in an over-one/under-one alternation of warp ends. Tapestry is also typically weft-faced, meaning the weft completely covers and hides the warp ends. As with other weaving, the weft insertion into a selected shed (the opening created when some warp ends are raised or lowered) is called a pick. When two picks are used in alternate sheds, the plain-weave structure is formed. These are the basic components that create the many results possible in handwoven tapestry. Although the fabric structure is simple, there are myriad ways in which multiple discontinuous wefts can be woven within it. I’ll describe one of those methods here: meet and separate. In this method, multiple wefts in the same shed don’t overlap one another.
SUBSCRIBER EXCLUSIVE
Featured in Easy Weaving with Little Loom's Summer 2022, Tommye McClure Scanlin's first installment of her Tapestry Talk series covers the meet-and-separate technique, an easy and fun way to weave shapes in tapestry. Current Easy Weaving with Little Looms subscribers can log in below to access this full article by Tommye, including step-by-step photos for meet and separate.
We usually think of handwoven tapestry as weft-faced plain weave and a fabric in which wefts don’t necessarily travel from selvedge to selvedge. In fact, there are often multiple wefts running in each row or pick of a tapestry.
Let’s look at the vocabulary that describes handwoven tapestry, starting with the structure. As mentioned, it’s usually plain weave with each row of weft woven in an over-one/under-one alternation of warp ends. Tapestry is also typically weft-faced, meaning the weft completely covers and hides the warp ends. As with other weaving, the weft insertion into a selected shed (the opening created when some warp ends are raised or lowered) is called a pick. When two picks are used in alternate sheds, the plain-weave structure is formed. These are the basic components that create the many results possible in handwoven tapestry. Although the fabric structure is simple, there are myriad ways in which multiple discontinuous wefts can be woven within it. I’ll describe one of those methods here: meet and separate. In this method, multiple wefts in the same shed don’t overlap one another.
[PAYWALL]
Meet and separate describes the action that happens across one row or pick when adjacent wefts are inserted into the shed in such a way that they move in opposite directions. Any two wefts can move toward each other in a shed and will meet at some point. After meeting, when the shed is changed, those two wefts turn and move away from each other to complete the plain-weave alternation. Notice that they are again moving in opposite directions, but in the second shed, they are separating from the point where they’ve turned between two warp ends.
 Left: Weft is placed across the shed in plain weave. Right: Weft is pulled up in a big loop between two warp ends.
As a result, even though two (or more) wefts may be in the same row at the same time, when set up in this way, they are still weaving the correct sequence for plain weave. To illustrate this, think about what the two wefts do as they turn away from each other in the second pick. First, visualize the weft as if it were a continuous weft pick from selvedge to selvedge: plain weave would be seen all the way across as shown in the left photo above, correct? Now, imagine the pick of weft in that row being pulled out between two warp ends in sort of a big loop (photo above at right). Then consider that loop being cut in half with each end inserted into the next plain-weave shed. In other words, the wefts (now in two parts) will turn away from each other to move along for the next pick. Each row of the fabric still has the plain-weave alternation, over-one/under-one; it’s just being done with two wefts rather than one (photo shown below left).
 Left: Waeft loop has been cut and the two strands are woven back into the next shed, turning at the adjacent warp ends. Right: At the turning point notice how each weft either covers or goes behind and adjacent warp. Terms describing this are "high" or "hill" when the weft covers the warp as it turns are "low" or "valley" when the weft goes behind the warp as it turns. These two positions are always what you'll see when the wefts are set up to move in opposite directions in the same shed for the meet-and-separate method.
Next, notice how each of the two weft strands have made the turnaround two adjacent warp ends as they move away from each other. If you’re using a loom with a shed-making device, you‘ll see that one end is up and the one beside it is down, and each weft will either cover or go behind adjacent ends. Even with a loom that requires opening the shed manually, you’ll see that one of the wefts goes over the warp end as it turns while the other one goes under the adjacent warp end it moves around, thereby keeping the over/under alternation of plain weave intact. Depending on the shed and where the turn is made, two adjacent wefts will always turn and either go over or under adjacent warp ends (photo shown above right).
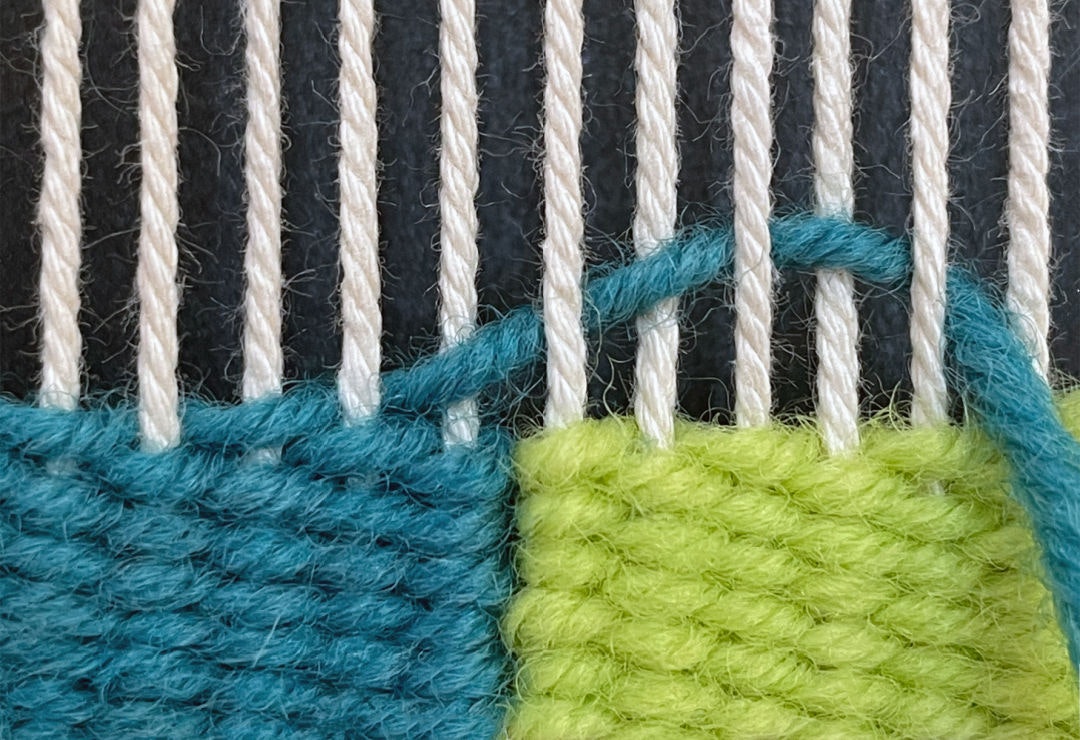
 The blue-green weft is able to weave over the last pick of hte yellow-green weft in the correct shed because both were set up to meet and separate.
The advantage of meet and separate is that by having wefts traveling in opposite directions in the same shed, you can take either weft into the area where the other one has been woven in the previous pick without overlapping the two in the same shed (above photo). Overlapping doubles the weft thickness, making it difficult to pack the weaving well in that area, which will cause the warp ends to show. With meet and separate, you can either weave the tapestry by inserting wefts across each row as needed and packing them into place to keep the tapestry moving up a level, or you can build shapes independently and then fill in beside them, confident you’ll be able to figure out the correct shed to use at any given point.
When there are just two wefts and you have set them up so that they meet and separate in the same shed, all is fine and dandy. They can weave side by side to make a slit or opening between them, or they can move over into the adjacent area when the two sides are level without having weft overlap in the same shed. But when you want to add another shape between those two wefts—suddenly there’s a problem! Why? Because although you can set up the new weft to travel in the same shed to be opposite one of the existing wefts, it will be moving in the same direction as the other existing weft in that same shed.
This is the quandary that is a constant throughout tapestry weaving when using meet and separate. You will always be making adjustments to correct the weft direction to keep all wefts traveling in opposite directions as new shapes are added and others drop out. Rather than being frustrated by this, there are a couple of ways to resolve the challenge.
 Left: In this instance, as a third shape is added it has two working ends so that both ends will meet and separate in the correct orientation with the two existing wefts. Do this by putting the weft into the shed so that both ends extend outward, eliminating a beginning tail. Right: Stagger the turns for the third shape so that as it meets and separates with itself it won't create a slit.
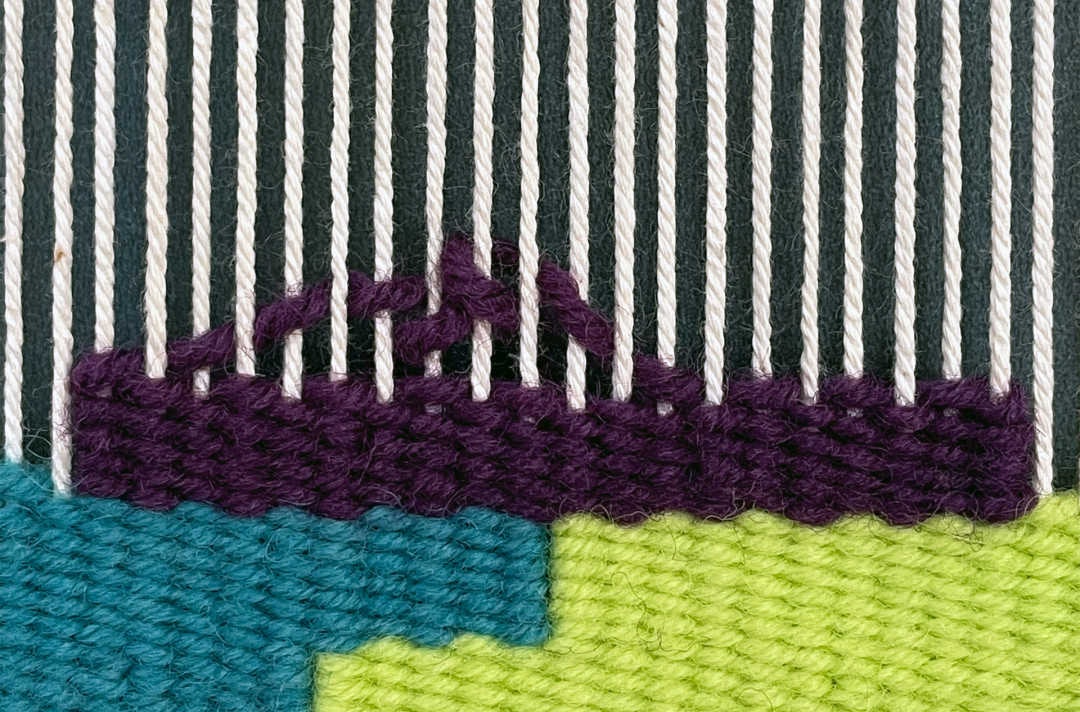
One solution when you add weft for a third shape is to give it two working ends. In this way, you’ll have resolved meet and separate with the existing wefts because the new weft, by having two ends that are going in opposite directions, will be in the opposite path of the existing wefts. To do this, put the weft into the sheds o that both ends are able to weave back and forth to meet and separate with each other (photo above left). Weave them back and forth in an irregular way to avoid making a slit between them; if you make the turns carefully, you won’t notice any difference of surface for the new shape (photo above right). This solution works quite well if the new shape is wider than just a few warp ends across because you’ll need enough space in which to make the irregular turns for the weft. When ending this shape, be sure to return the two weft ends toward each other and fasten them off side by side rather than ending them at each edge of the shape. This will keep the two original wefts in the correct orientation of opposition so they may continue interacting above the added shape (photo below).
 Complete the third shape by fastening off the two ends somewhere near the center of the shape. This will allow the two original wefts to weave across the top of the shape in the correct order with each other.
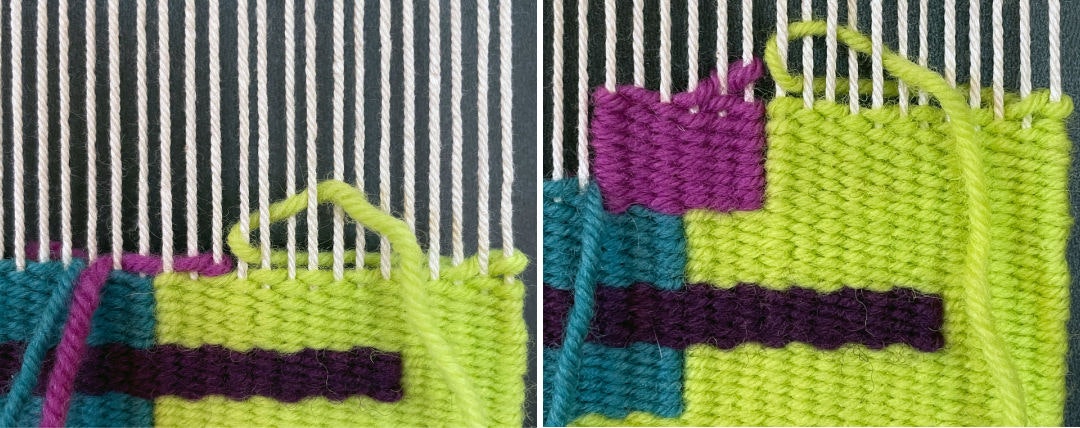
Another way to resolve the issue is to change the direction for one of the existing wefts. You can do that by snipping the weft off and securing the end, then restarting it at the opposite edge of the shape. This will allow one of the two original wefts to move opposite the newly inserted weft. Also, rather than snipping and restarting the weft, you could attach it and allow the weft to float across the back to the point where it will be reattached and reinserted, so it will be heading in the opposite direction (photos below). This float-across method works very well for a short distance of not more than a couple of inches. For a wider area, it’s best to clip off and reinsert. When ending the new shape, you can fasten off the weft at either side, but remember that one of the two original wefts will again have to change direction to be able to meet and separate correctly once more (photo below right).
 Left: Another way to add the new color is to meet and separate correctly with one of the original colors. Change the direction of the original color by either clipping off and reentering from the opposite side of its area or, as shown here, by fastening it off and floating it across the back to reattach and enter next to the start of the third shape. Right: End the third color shape on the same side it began, then adjust the second color so that it will again meet and separate with its original partner.
Keep in mind that if you use many shapes within your design, you’ll never be able to be in the “correct” shed for an entire tapestry design without making adjustments of direction. Rather than becoming frustrated by this fact, try each of these ways to fix the shed. You’ll soon find that it will give you almost total freedom to create the images you want in tapestry weaving!


 Left: Weft is placed across the shed in plain weave. Right: Weft is pulled up in a big loop between two warp ends.
  Left: Waeft loop has been cut and the two strands are woven back into the next shed, turning at the adjacent warp ends. Right: At the turning point notice how each weft either covers or goes behind and adjacent warp. Terms describing this are "high" or "hill" when the weft covers the warp as it turns are "low" or "valley" when the weft goes behind the warp as it turns. These two positions are always what you'll see when the wefts are set up to move in opposite directions in the same shed for the meet-and-separate method.
 The blue-green weft is able to weave over the last pick of hte yellow-green weft in the correct shed because both were set up to meet and separate.
 Left: In this instance, as a third shape is added it has two working ends so that both ends will meet and separate in the correct orientation with the two existing wefts. Do this by putting the weft into the shed so that both ends extend outward, eliminating a beginning tail. Right: Stagger the turns for the third shape so that as it meets and separates with itself it won't create a slit.
 Complete the third shape by fastening off the two ends somewhere near the center of the shape. This will allow the two original wefts to weave across the top of the shape in the correct order with each other.
 Left: Another way to add the new color is to meet and separate correctly with one of the original colors. Change the direction of the original color by either clipping off and reentering from the opposite side of its area or, as shown here, by fastening it off and floating it across the back to reattach and enter next to the start of the third shape. Right: End the third color shape on the same side it began, then adjust the second color so that it will again meet and separate with its original partner.