As a young child, I spent hours with a small plastic potholder loom, carefully weaving brightly colored loops, fastening the sides with a tiny plastic crochet hook, and then unweaving so I could weave again. While the potholders were nonfunctional, thanks to the nylon loopers used in kits at the time, what I ended up gaining was the spark that eventually became a fiery passion for weaving. Recently I revisited potholder weaving, this time with a solid metal loom and functional cotton loopers, and found even more to love.
After lurking on a few potholder loom groups online and reading the fabulous In the Loop: Radical Potholder Patterns & Techniques, I purchased a loom kit and an extra bag of multicolored loopers. The loom came in the mail right before I had to supervise a photoshoot—perfect timing!
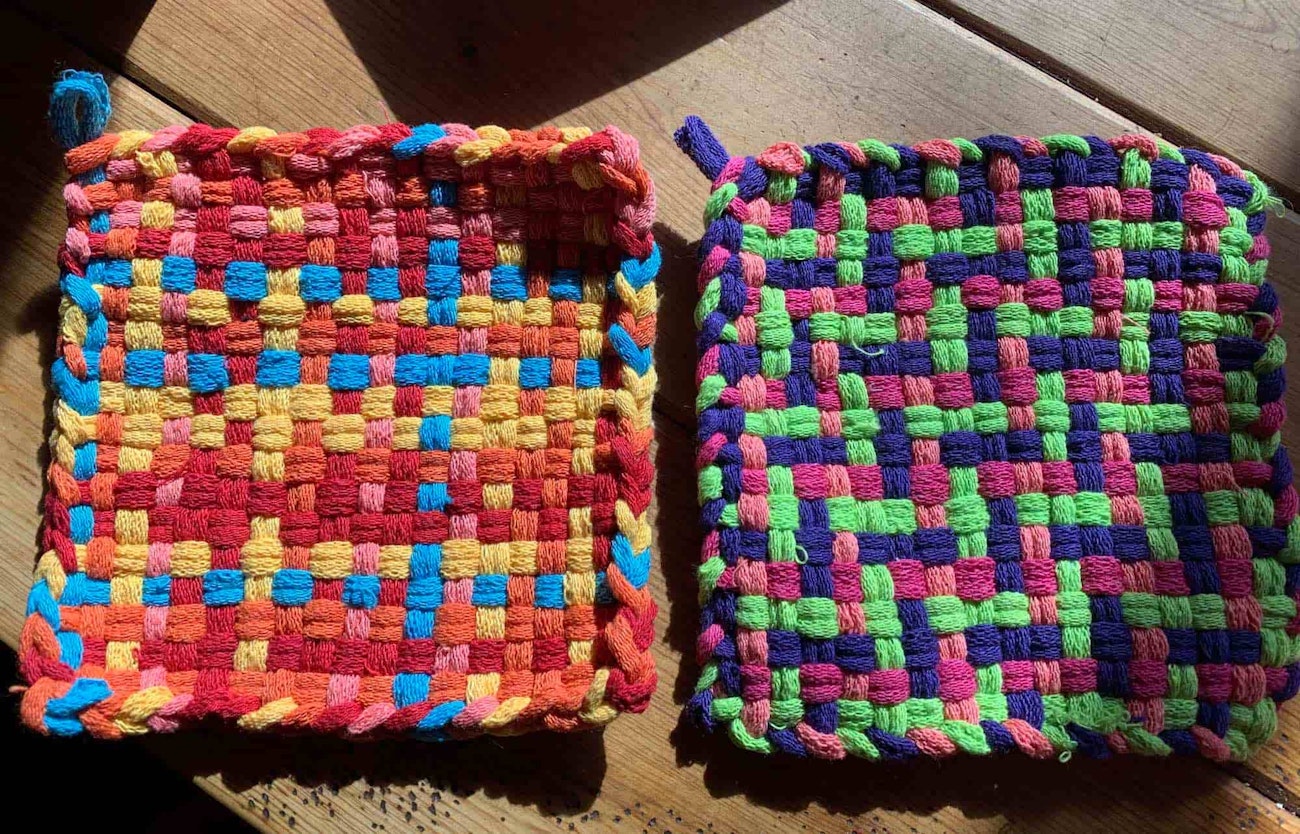
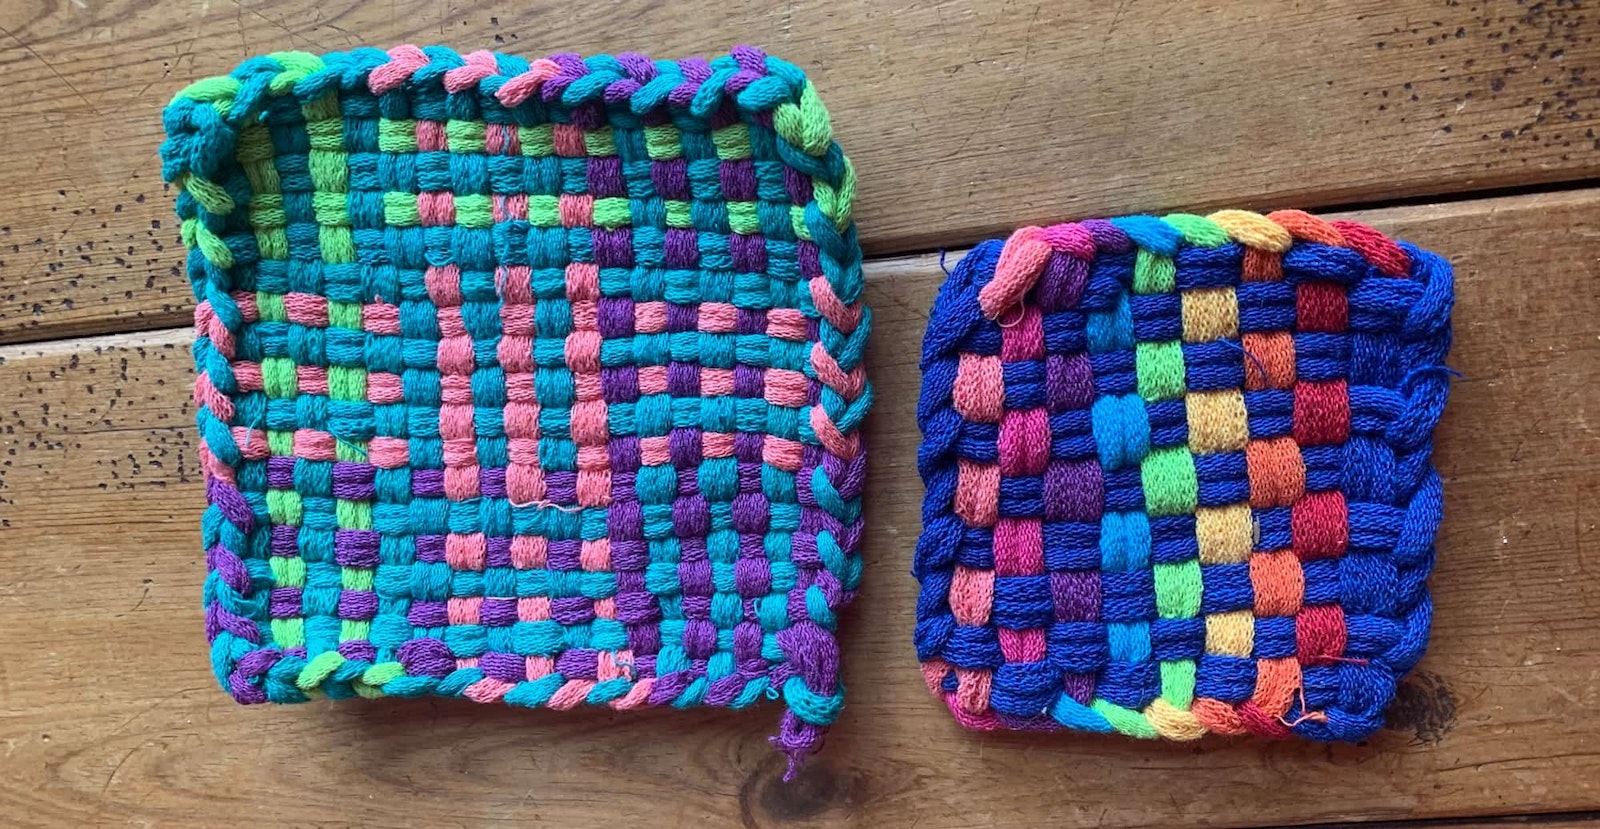
Christina wove the mug rug on the right following a color-and-weave pattern and the one on the left by randomly picking and placing loopers.
As soon as the metal loom and bright-colored loopers were in front of me, it all came back. I happily plotted out color-and-weave patterns and played with mostly random designs. I wove and unwove until the designs were just right. After finishing four potholders, I had just 20 loopers leftover—not quite enough to weave a fifth potholder. I remembered seeing on the online group that it was possible to weave a mug rug using a potholder loom, so I decided to give that a try and found it was easy and fun!
Interested in weaving your own mug rugs using a potholder loom? It's as easy as 1-2-3!
Three Steps to Weave a Mug Rug
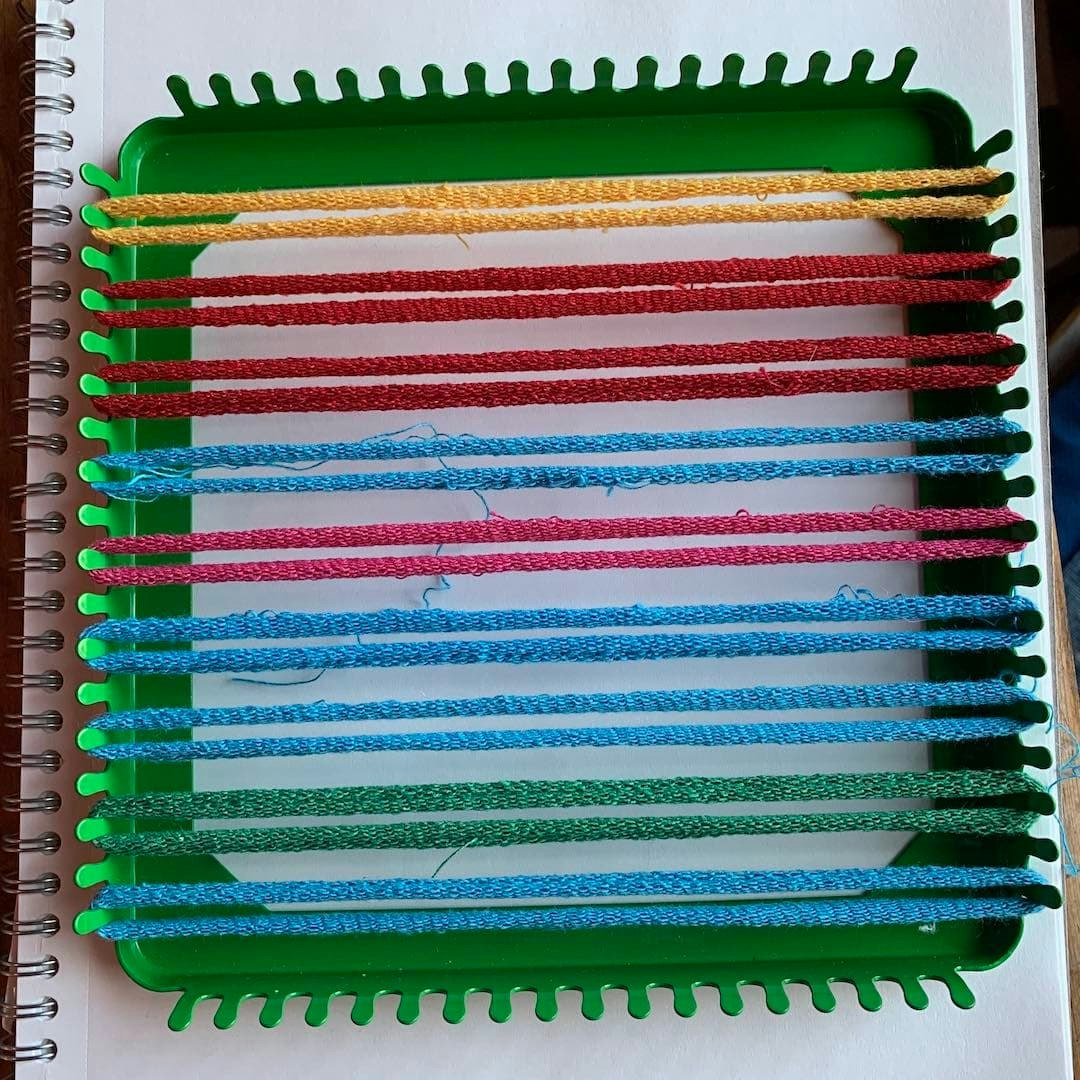
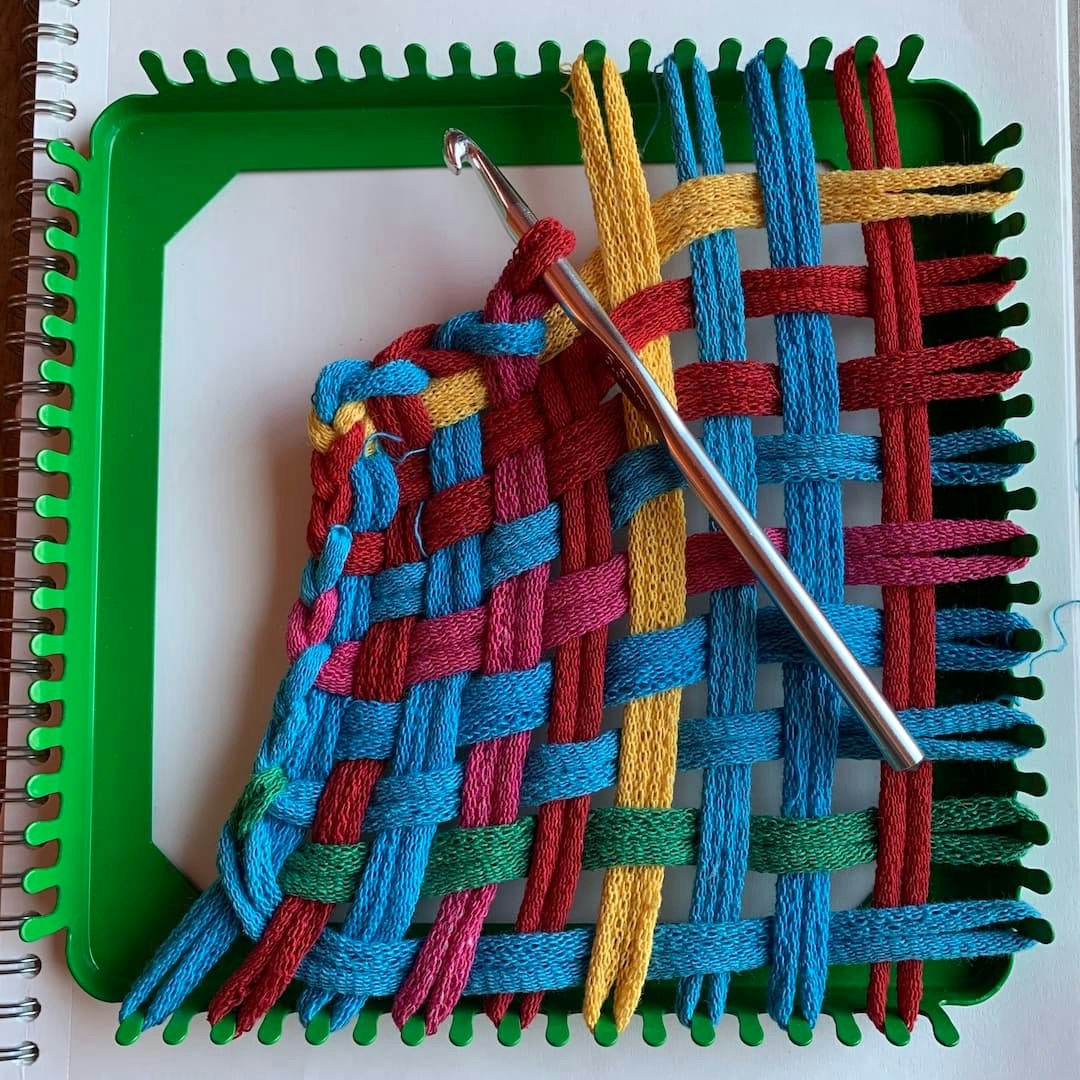
To start the mug rug, warp loops are placed on every other tooth.
Step 1. Warp the loom. I warped the loom dutifully skipping every other tooth. (I did not take photos of the process when I wove the actual mug rugs so these photos show the loom with a random assortment of leftover loops.)
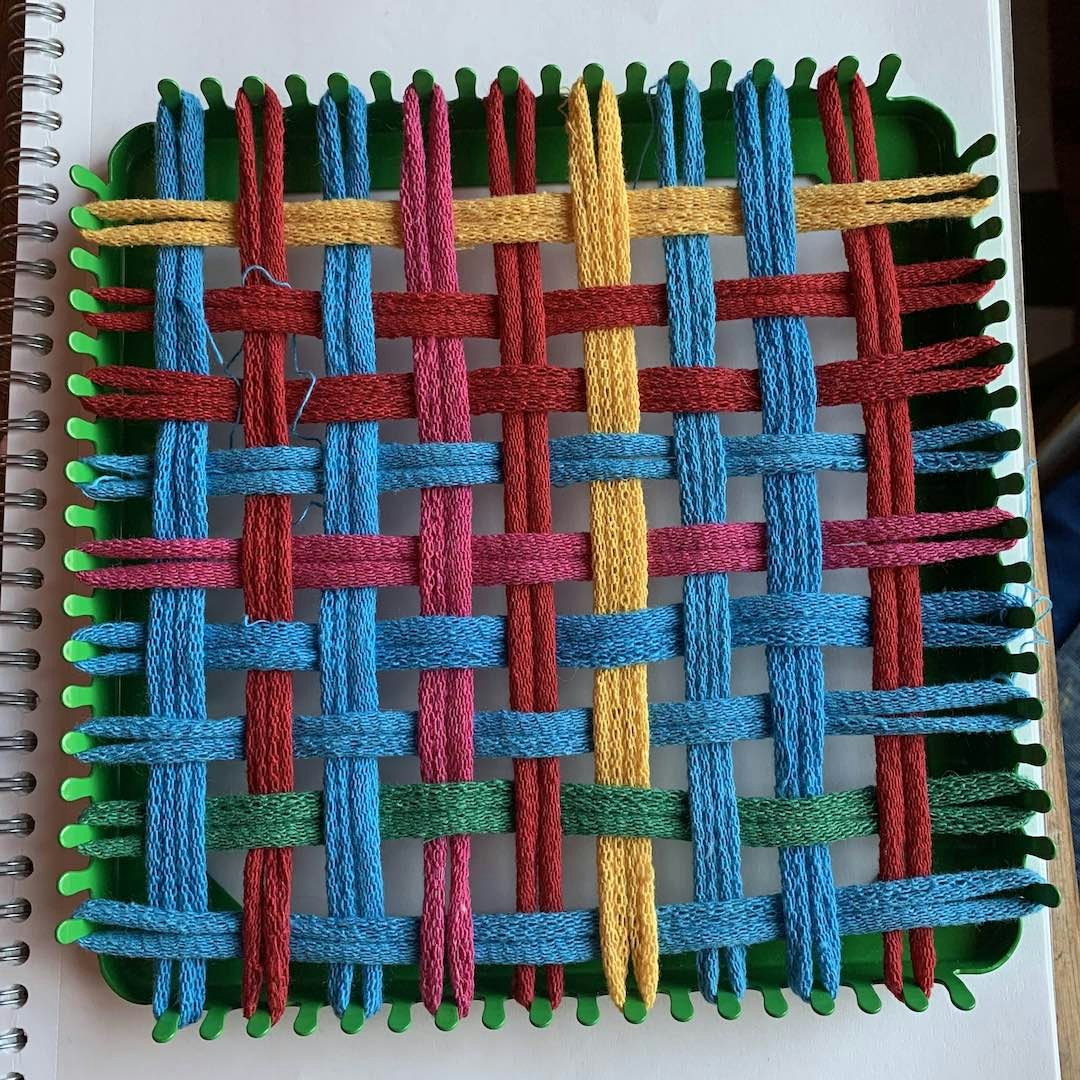
The weft of the mug rug is spaced similarly to the warp.
Step 2. Place the weft. I finger wove the weft, once again skipping every other tooth. On the loom, the fabric looks disconcertingly loose, I know, but you’ve got to trust the process.
Though this mug rug is only partially finished, you can see how much the fabric draws in during the finishing process.
Step 3. finish the sides I finished the sides using a crochet hook by putting a corner loop onto the hook and then pulling the next loop through the first loop. I repeated this process with the loop on my hook and the next loop on the loom and continued until all the loops were finished. You can see a mug rug partially finished above. Instead of leaving the final loop in the corner as I would for a potholder, I wove it back into the fabric. As you can see from the finished mug rug at top, the draw-in was enough to fill all the empty space between warp and weft.
Voilà! Just three simple steps to create a fun mug rug. They’re just the right size, and the thick cotton easily absorbs stray drips and drops. If you've got the dreaded nylon loopers lying around, you can use them to make mug rugs instead of throwing them away. Now that I know how easy it is, I’m planning to buy more loops to match my favorite mugs—and to weave a few more potholders as well.
Happy Weaving!
Christina
Originally published 3/14/2023; updated 1/8/2026