Subscriber Exclusive
How to Make Weaving Tablets
Learn how easy it is to make your own weaving tablets using old playing cards.
Learn how easy it is to make your own weaving tablets using old playing cards. <a href="https://littlelooms.com/how-to-make-weaving-tablets/">Continue reading.</a>
https://littlelooms.com/cdn-cgi/image/format=auto/https://www.datocms-assets.com/70931/1764702112-tablet-header-2-with-supplies.jpg?auto=format&w=900
Contents

I love tablet weaving, and over the past couple of years I’ve built up a collection of weaving tablets from a variety of makers. While I love all these tablets, I recently decided I needed to learn how to make my own tablets. Tablets are easy to purchase online and, if you’re lucky, at local weaving-supply shops—so why would you want to learn to make your own?
- If you want to start a project and don’t have enough tablets—or you’re completely new to tablet weaving—you won’t have to wait for an online order to ship. If you make your own tablets, you can get started weaving right away.
- Forgot your tablets at home while on vacation? You can find the simple tools needed to make tablets at many stores, so it’s easy to make a set even when you’re away from home.
- With handmade tablets, you can customize their size and how they’re labeled.
- Want to teach somebody to tablet weave, but don’t want to risk losing any of your precious tablets? Make them a set—or teach them how to make their own!
- It’s a great way to upcycle old playing cards that might otherwise get thrown away.
- Sometimes during tablet warping and weaving, tablets get damaged. With homemade, upcycled tablets, it won’t hurt as much if one gets bent or ripped.
I’ve also found I enjoy the process of making the tablets—plus there’s just something really lovely about using a tool you’ve made yourself. I’m sure I’m not alone, so I’ve written out my tried-and-tested step-by-step method of making tablets in this subscriber-exclusive tutorial. (Not a subscriber yet? Check out the different tiers and benefits here.) Let's get started!
Supplies
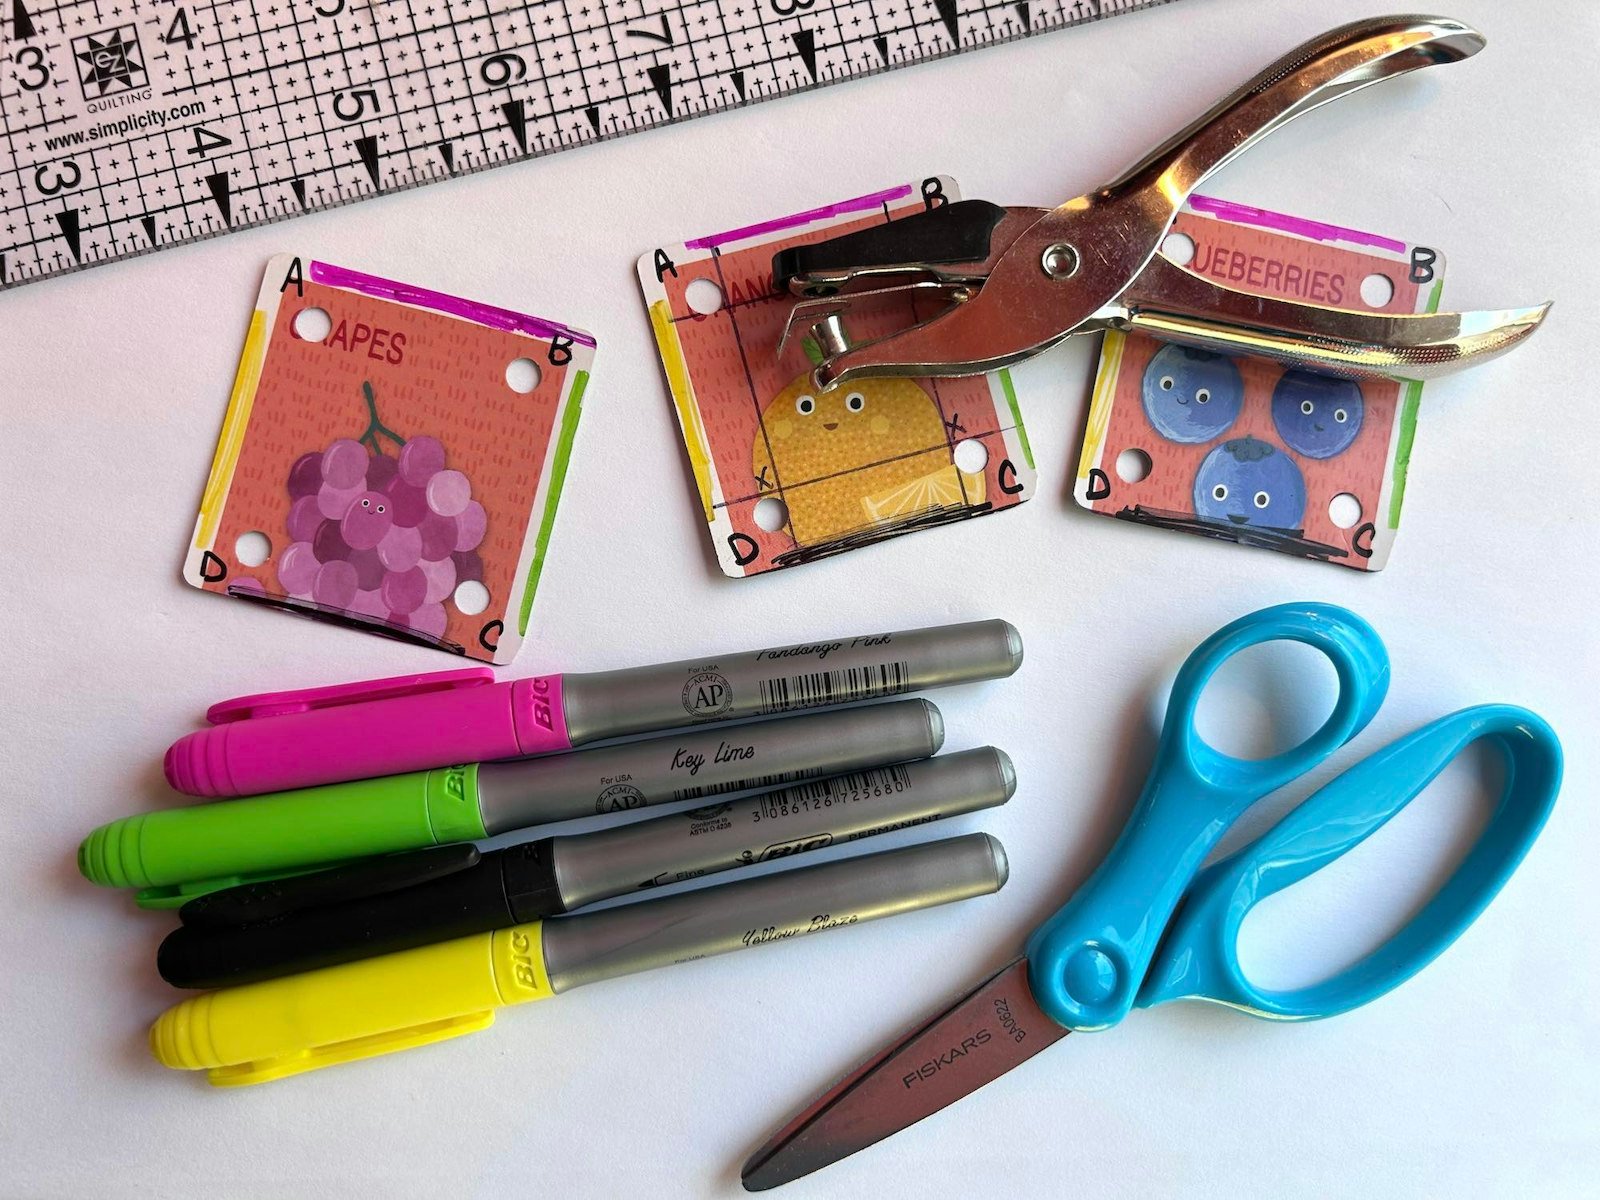
Making your own weaving tablets (sometimes called weaving cards) is extremely simple. First, gather your supplies:
- 1 pack of sturdy cards
- At least 1 permanent marker (standard fine tip and ultrafine both work)
- Hole punch tool
- Straightedge ruler
- Scissors
Other optional “nice to have” supplies include a corner-rounder punch tool (you can find these in the scrapbooking section of many craft stores), 3–4 permanent markers in different colors, 3–4 rolls of washi tape in different colors/designs, and paint markers or white out.
SUBSCRIBER EXCLUSIVE
I love tablet weaving, and over the past couple of years I’ve built up a collection of weaving tablets from a variety of makers. While I love all these tablets, I recently decided I needed to learn how to make my own tablets. Tablets are easy to purchase online and, if you’re lucky, at local weaving-supply shops—so why would you want to learn to make your own?
- If you want to start a project and don’t have enough tablets—or you’re completely new to tablet weaving—you won’t have to wait for an online order to ship. If you make your own tablets, you can get started weaving right away.
- Forgot your tablets at home while on vacation? You can find the simple tools needed to make tablets at many stores, so it’s easy to make a set even when you’re away from home.
- With handmade tablets, you can customize their size and how they’re labeled.
- Want to teach somebody to tablet weave, but don’t want to risk losing any of your precious tablets? Make them a set—or teach them how to make their own!
- It’s a great way to upcycle old playing cards that might otherwise get thrown away.
- Sometimes during tablet warping and weaving, tablets get damaged. With homemade, upcycled tablets, it won’t hurt as much if one gets bent or ripped.
I’ve also found I enjoy the process of making the tablets—plus there’s just something really lovely about using a tool you’ve made yourself. I’m sure I’m not alone, so I’ve written out my tried-and-tested step-by-step method of making tablets in this subscriber-exclusive tutorial. (Not a subscriber yet? Check out the different tiers and benefits here.) Let's get started!
Supplies
Making your own weaving tablets (sometimes called weaving cards) is extremely simple. First, gather your supplies:
- 1 pack of sturdy cards
- At least 1 permanent marker (standard fine tip and ultrafine both work)
- Hole punch tool
- Straightedge ruler
- Scissors
Other optional “nice to have” supplies include a corner-rounder punch tool (you can find these in the scrapbooking section of many craft stores), 3–4 permanent markers in different colors, 3–4 rolls of washi tape in different colors/designs, and paint markers or white out.
[PAYWALL]
Making Tablets from Playing Cards
While cleaning out our board-game storage, I found a plethora of playing cards my kids never use. You can also often find packs of cards at the thrift store as well as other discount stores. If you can’t find any locally, ask a friend with small children. Chances are they have a multitude of memory games and Old Maid sets that are collecting dust.
Step 1: Make the template.
If you’re using cards that are already square, skip this step and head straight to Step 2. To make your template, you’ll start with two cards. You’ll lay one down vertically then lay the other one on top of it, horizontally. Line up the upper left corners, left side, and top of the cards. Using your permanent marker, trace along the bottom of the horizontal card stopping just before you get to the edge of the vertical card. Move your horizontal card leftward so the upper right corners and right sides are lined up. Finish tracing. It should look like the photo below. Cut along the line, making sure to curve the corners—if you have a corner-rounder punch tool, you can use that in lieu of scissors for the corners.
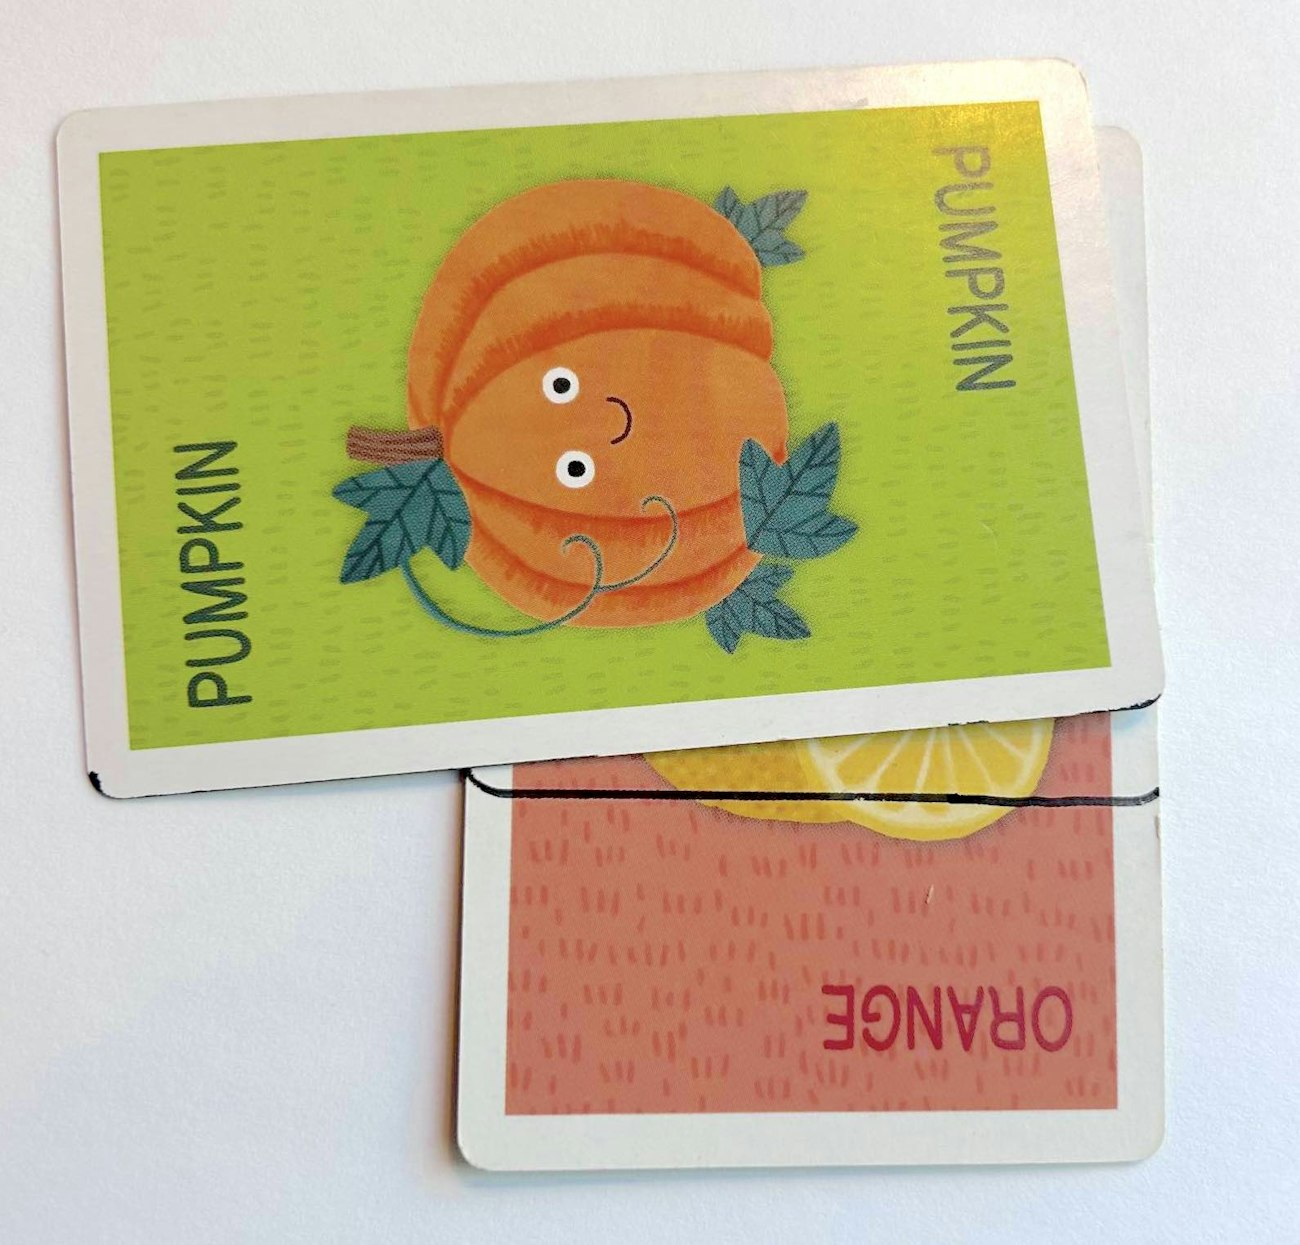
Using a second card as a guide, draw a cut line on your chosen template card. Make sure both the corners of the cut line are curved.
Step 2: Measure for your holes.
While looking at the weaving tablets in my collection, I noticed that no matter the size of the tablets, the holes were all about the same distance apart: about 1¼". My template card measures 2¼" which means I need to put each hole ½" from the edges. To make sure my holes are the right distance from the edges and from each other, I measured and drew a grid on my card. I used a clear quilting ruler to get it as precise as possible, but any ruler should work. The holes don’t line up exactly with my other commercially made tablets, but they’re close. Fortunately, with homemade tablets, consistency is more important than precision.
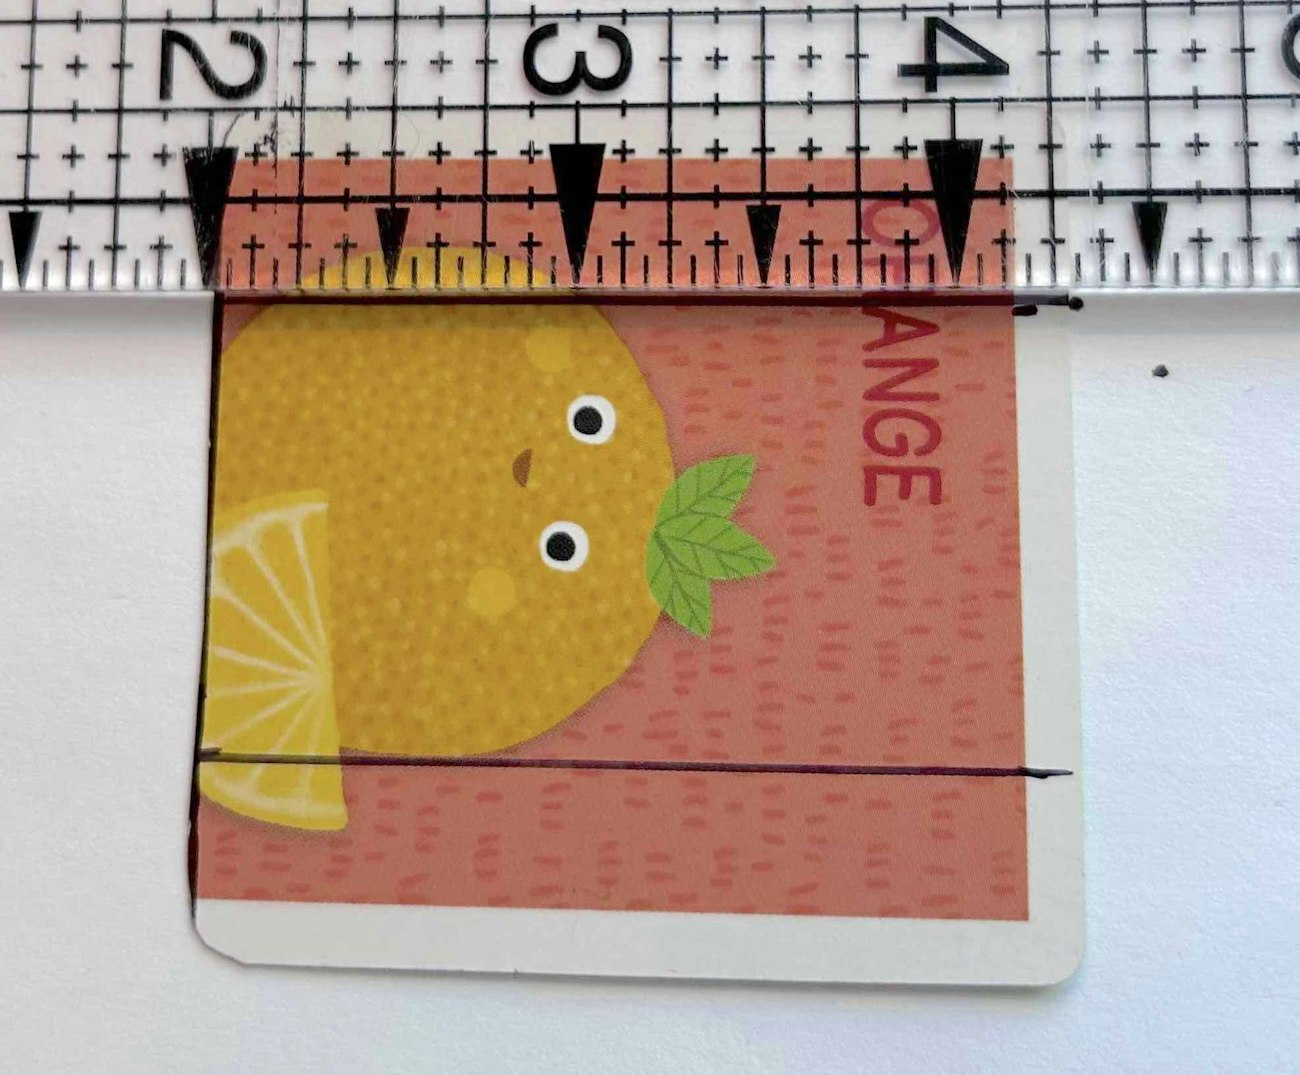
Use a ruler and a permanent maker to draw a grid on your template. The center square of the grid should be about 1¼" square.
Step 3: Punch the holes.
Your tablet template should now have a grid with a square in the center. Line your hole punch up with the vertical and horizontal lines coming off one of the square’s corners and punch your first hole. Do not punch your hole inside the square. Continue for the other three holes for a total of four holes. You can see my completed tablet template in the photo below.
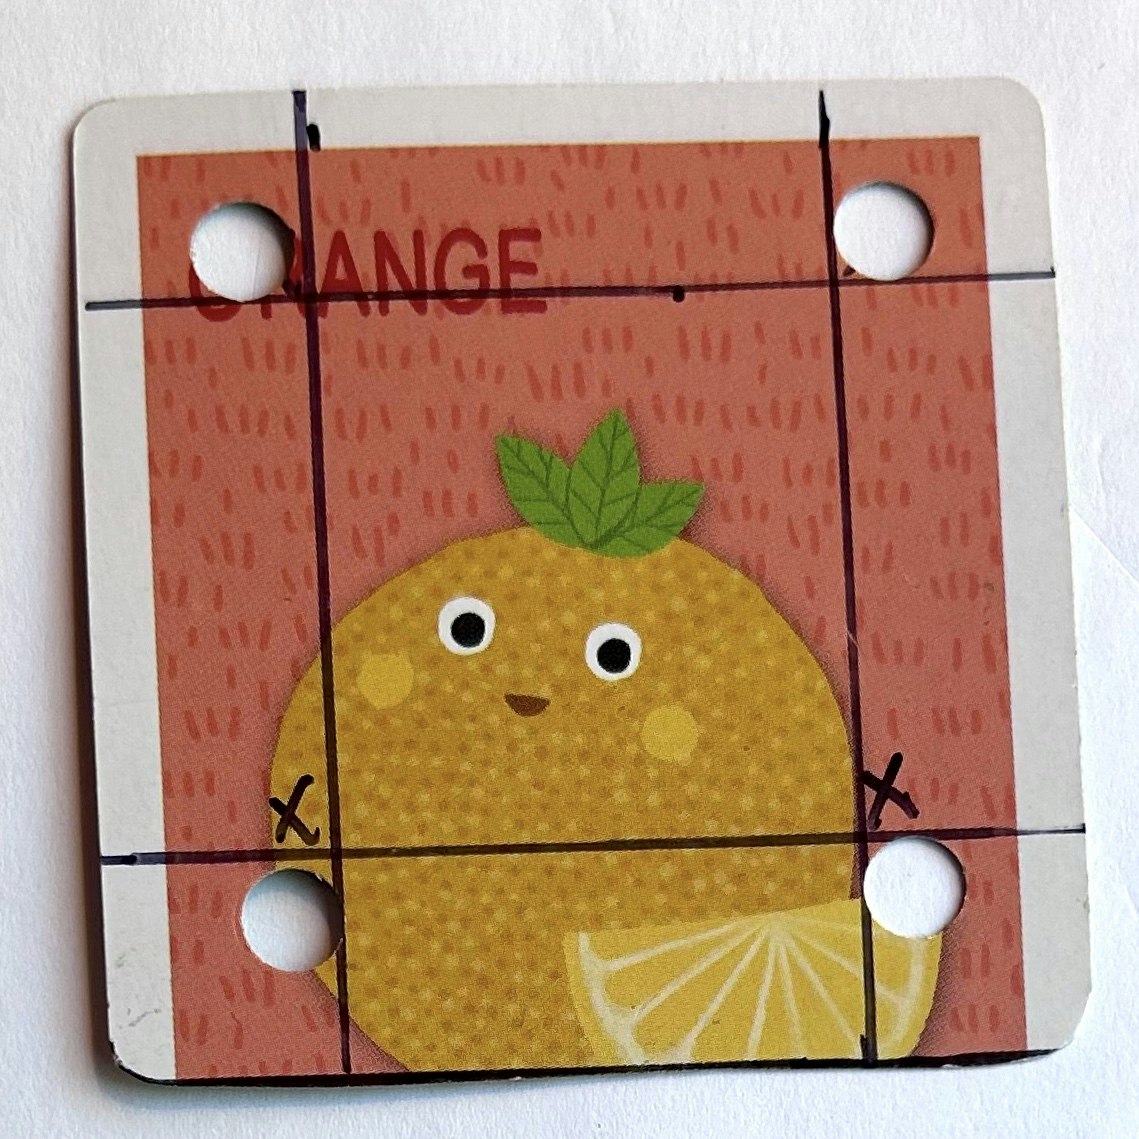
After you’ve drawn your grid, punch four holes on the outside of each corner of the grid’s inner square.
Step 4: Make more tablets.
Once you’ve punched holes in your tablet, use the template to trace cut lines to make more tablets. For the holes on these other cards, you can either trace the hole location using the template and then punch them out or, after cutting out the new card, hold it even with the template so all sides line up. Keeping a firm grip on the tablets with one hand, line up your hole punch with the holes in the template and punch so you’re punching through the templates holes and into the second tablet. Just be careful to keep the cards lined up at all edges so the holes will be as even as possible. Repeat for as many tablets as you need or feel like making.
Step 5: Label your tablets.
After all the tablets are cut out and punched, organize them so any designs are in the same direction. Using your permanent marker and starting with the upper left corner and working clockwise, mark your corners A, B, C, and D. (I realize now after making mine I probably should have written the C and D upside down so they’ll be easier to read when they’re at the top during weaving—learn from my mistake!) After labelling the corners, I color coded my sides, which is a completely optinoal step. These tablets, which you can see below, have three white sides and one patterned side, so I used different colors of permanent markers to color code each side.
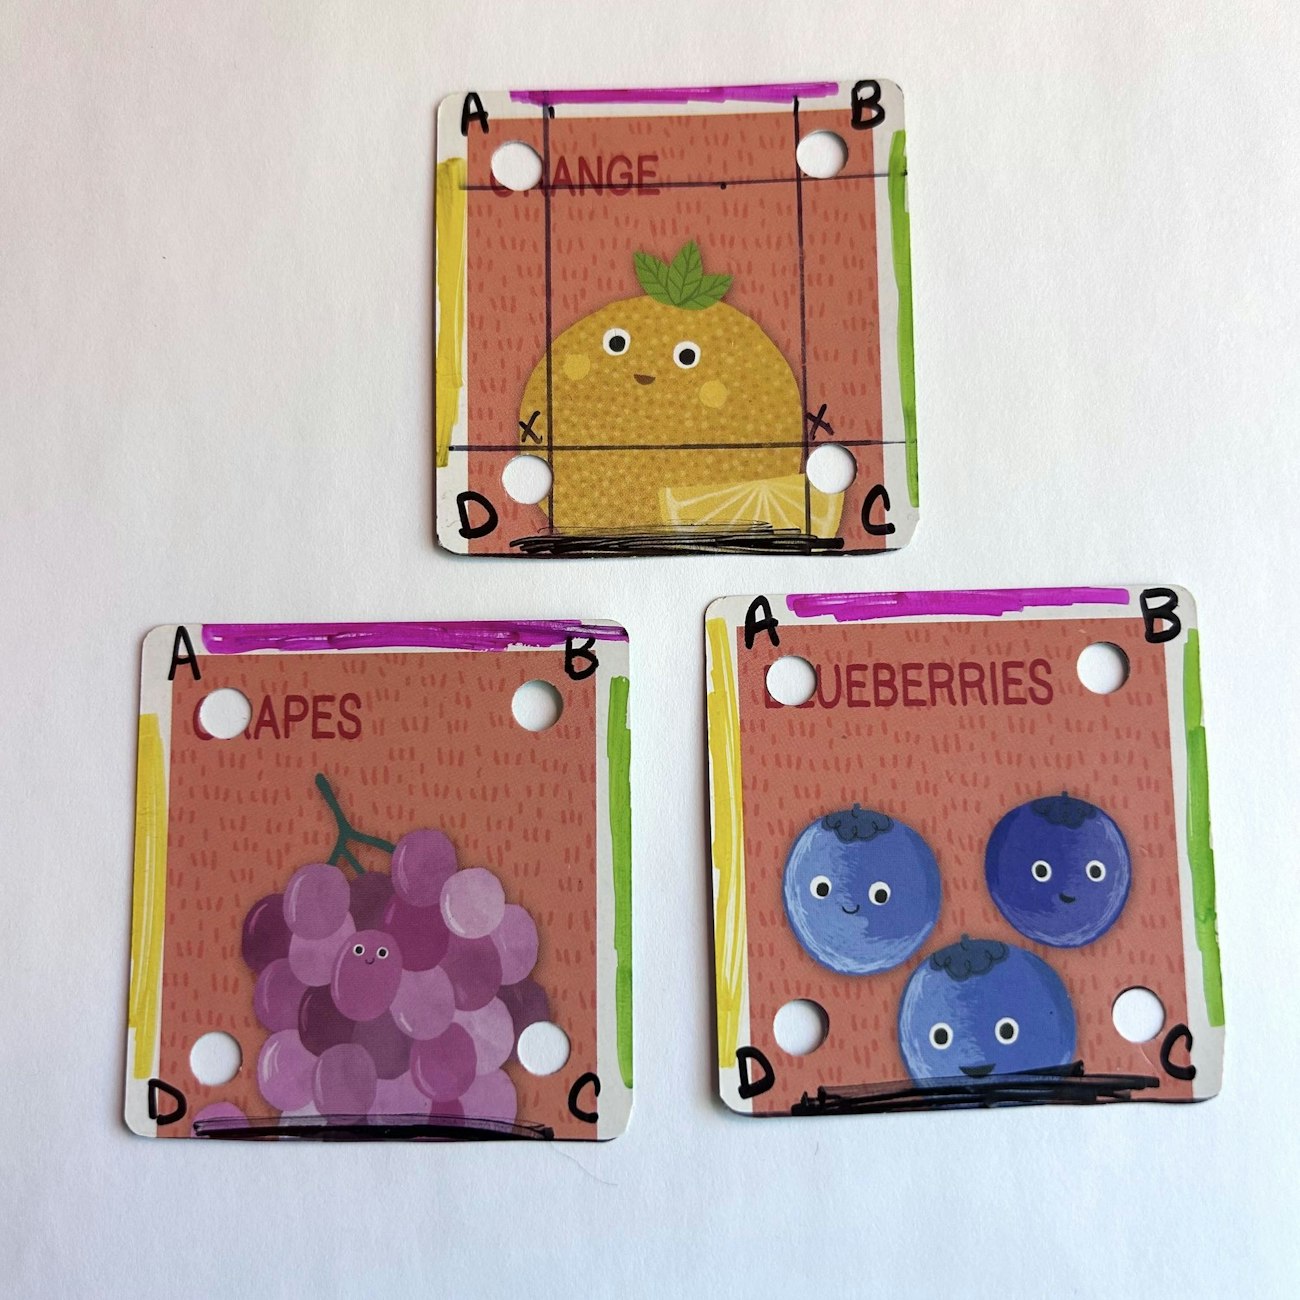
Three completed tablets with corners labeled and sides color coded.
Just be aware: If the base playing cards are all diffent colors, the same color of permanent marker might look different from one card to another. Before color coding the tablets shown below, I drew a small circle on each one using the same pink permanent marker—the background color of each tablet turned turned the pink a different color. For these cards, I decided to instead use different colors of washi tape on three sides. On the fourth side I tried both black and a metallic permanent markers and found them equally visible. You could also use paint pens or even white out.
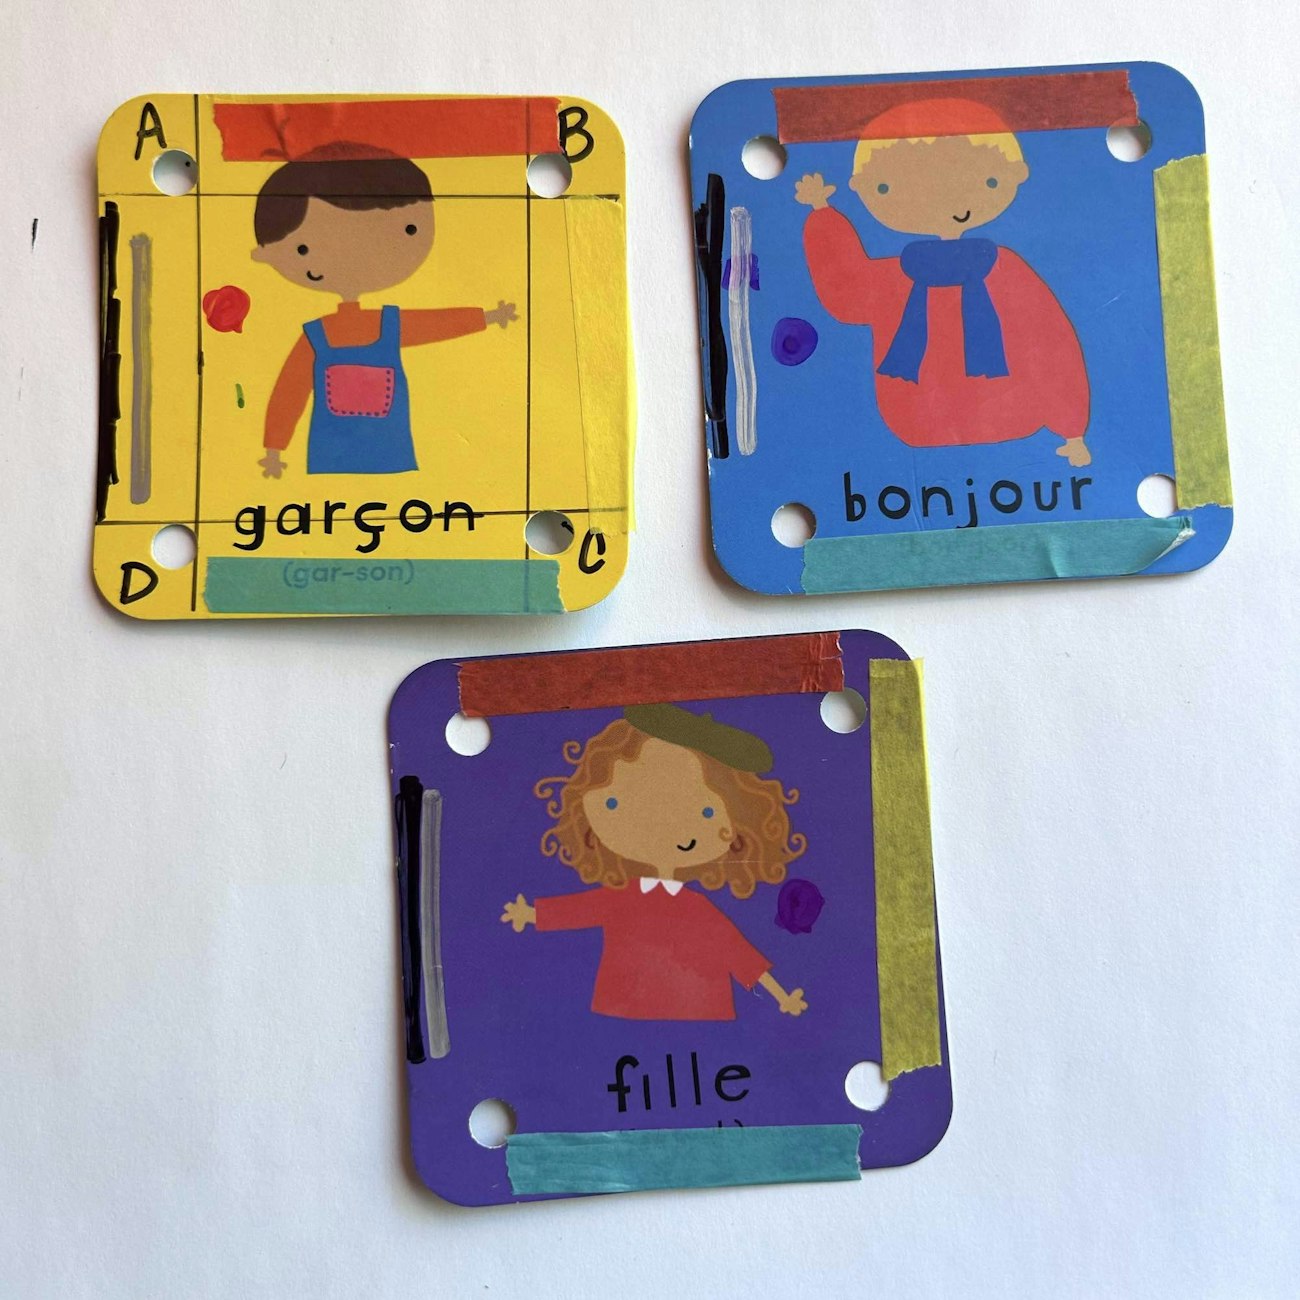
After swatch testing these tablets with a pink permanent marker, Christina realized she needed to find an option that wouldn’t drastically change when placed over the dark background colors. She ended up using a combination of washi tape, black permanent marker, and a metallic permanent marker.
Start Weaving
Once your tablets are finished, you can warp them up and start weaving! If you’re new to tablet weaving and looking for a perfect first project and maybe guidance on threading, check out this article, which includes helpful information to get you started, including a project for shoelaces that uses just 10 tablets—no loom required.
Happy Weaving!
Christina