

I’m not a fan of butterflies. No, I don’t mean the often spectacularly hued winged insects; rather, I’m talking about yarn butterflies. I know that in theory they make sense if you need only a small bit of a certain weft yarn, but they’re not always the best option. Netting shuttles are a possible butterfly alternative, but what if you don’t have a netting shuttle or you need a dozen or more small put-ups? Don’t worry, there’s an easy DIY solution, one I learned from frequent Little Looms designer, Gala McCurdy: cardboard mini-shuttles.
For an upcoming project in our Winter 2026 issue (coming out in October), Gala needed 30—that’s right, 30—small put-ups of yarn for embellishments. Instead of making 30 butterflies, she decided to make her own mini-shuttles. Not only were these stick-style shuttles easier to use than butterflies, but Gala was also able to customize the dimensions.
How to Make Cardboard Mini-Shuttles
Supplies
First, gather your supplies! Here’s what you need:
- 1 cereal box or other cardboard box in a similar weight (do not use corrugated cardboard)
- Sharp scissors
- Ruler
- Writing utensil
Step-by-Step Mini-Shuttle Instructions
Step 1. Start by dismantling your cardboard box into one flat piece. You should be able to pull it apart at the glued seams. If the glue is doing too good of a job, you can use scissors to cut the box.
 Step 1
Step 2. Use your ruler and writing utensil to measure out and mark your mini-shuttle on the cardboard. I made the shuttle shown here 3" x 3/4" at Gala’s recommendation. To make your life easier, for this first shuttle, use the box’s folds to line up your edges and to serve as a cutting line.
 Step 2
Step 3. Cut out your first shuttle. Then, if you want more than one shuttle, you can use this first shuttle as a template for the rest.
 Step 3
Step 4. Once you’ve cut out all your shuttles, snip a small “V” on either narrow end of each shuttle. Optionally, you can also make a small snip in the bottom of one of the Vs as a yarn-tail holder.
 Step 4
Step 5. Wind on your yarn.
Testing the Shuttles
These shuttles are easy and cute, but how much yarn can they really hold? And speaking of holding, how do they hold up to repeated use?
Shuttle Capacity
 Christina tested how much yarn her shuttles could hold by winding three, each with a different yardage of 3/2 cotton.
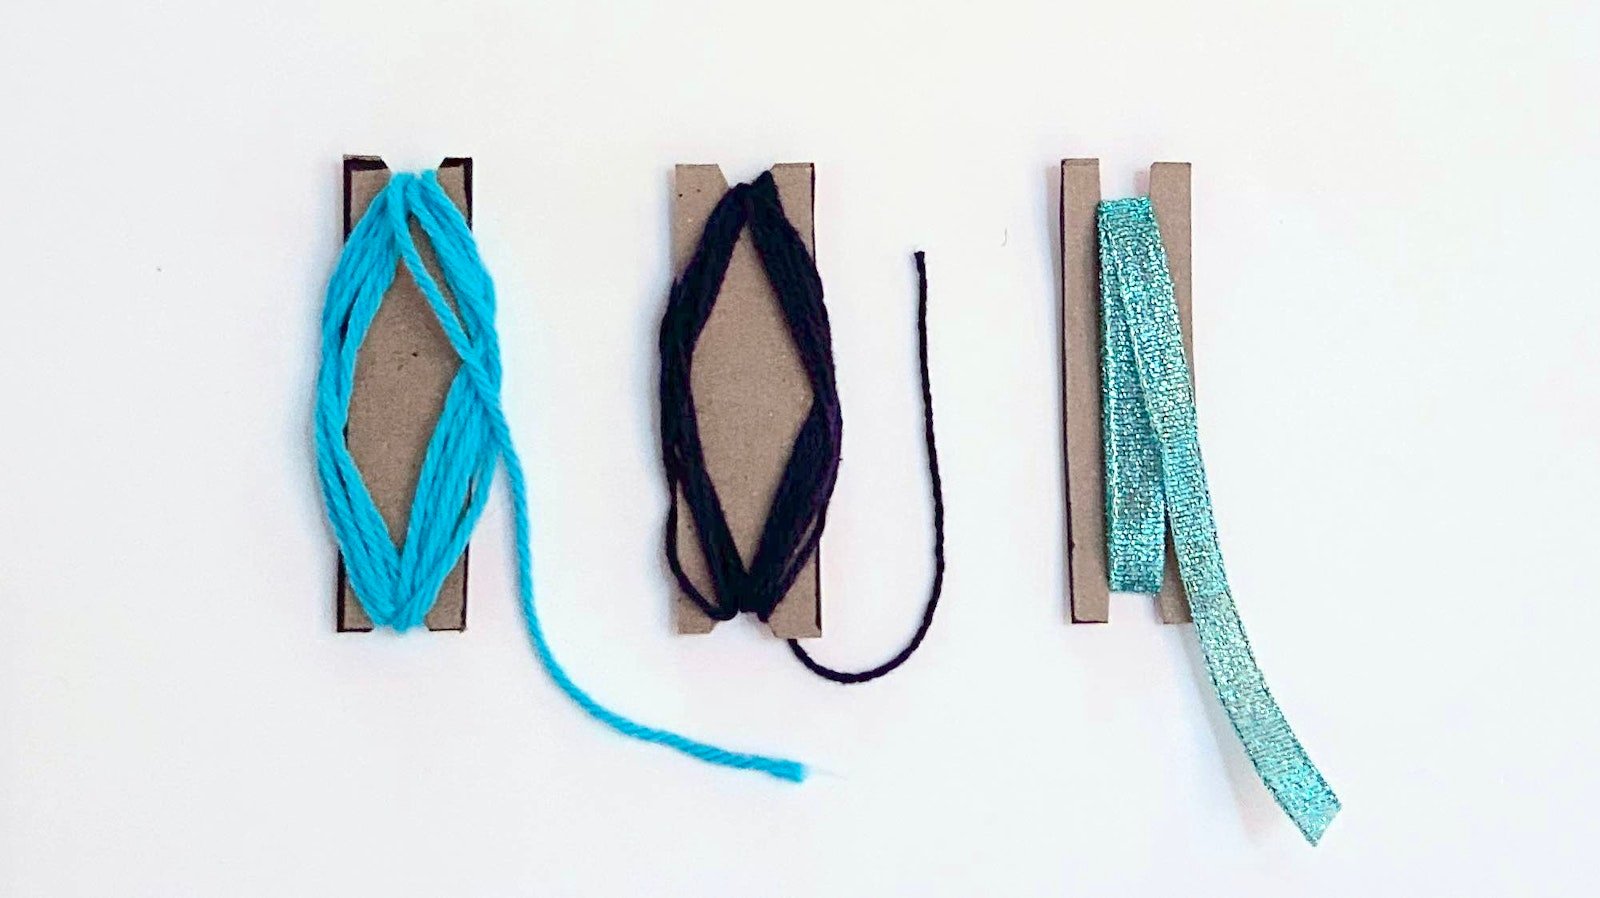
To test the shuttle’s capacity, I made three shuttles and wound each one with a different length of 3/2 cotton. The shuttle on the left has 1 yd, the middle shuttle has 2½ yds, and the shuttle on the right has 5 yds. After handling each of the loaded shuttles, I’d say that at this size shuttle and yarn, 5 yds is pretty close to capacity. If I needed 5 yds or more, I’d make my shuttle larger, or use a regular wood stick shuttle instead.
Next, I decided to wind a shuttle with some thicker Sugar’n Cream cotton, winding on about 2 yds, which seemed a good fit. (You can see the loaded shuttle in the photo at the top of the article). I also tried putting on some bulky art yarn (not shown), but it did not wind on nicely. I would definitely need a wider shuttle with a deeper, wider V at either end to properly hold bulky yarns.
 Christina modified one of her shuttles to hold ribbon.
Finally, for fun, I tried modifying one of the shuttles to hold some ribbon. I changed the V on either end to a square notch about the width of my ribbon. The ribbon wound on easily, although I opted not to use the typical figure-8 pattern to avoid creasing it. I put on only about ½ yd of ribbon, but I probably could have fit on a bit more.
Shuttle Durability
While winding the shuttles, I was also able to evaluate durability. If I had too much tension on the weft, the shuttles would start to buckle and bend, so a light hand is needed when winding.
I haven’t had a chance to weave with the shuttles (yet), but based on handling them during winding and after, I’d say they’re perfect for light weaving work. If you need a bit of inlay or have a weft color used for only a pick or two, a cardboard mini-shuttle will do the job.
Final Thoughts
I genuinely like these little shuttles. They’re much easier to use than butterflies and take minutes to make. I plan to keep the shuttles I made for this article alongside my regular weaving shuttles, although I will absolutely decorate them with paint pens and glitter before I do. These shuttles probably won’t last a long time, but they work well in a pinch. I also appreciate that while they are not tools made to last, they are recyclable.
Happy Weaving!
Christina