Subscriber Exclusive
Subscriber Bonus: Cuppa Tea Cozy Embroidery Stitches
Learn the 4 basic embroidery stitches Margaret Stump uses in her Cuppa Tea Cozy with this subscriber exclusive.
Learn the 4 basic embroidery stitches Margaret Stump uses in her Cuppa Tea Cozy with this subscriber exclusive. <a href="https://littlelooms.com/subscriber-bonus-cuppa-tea-cozy-embroidery-stitches/">Continue reading.</a>
https://littlelooms.com/cdn-cgi/image/format=auto/https://www.datocms-assets.com/70931/1666379636-220523_llwinter22-214.jpg?auto=format&w=900
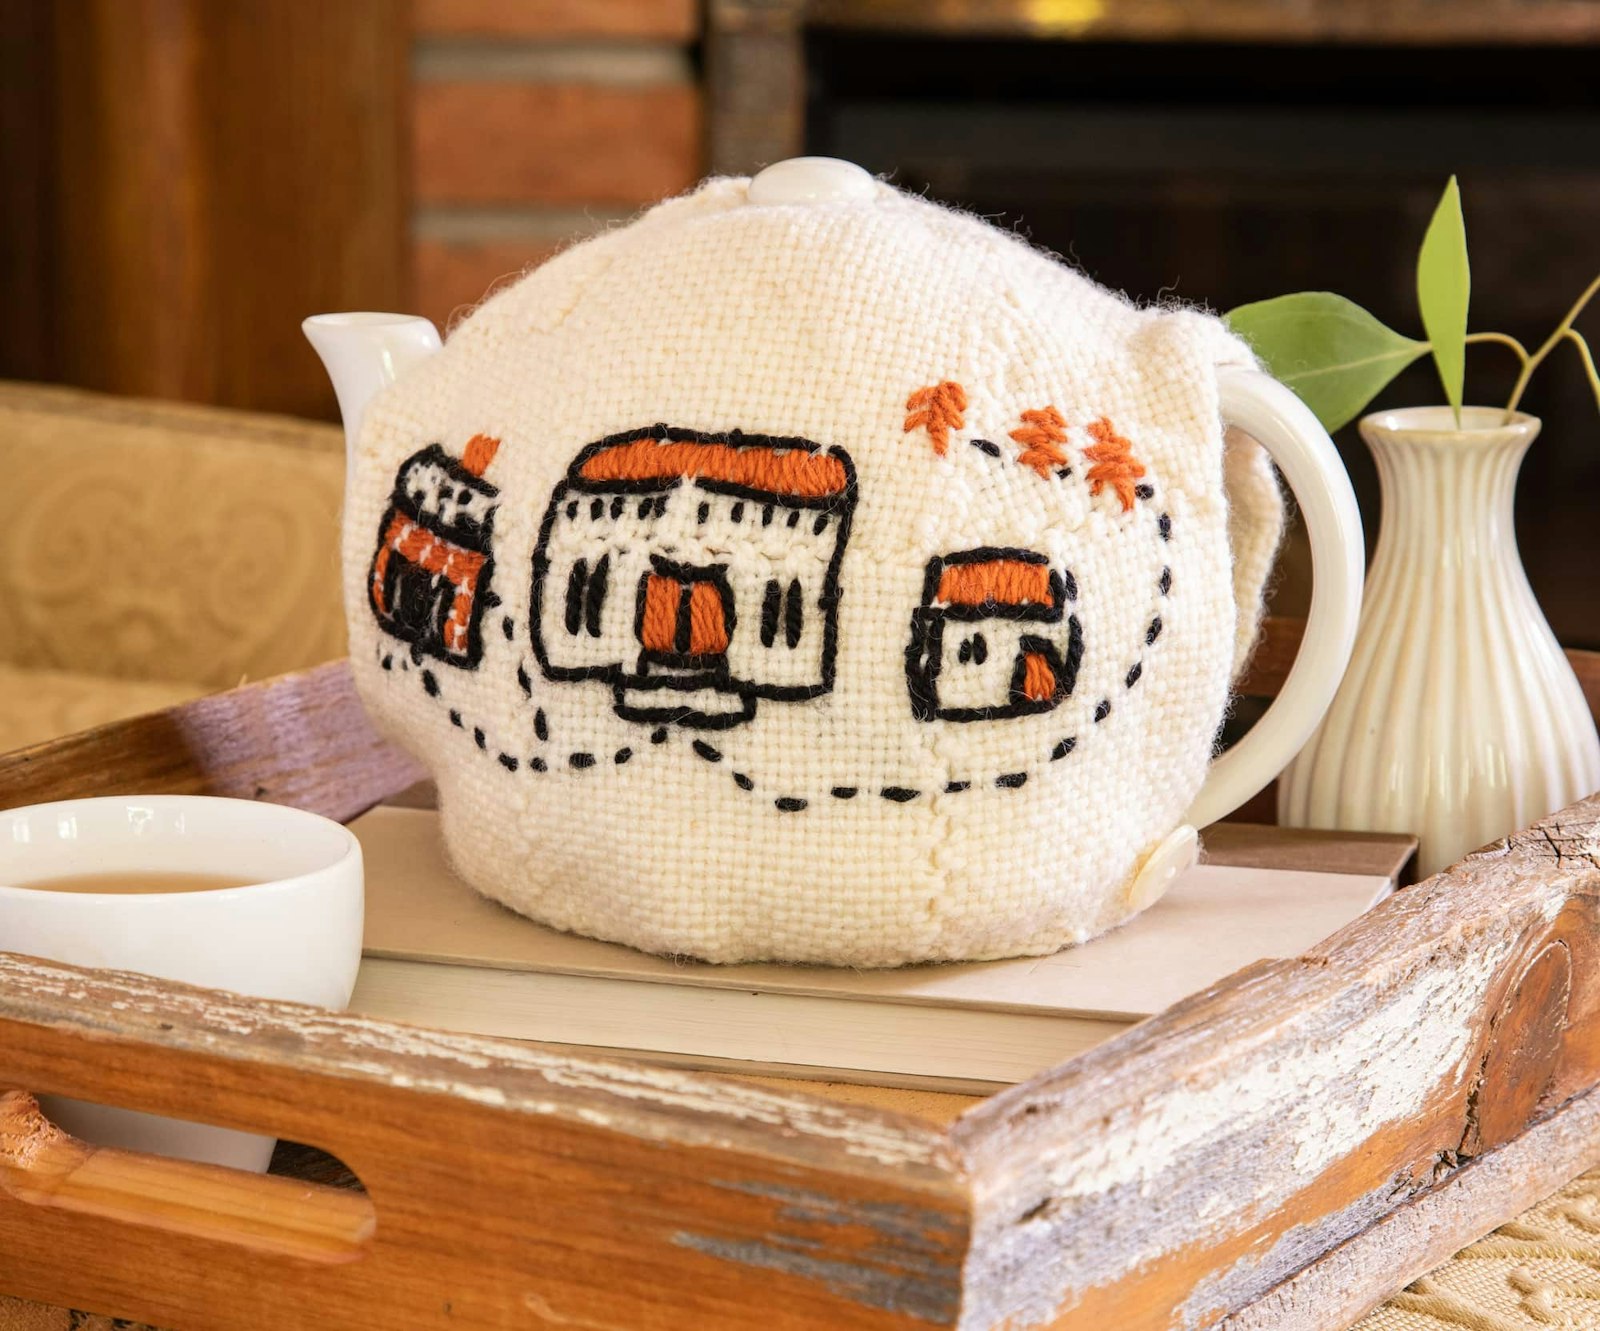
As a lover of mystery novels I have a special place in my heart for Margaret Stump’s Cuppa Tea Cozy from the 2022 Winter issue. Whenever I open a new mystery and see a thoughtfully drawn map on one of the first few pages, I know I’m in for a good time.
While the embroidery at first glance might seem like a lot, the truth is that Margaret primarly used simple stitches that just about any beginner can pick up easily: straight stitch, running stitch, back stich, and a sort of satin stitch.
Of these 4, the straight stitch is probably the simplest in that it is simply a stitch in a straight line (used in the “windows” of the large house in the photo). You take the needle and starting from the back of the fabric, push it thorugh and pull it out the front. Then at your desired distance later, repeat the process except this time push the needle thorugh the front of the fabric and pull it out the back. The result is one straight stitch (hence the name), and it’s the basis of pretty much every other stitching technique.
The other 3 stitches are almost as easy and are all variations on the straight stitch but have their own peculiarities that are best explained with images. As a bonus for our current subscribers, here are illustrations of the running stitch, back stitch, and satin stitch.
SUBSCRIBER EXCLUSIVE
As a lover of mystery novels I have a special place in my heart for Margaret Stump’s Cuppa Tea Cozy from the 2022 Winter issue. Whenever I open a new mystery and see a thoughtfully drawn map on one of the first few pages, I know I’m in for a good time.
While the embroidery at first glance might seem like a lot, the truth is that Margaret primarly used simple stitches that just about any beginner can pick up easily: straight stitch, running stitch, back stich, and a sort of satin stitch.
Of these 4, the straight stitch is probably the simplest in that it is simply a stitch in a straight line (used in the “windows” of the large house in the photo). You take the needle and starting from the back of the fabric, push it thorugh and pull it out the front. Then at your desired distance later, repeat the process except this time push the needle thorugh the front of the fabric and pull it out the back. The result is one straight stitch (hence the name), and it’s the basis of pretty much every other stitching technique.
The other 3 stitches are almost as easy and are all variations on the straight stitch but have their own peculiarities that are best explained with images. As a bonus for our current subscribers, here are illustrations of the running stitch, back stitch, and satin stitch. [PAYWALL]
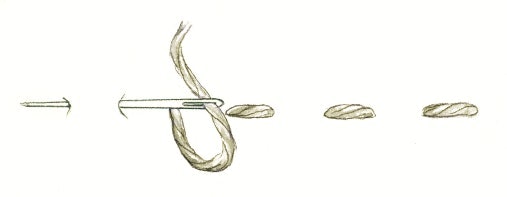
Running Stitch
Starting with the simplest of the remaining 3 stitches, let’s talk running stitch. Running stitch builds upon straight stitch. Once you finish a straight stitch, you’ll move your needle a chosen distance along the back of the cloth and then push it through the back and pull out through the front. This will create a straight stitch on the back of the cloth. To continue, simply repeat: straight stitch on front, straight stitch on back. The result is a dashed line, as in the “path” between the houses in the photo. If you’ve handsewn anything, you’ve done the running stitch. Often you’ll make the dashes and spaces all the same size, but sometimes you might have artistic reasons for varying the length of the stitches on front or back.

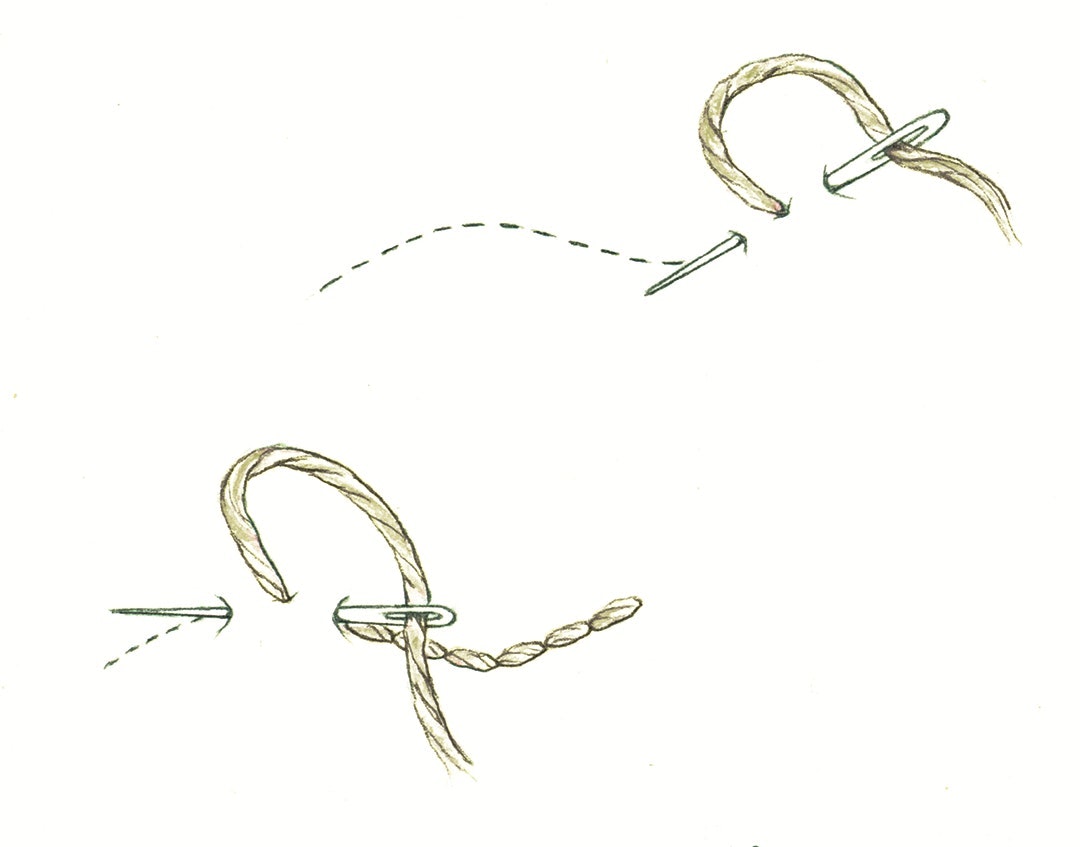
Back Stitch
Now let’s talk back stitch, which is a bit of a modified straight stitch. You’ll start out as before by pushing the needle through the back of the fabric and pulling it through the top. Then, when you push the needle back through the top of the fabric instead of pulling it straight through, you’ll take the tip of your needle and push it through the back of your fabric a short distance behind the stitch you just created. At this point you’ll have both the eye of the needle and the point out of the fabric at the same time.

Pull the needle through the fabric The result is a straight stitch on top and a straight stitch on bottom, and your needle at the top of your fabric. For your next step, you’ll repeat this same process directly next to the straight stitch on top you just made. Continue on for your desired length. The result is a solid line of stitching that you can make straight or curve around as you wish. Back stitch is an excellent stitch for outlining shapes. It’s what Margaret used to outline the houses.
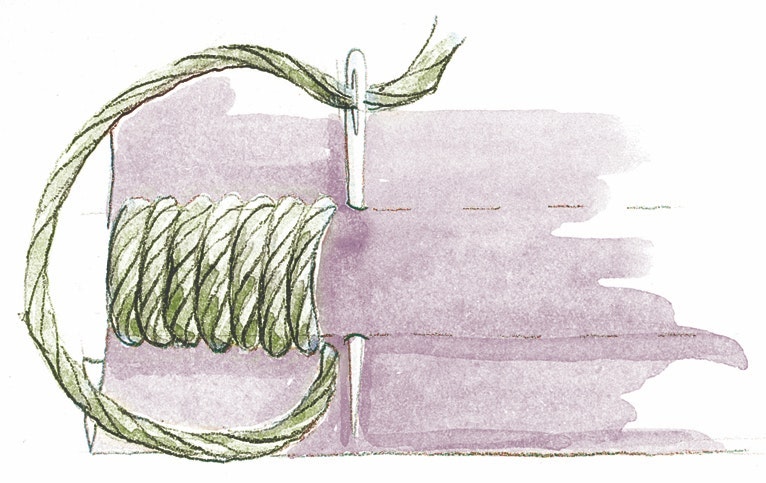
Satin Stitch
Finally, we’ve got satin stitch, which not only starts with a straight stitch, it’s all straight stitches. While there are variations on satin stitch on how and where you enter the fabric, at its most basic, it’s a series of straight stitches parallel to one another. It’s often used to fill in shapes. I say Margaret “sort of” used this stitch because her satin stitch for the roof of the middle and right houses isn’t perfectly parallel because she wanted to emulate the simplicity of hand-drawn maps found in mystery novels. You can choose to do your own satin stitch perfectly parallel or slightly off as Margaret did.

Just remember, as with extra-long warp or weft floats, satin stitch can catch and snag if you make it too long.
So there you have it! Four basic stitches—3 with images—to get you embroidering your own Cuppa Tea Cozy today.
Happy Weaving!
Christina


