Contents
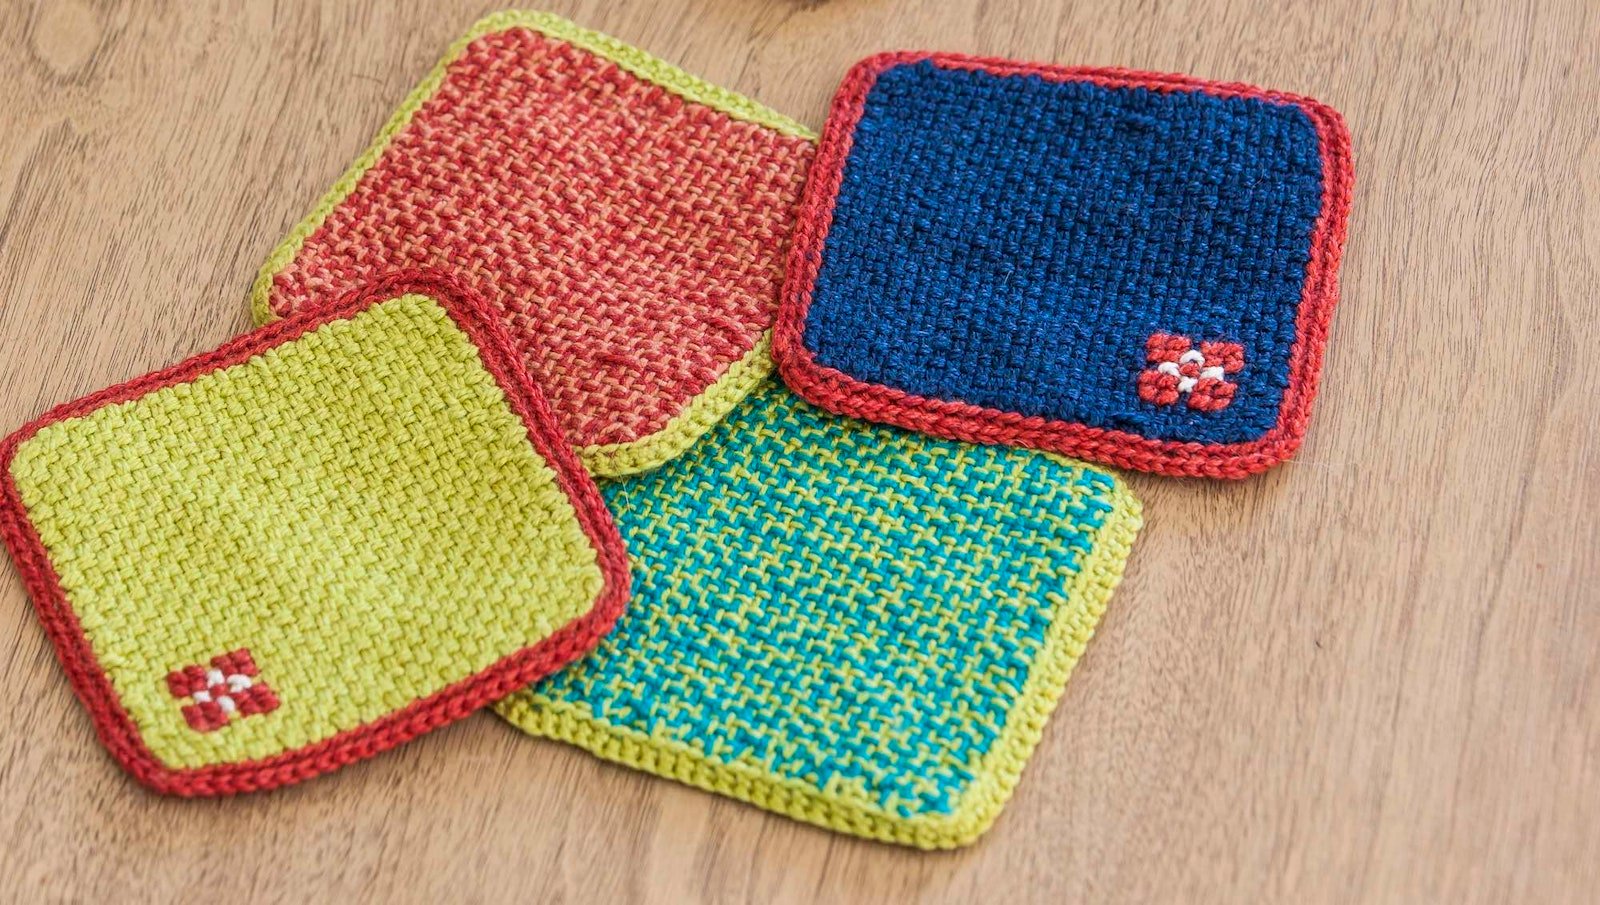
Adding knitted or crocheted trims can help elevate already beautiful projects or turn ones that are relatively simple into something stunning. You can use them to secure raw edges in lieu of fringe or braids, to make buttonholes, and to cover up wonky selvedges, or to simply add an extra element of decoration. They work equally well on rigid-heddle and pin-loom fabric, and you can use the same yarn you wove with or a completely different yarn to give the trim a different effect.
While all the trims featured in Easy Weaving with Little Looms so far are ones you work directly onto the weaving, did you know some trims can be knit or crocheted separately, then stitched to the fabric later? I certainly didn’t—at least not until I stumbled upon a project by Heather Winslow from our sister publication Handwoven for a woven scarf with 23 different trims.
Reading over this project, I was amazed at all the different options and uses for these trims, so naturally I had to bring it over to Little Looms. While the full project with all 23 trims is available as a subscriber-exclusive download, I’ve got Heather’s tips for trimming your fabric in style as well as the instructions for two of the trims, one knit and one crochet. (Not a subscriber yet? Learn more about subscriber options and benefits here.)
Tips for Top-Notch Trims
Secure the raw edges. Serge or machine stitch 2 rows of straight stitching ¼" apart and ¼" from the raw edge of the fabric. If the yarns in the fabric are particularly heavy or very slick and prone to raveling, encase the edges with Seam Finish from Farmhouse Fabrics or a similar bias edging.
Knit or crochet a sample swatch. Experiment with different yarns, needle/hook sizes, and stitches to get the look that you want. Prewash wools containing a lot of spinning oil to allow the yarn to bloom before knitting/crocheting and use needles/hooks at least one size smaller than recommended on the yarn label to obtain firm edging. Count the number of stitches in an inch to determine the gauge and the number of total stitches you will need to pick up. If you have a woven sample of the fabric, you can even add trim to the sample before wet-finishing it to get even more information about how the yarn will work.
Mark the edge of the cloth in inches. Use small safety pins to mark the length of the fabric in inches. Use these marks as a guide to pick up the exact number of stitches per inch as determined by your test swatch.
Use a crochet hook to pick up your first row of stitches for adding knitted trims directly to the fabric edges. Use a crochet hook the same size as the knitting needles. Start on the right edge of the fabric with the right side of the fabric facing you. Where you want your first loop to be, insert the crochet hook into the fabric from front to back, below the double row of machine stitching, as seen in the illustation above. Hook the yarn from behind the fabric and pull it to the front to create a loop. Insert the hook where you want your next loop to be and repeat. Hook an inch or so of loops, being careful to maintain the appropriate number of stitches per inch. Then transfer the loops from the back handle of the hook onto a knitting needle. Continue hooking the yarn through the fabric and transferring stitches to the knitting needle until you have cast on all your loops. Note that the stitches will be backward on your knitting needle. You may choose to correct this or leave them twisted. (Heather finds twisted stitches result in a stable fabric with an increased elasticity.)
Bind off loosely. Follow the direction for your trim and make sure you don’t bind off too tightly when you’re finished.
Sample Trims and Finishes
For her project, Heather used an 8/3 worsted wool (166 yd/50 g; 1,490 yd/lb) from Jagger Spun that’s no longer available. All instructions are written with that size yarn in mind, so if you’re using a different yarn, make sure to adjust the needle or hook size accordingly. Similarly, Heather wrote these instructions to make about 7 inches of trim on her sampler so she could fit in all 23. To make your trim longer, simply increase the number of stitches in the first step for your desired length.
Knitted Decorative Stockinette Picot Hem
Photo by Joe Coca
A decorative stockinette picot hem is used to encase a raw edge.
- Pick up 48 sts (or an even number) into 7" of the bottom left edge of fabric (under 2 warp threads) at 7 sts/in. Heather used a 3 mm crochet hook to pick up and slide the stitches onto the knitting needle (be sure they are not twisted on the needle).
- Rows 1–5: Work St st beginning and ending with a wrong side (purl) row. To create a herringbone design of purls on a stockinette ground, follow the stitch order below.
- Row 6 (turning row): K2tog, yo, repeat and end with k2tog, k1.
- Rows 7–14: Work 7 rows St st and bind off on Row 14 (right side).
- Sew beads on some of the purl stitch bumps if desired. Sew bound-off edge to wrong side of handwoven fabric, covering the base of picked-up stitches.
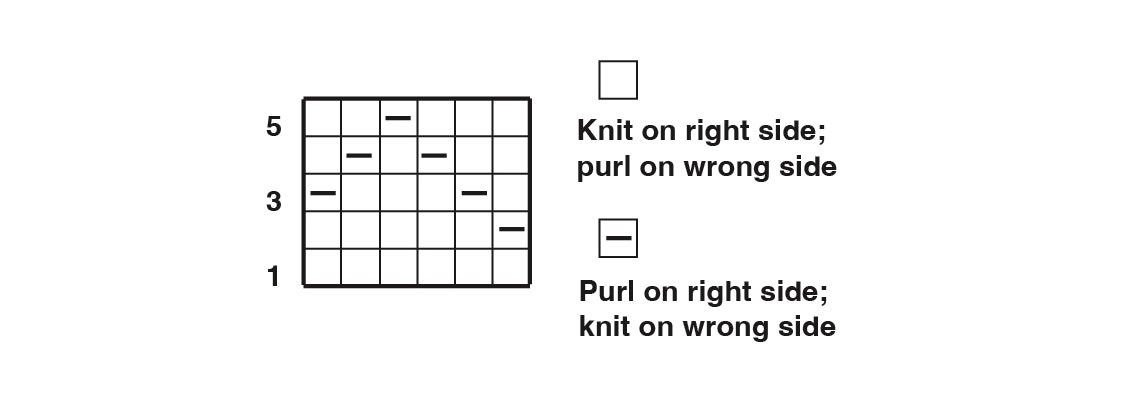 Stitch order for the decorative stockinette picot hem
Single Crochet Variation
Photo by Joe Coca
Technically this is a two for one because the single crochet base can be used by itself for a simple, but lovely, trim. With the variation, however, you end up with a trim that provides full coverage on the front but not on the back of the edge, making it good for areas where less bulk is desired because there is less crochet coverage on the back side (and decreased bulk). A narrow satin ribbon can be threaded through the stitches on the wrong side as a decorative element.
- Row 1 (Single Crochet): Insert the crochet hook through fabric below 2 warp threads along the selvedge and draw a loop of yarn through; draw a second loop of yarn through the loop on the hook to form a base st; * skip 2 weft picks and draw yarn loop up through fabric to left of last st; yo and draw through the 2 loops on hook; repeat from * . The trick is to get just the right number of sc so that your edge is not drawn in by too few stitches or doesn’t buckle and wave from too many. It takes at least 4" of edging to judge whether you have the right tension.
- Row 2: * Insert hook through fabric to left of last st and pull up a loop of yarn to edge of the selvedge. Insert hook through the fabric again a little farther to the left and draw up a second loop. Yo, and draw this loop through all 3 loops on the hook, keeping the active loop loose. Repeat from * along edge to the end of the single crochet base.
Final Thoughts and Project Download
While Heather’s original project was woven in twill on a multi-shaft loom, you can make your own base fabric using a rigid-heddle or pin loom to make a primer as Heather did, or you can skip making a primer and start using these stitches on your weaving right away. Ready to get started? Subscribers can download Heather’s project here.
Happy Weaving!
Christina